Manage Roots
If your group receives white-box testing services, you can add Git Roots and Environments to the scope of security testing. If your group receives black-box testing services, you can add IP Roots and URL roots.
Manage Git Roots
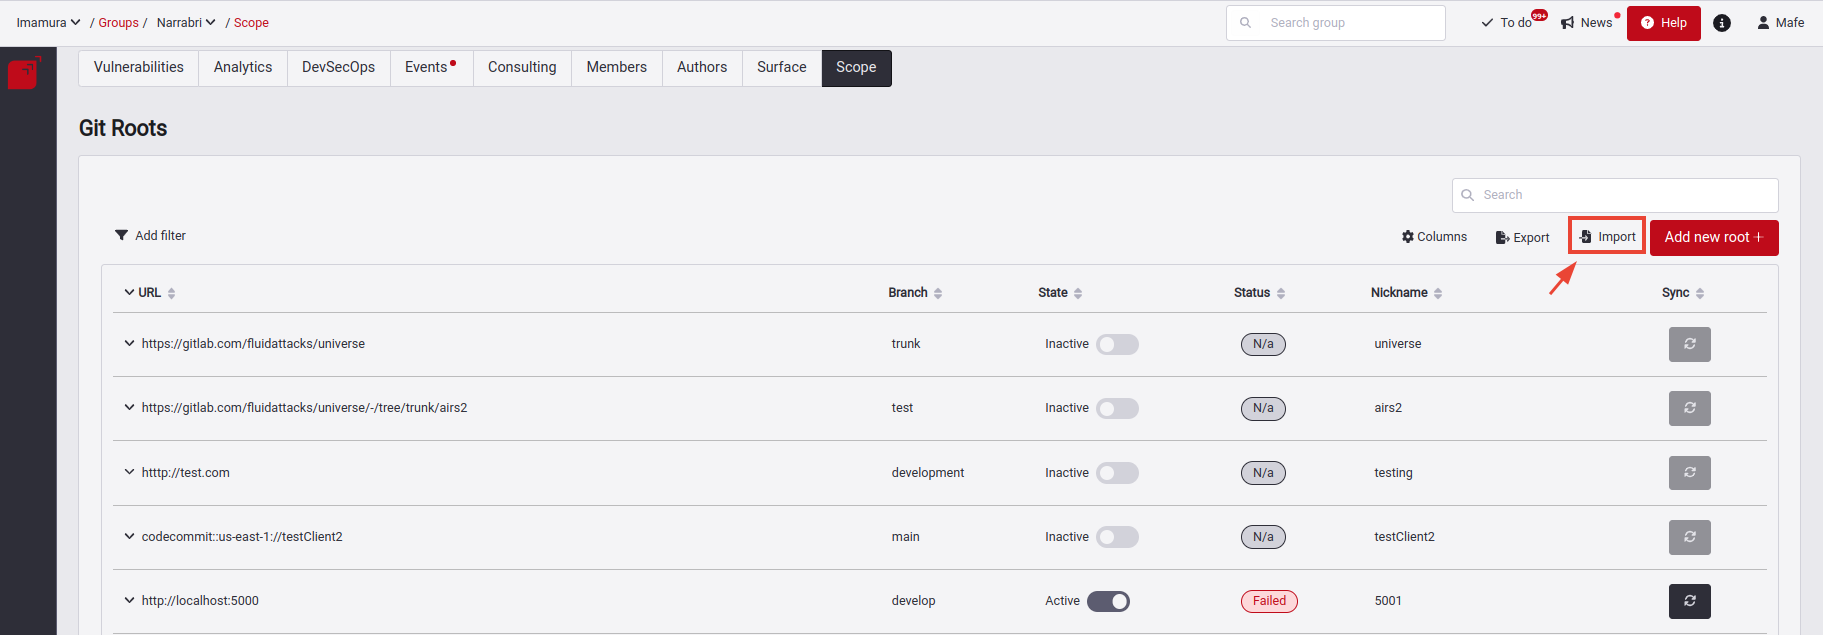
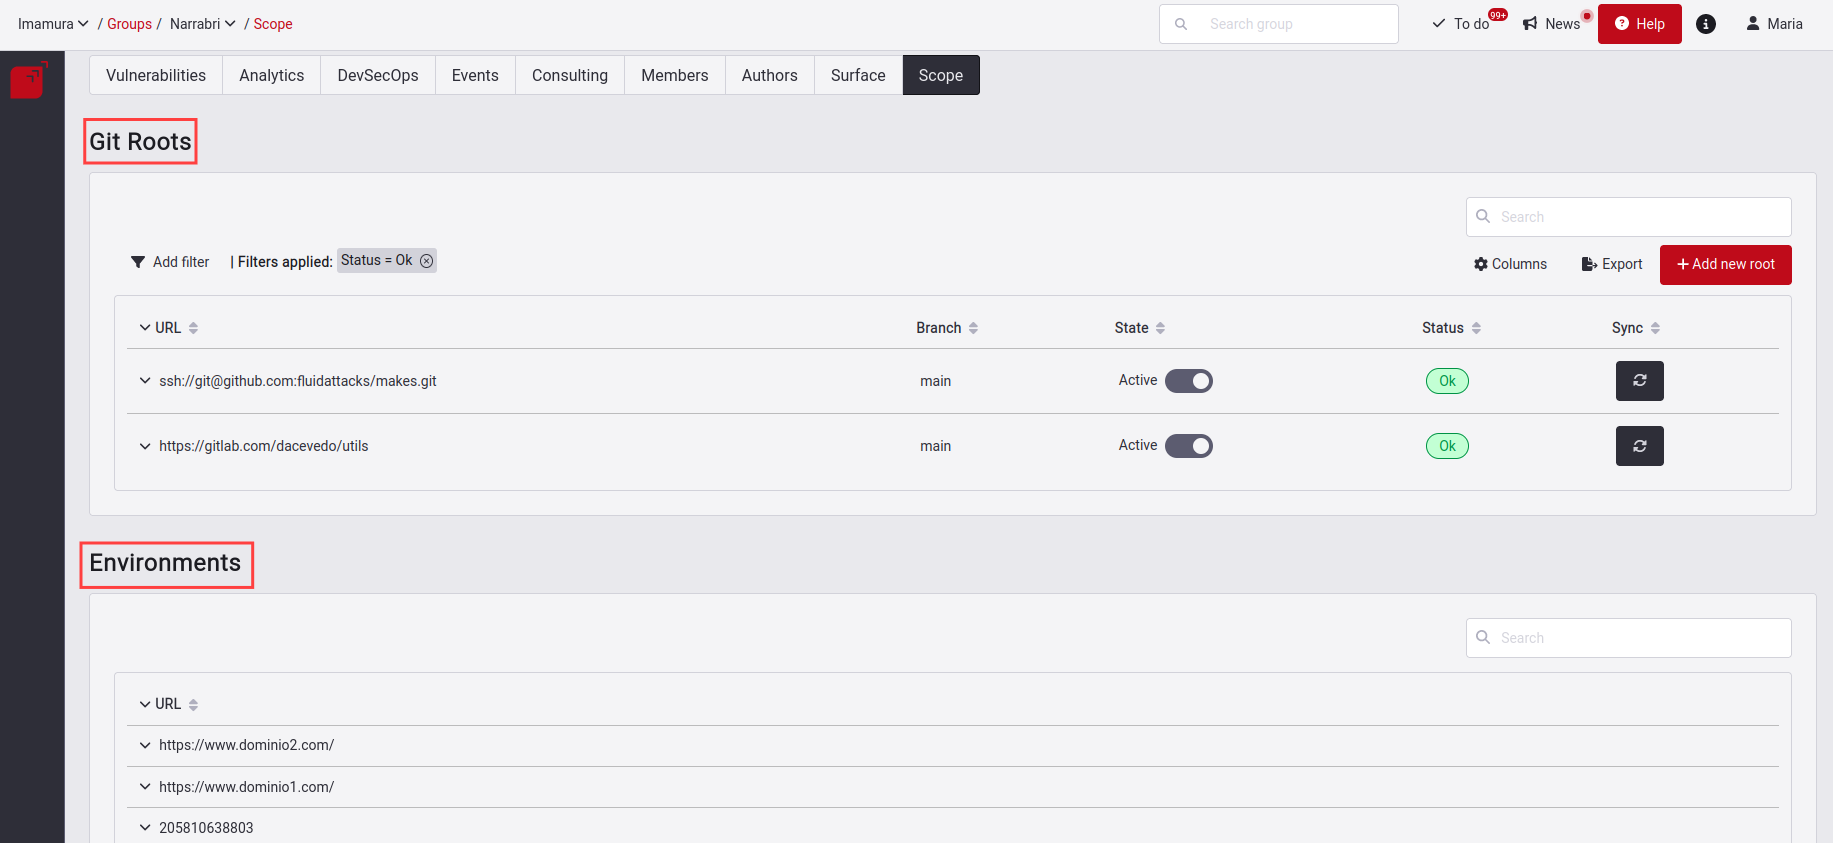
Under the title Git Roots in the Scope section, there are the Git repositories composed of code to clone and start their analysis. In Git Roots, you can add, edit, enable or disable the root. You can also export and filter the information of all your Roots that compose the table.
Know your Git Roots table


Here is a description of the columns of this table:
- URL: Refers to the URL of the repository where the code to be cloned is located.
- Branch: The branch to clone. Remember we assess only one repository branch per group, as explained above.
- State: There are two states: Active and Inactive. Active means that the root is being tested and Inactive means that the root is no longer being tested.
- Status: There are six: Cloning, OK, Failed, N/A, Queued and Unknown.
- Cloning: The repository is being cloned.
- Ok: The cloning was successful.
- Failed: Something went wrong with the cloning.
- N/A: The root is inactive.
- Unknown: Is the initial state when creating a root, meaning it has not yet been cloned or is glued for this action.
- Queued: A queued tool run to check this root.
- HCK: If Health Check is included in that repository. Please note that only groups that have the Advanced service active will have the Health Check field enabled.
- Nickname: The nickname of this repository to be easily identified.
- Sync: Request to clone that repository once again since changes have been generated and it is required to have it updated.
There is also a downward-facing arrow on the left of the Type column, which, upon clicking, will unfold the description for each repository.

 Note: It's essential to remember that the root nickname will be derived from the name of the URL that the root has added. Duplicate nicknames are not allowed within the scope; therefore, if a new root is added with an identical nickname to another existing nickname, a random 4-digit code will be appended to the new one, similar to this
 yournickname_1f5c.Add a new Git Root

Add Git Roots using OAuth
You can easily add repositories with OAuth from GitLab, GitHub, Bitbucket or Azure. To start using this functionality, you must first add credentials in the Credentials section. To learn more about this section, you can enter here.
Once you have added the necessary credentials, select the code repository hosting provider where you have your repository.

For this documentation, we will perform the example with the GitLab provider. When you click on this provider, you will get a pop-up window where you will be asked to choose which user are the credentials, listing all users who are part of that group and have an OAuth connection with that same provider.
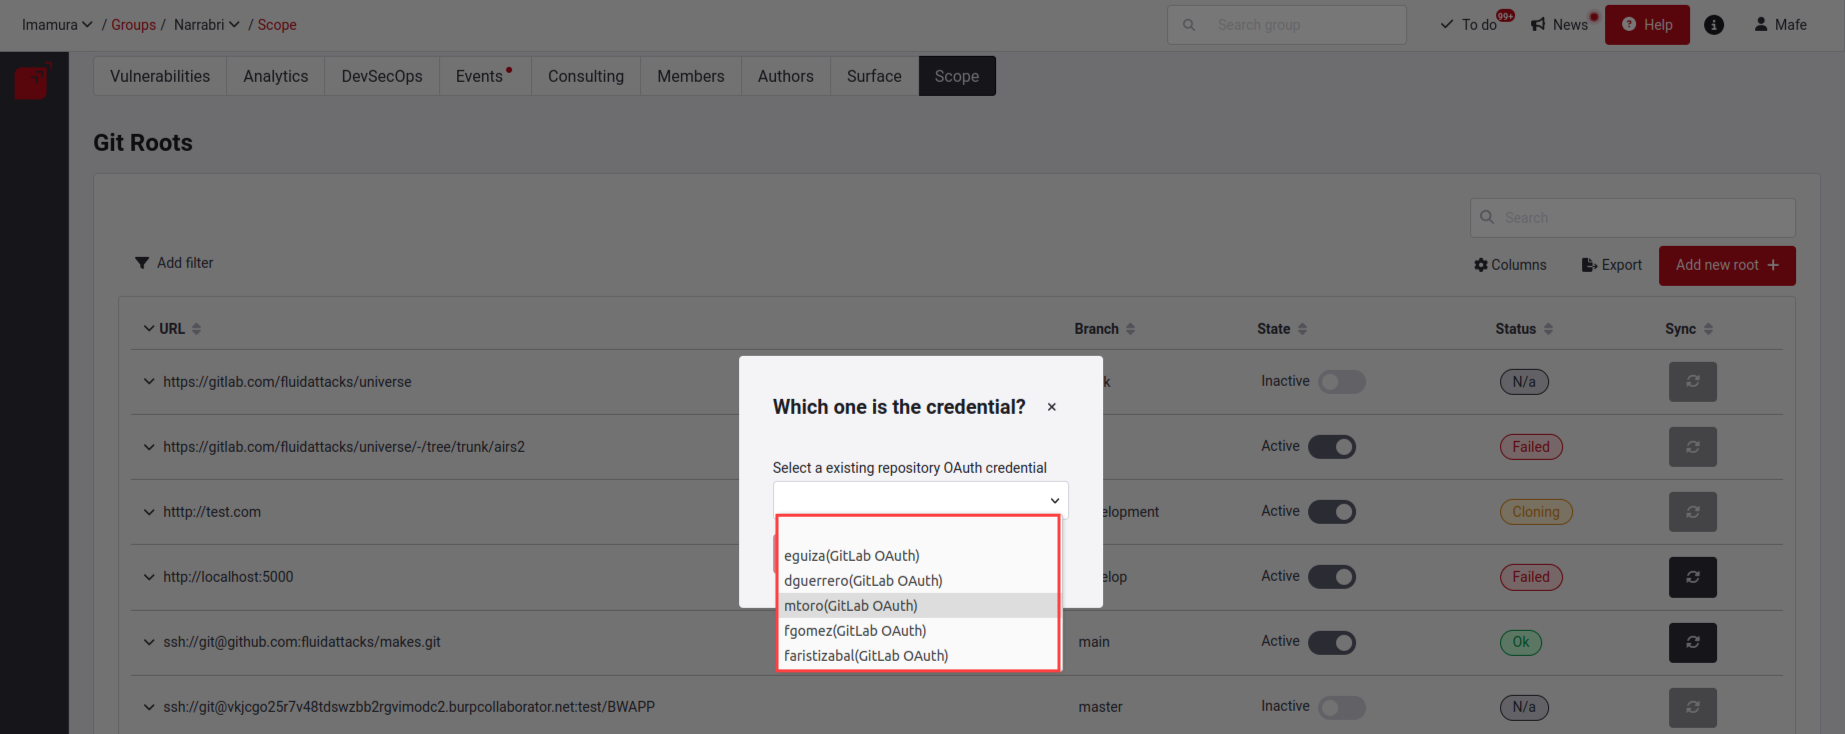
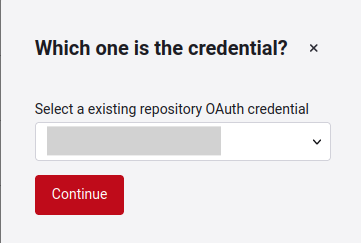
When selecting the credential, it will read all the data from its repositories and their branches (keep in mind that depending on the data, it may take some time to load). When finished, it will activate the continue button.
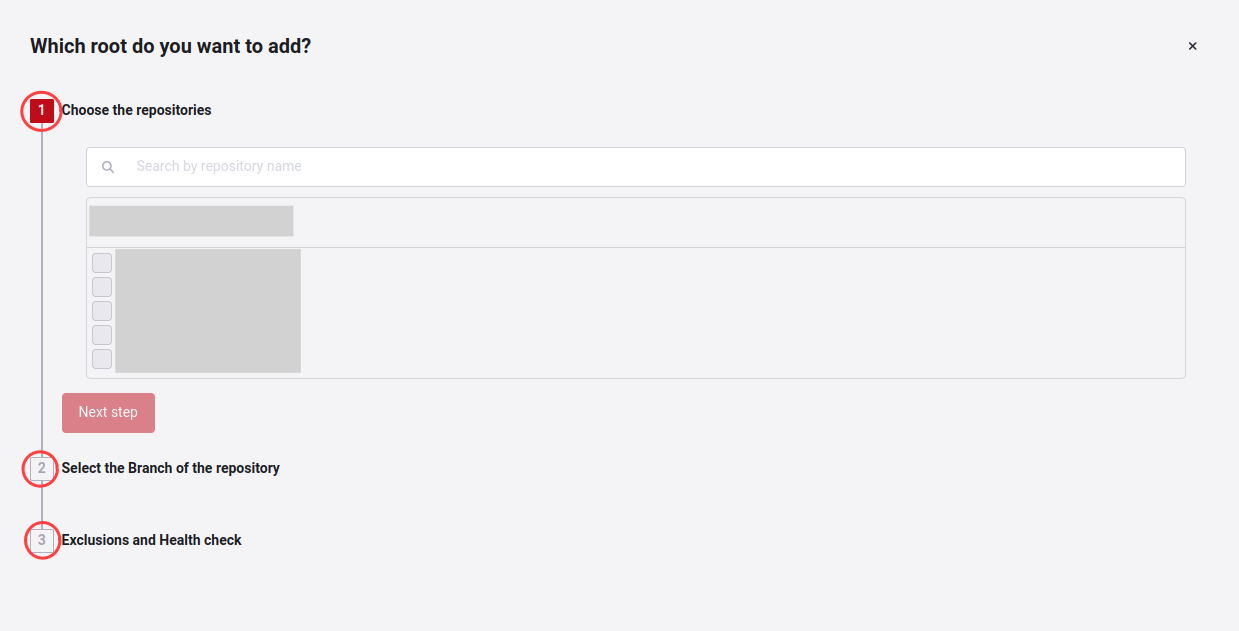
When you click continue, you will be presented with a form that consists of three steps: Choose the repositories, select the repository branch, and determine exclusions and use of Health Check.
In the first part of adding repositories, it will list the repositories that are not yet loaded on the platform, and you can search for them in the search bar or select them in the check box. Each repository you choose will activate a field called Environment kind (type of environment of this Git root), which can be production, QA, development, etc.
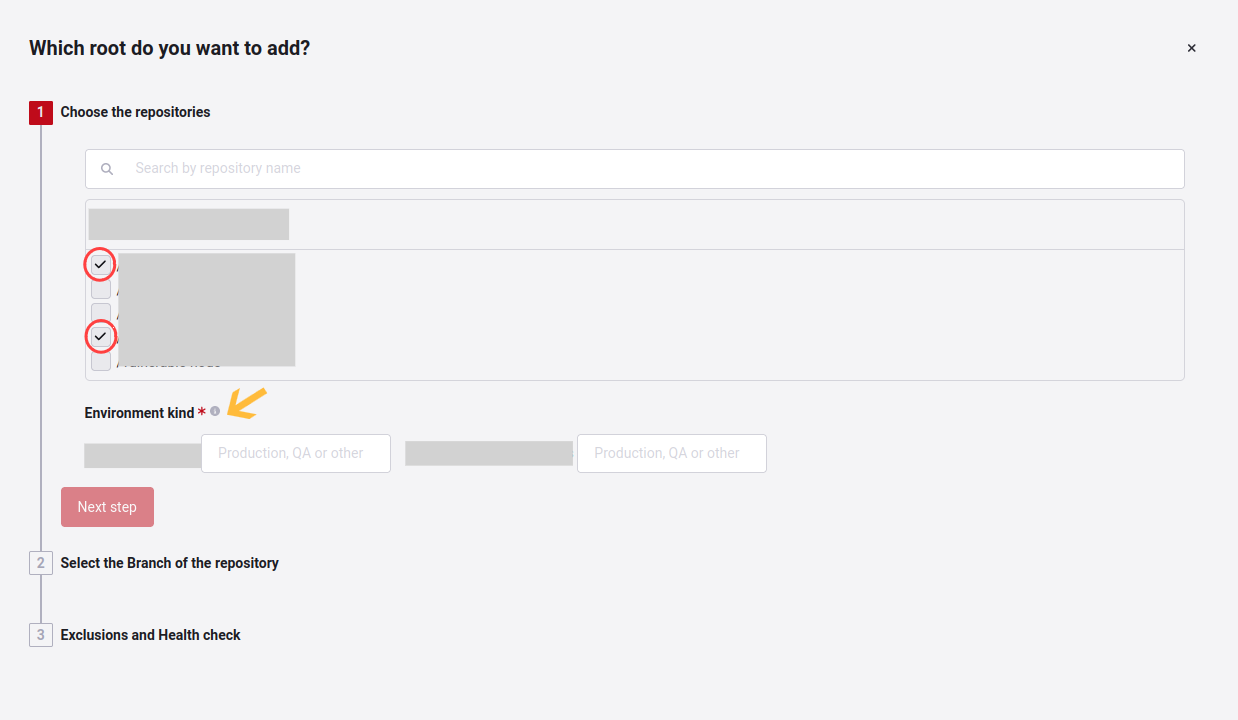
When you fill in the type of environment, the Next step button will be activated; you will select the branches with those selected repositories.

Once you have selected these, you can continue to the last step. You can also click the Previous button to return to the previous step.
You will be asked two questions in the Exclusions and Health Check section. First, Are there files in your selection that you want the scans to ignore? When you click on Yes, it will activate the fields for you to enter which file, folder, or path you want to ignore; if you have doubts about exclusions, you can enter here.
As a second question, you will be asked Health check: Would you like a health check for the existing code? Where you can decide with a yes or no.

When you finish filling in the three fields, Add root will be activated. Click the button to add the Git repository or repositories successfully. This way, you can add several repositories in only three steps.
Add a new Git Root manually
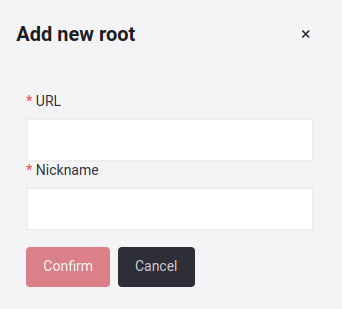
To add a new Git root manually, you must select the corresponding option under Add new root.

There you will get a pop-up window where you will have to enter the information of the new repository you want to add.
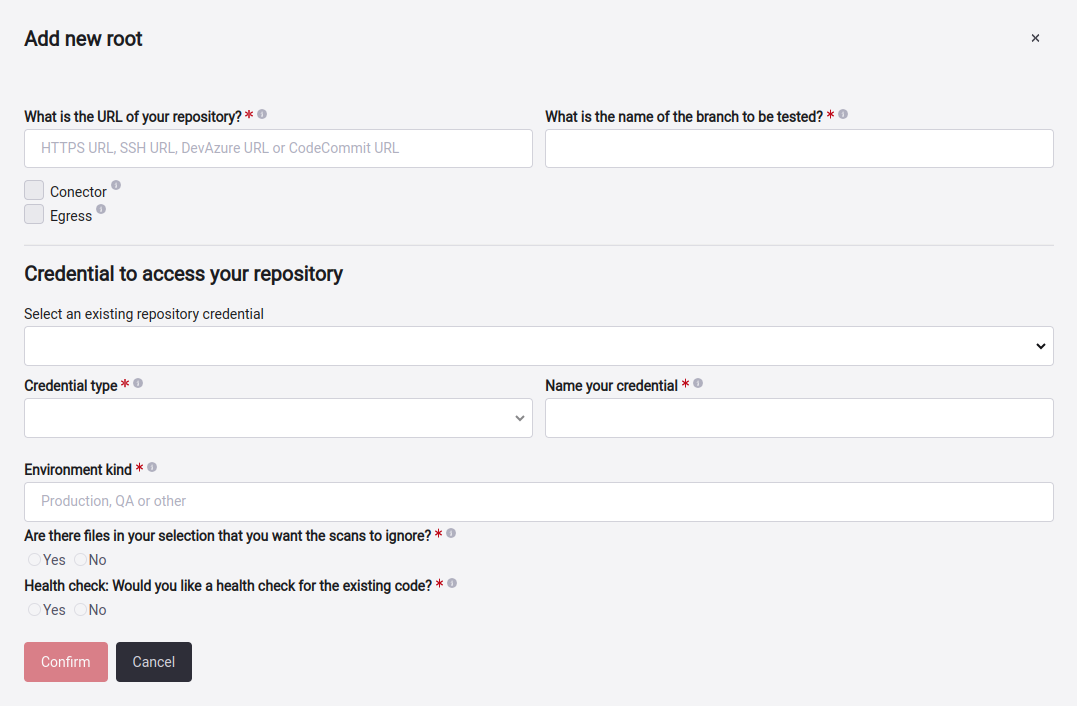
The information you have to fill in is as follows:
- URL: The URL where the repository is located.
- Branch: The branch that is inside the repository that I want to be validated.
- Connector: Selected when the root is using Cloudflare.
- Egress: Use when the repository is behind a private network and specific IPs needs to be whitelisted on your firewall. For more information click here.
- Existing credentials: These credentials have been created and used, you can be reused. For more information, click here.
- Credential type: To have access to the repository, we have to have access to the credentials, which are four types: HTTPS, Azure DevOps PAT, SSH and AWS IAM role. Here, you select which type of credential you want to add. For more information, click here.
- Environment kind: The type of environment that is this root.
- Exclusions: Specifies what files of that root will be ignored during the analysis by clicking on the Yes button, then you can add many as you need. If you want to know how to do it, you can enter here.
- Health Check: You have to select YES or NO if this git root will apply for Health Check.
When you fill in the required fields, click on Confirm, and your repository will be successfully added.
Existing credentials
Fluid Attacks needs credentials to have access to one or multiple repositories. When creating or editing a root, you can see the field Select an existing repository credential. Clicking on the dropdown will display a list of credentials previously used for other repositories.
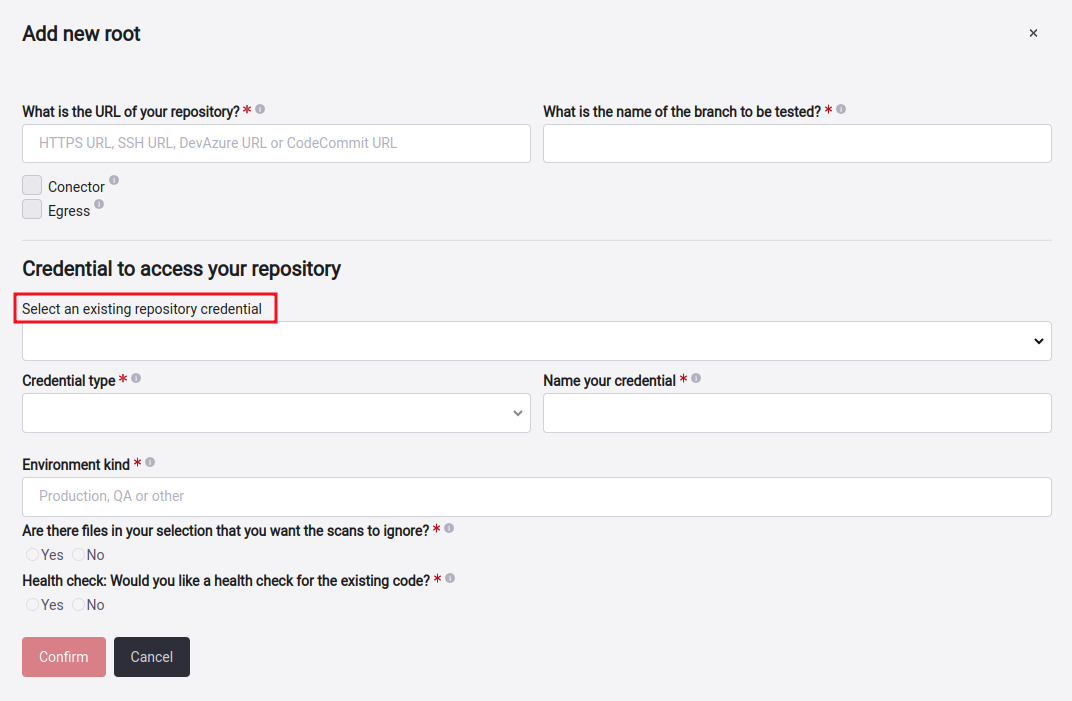
If any of the credentials in the list is useful for the root that you want to create or edit, select it, and the Credential type and Name your credential fields will be autofilled.

Credential Type
To clone a Git repository in the Scope section, you can do it with any of these authentication methods: Protocol HTTPS (User and Password), SSH key (Security Shell) Azure Organization (Access Token) or Cross-account AWS IAM role. We deduce the type of credential from the repository URL that you provide.
Add a root with user and password
With HTTPS you can access by providing a User and Password pair.

Remember that the Check Access button helps validate if the access credentials given are correct to perform the cloning successfully. If they are not, you will get invalid Credentials, and if they are valid, you will get Success access.
Note: If you clone via HTTPS with GitHub, you must replace the password with a personal token. To generate this token, you can go to the official GitHub documentation link.Add a root with an SSH key
With SSH keys, you can connect to your repository server without using a username and password. Here you have to supply a Private Key. If you need to set up an SSH Key, we recommend reading this document: Use SSH keys to communicate with GitLab .
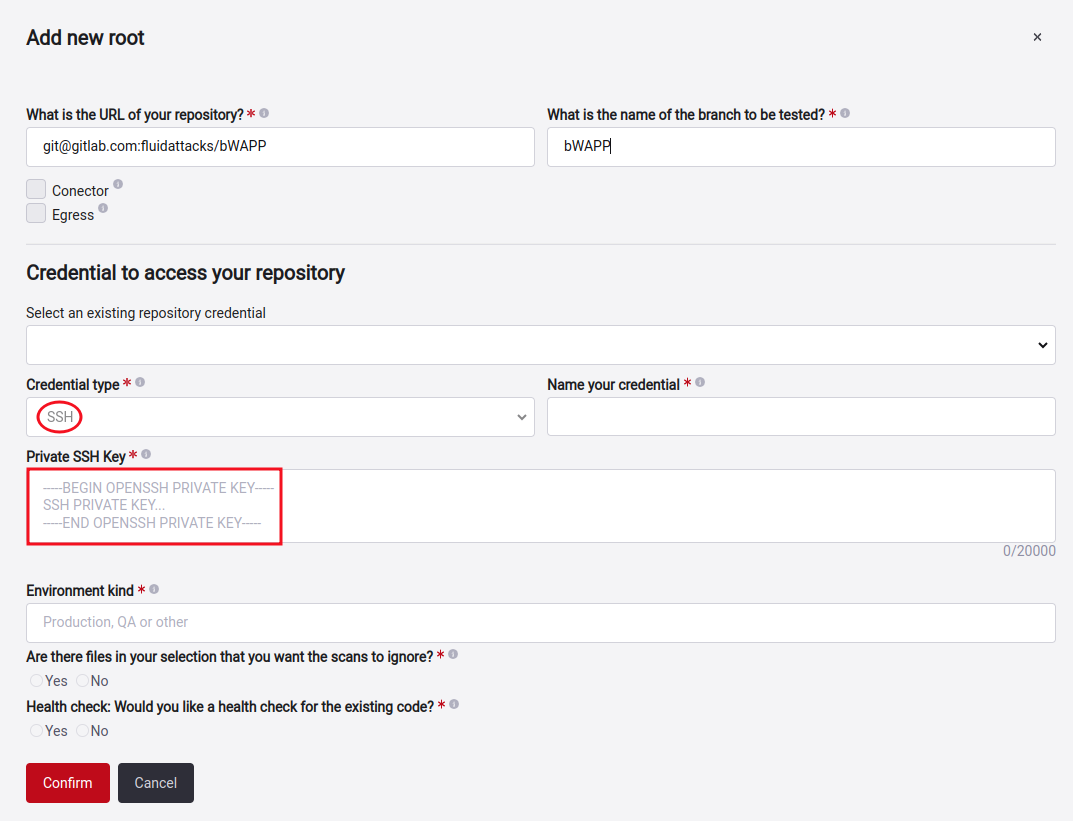
Remember to click on the Check Access button or validation if the credential gives access to clone the repository.
Add a root with an Azure DevOps PAT
Azure DevOps is a platform that provides software development services, among those able to have repository management and control the source code. We invite you to access the official documentation of Azure DevOps if you want more information.

After entering these data, click on Check Access. If the information given is correct, the Root will be created successfully.
Add a root with a cross-account IAM role
Cross-account AWS IAM role is an IAM role that includes a trust policy that allows IAM principals in another AWS account to assume the role. Put simply, you can create a role in one AWS account that delegates specific permissions to another AWS account. Official documentation if you want more information.

Here is how you can set up your role to use this feature successfully.
Note: Remember that you can also add all these credentials types in the Credentials section. For more information, click here.Exclude subpaths in Git Roots
Fluid Attacks' platform brings you a way to do this. But keep in mind that any files or folders excluded by the gitignore will prevent any vulnerabilities from being reported for them and are effectively taken out of the group's scope, so we advise you to be careful with this.
Note: There is no limit on exclusions; you can add as many as necessary according to your requirements.You need to go to the scope section of your group and click on the Add new root or select the already created root you want to add that exclusion. A new window will show up depending on what you want to do.
There, you can see the question Are there files in your selection that you want the scans to ignore? If you choose Yes, you will get a warning as a preventive message, followed by the field where you can start adding patterns for the files or folders you want to exclude. This way, you can specify the paths you don't want us to test. If you need to add more, click the Add another button.

For your convenience, you can also click this link to access said web page. Using these patterns, you can efficiently exclude all the files and folders you want. However, we advise you to be careful when you use the wildcard(*), as this may cause you to accidentally exclude something you don't want to and stop receiving reports of any vulnerabilities in it, so whenever you can, always try to be specific when excluding paths.
Note: If you exclude files or folders with open vulnerabilities, please be aware that those reports will not be closed automatically. You will have to wait for the next scheduled tool run or request a manual reattack so that Fluid Attacks' analysts or tool can close them.Exclusion examples
- node_modules/
- build/tmp/
- test/*.js (this one uses the wildcard that advise you should be careful with)
- repo-root/dummy/excludeme.js
Set exclusions as code
Fluid Attacks' scanner allows you to add exclusions inside the source code of your application. Click here for more information.
Import repositories through a CSV file
Role required: User or User ManagerPrepare the CSV file
You should keep in mind that the headers in the .csv file must be formatted with six columns, which are shown in the next screenshot and described further below.

Below, we will explain the information contained in this file:
- environment: The type of environment that this root represents.
- url: Refers to the URL of the repository where the code to be cloned is located.
- branch: The branch to clone. Remember we assess only one repository branch per group.
- includes_health_check: Indicates whether Health Check is included in that repository. This column is filled with a Boolean value, but it can also have empty spaces, as it is not mandatory to fill it.
- git_ignore: You can specify the paths you don't want Fluid Attacks to test. Here, you pass the path without quotes, and if you have many paths to add with the same root, you separate them with commas. Also, this is another field that can be left blank, as it is optional to fill it.
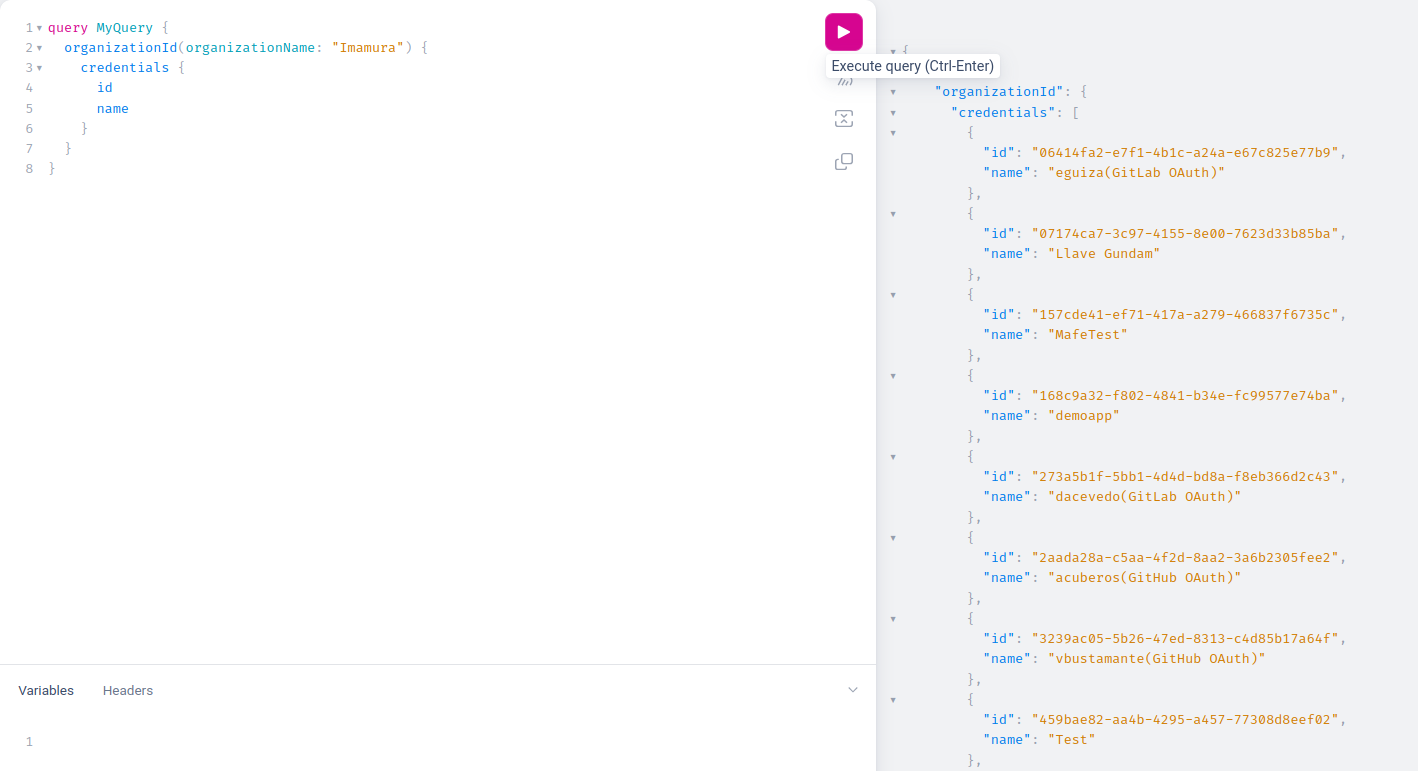
- credential_id: To obtain the ID value, you need to connect to the Fluid Attacks API. Once connected, you pass a query that lists all the credential IDs. However, remember that to list the credentials, you must have completed the first step, which is registering them. If you have doubts about how to do this, we invite you to visit the following link. The query to pass is as follows:
  query MyQuery {
          organizationId(organizationName: "org_name") {
           credentials {
            id
            name
           }
          }
         }
You will be able to see the following result, copy the information that says ID.
Import the CSV file
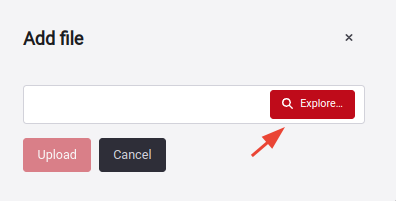
There, a pop-up window will appear where you can upload your .csv file. Click the Explore button, select your file, and then click the Upload button.
You will receive a confirmation message. You can then view the added Git Roots on the platform, which will be synchronized.
If you encounter an error, it's likely because your file does not conform to the specified typing and schema. Read the error message carefully; it will explain why the error occurred and in which row it was detected.
CSV file validations
The validations performed in the .csv file are as follows:
- Invalid URL or Branch: It checks that the specified URL or branch is valid and in the correct format.
- Prevention of CSV Injection: It prevents malicious code injection through the .csv file.
- Incorrect Characters: It verifies that the fields in the file do not contain incorrect characters or disallowed symbols.
- Credentials ID Validation: It verifies that the specified credentials ID is correct and valid.
- Avoiding Duplicates: If the file contains entries with the same URL and branch, only one of them will be uploaded in the scope, avoiding duplicates.
- Avoiding Root Duplicates: If an attempt is made to add a root that already exists in the platform, it will not be mounted again, as it is already present.
Export Git Roots table

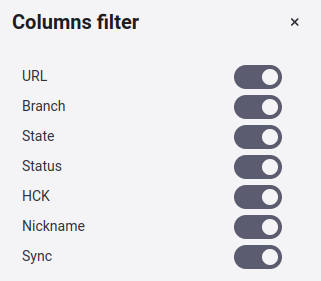
Show or hide columns of the Git Roots table
Filter the Git Roots table

Edit a Git Root

The Git repository tab allows you to change details of your Git root. Keep in mind that modifying the repository’s URL and branch is only allowed if absolutely no vulnerabilities have been reported in it. If there are reported vulnerabilities, you will have to add a new root with the URL and branch you need to include in the security tests.
If you want to know how to edit or add an environment, enter here. Now, if you're going to add or edit secrets, you can learn how to do it here.
Deactivate a Git Root
Role required: User Manager
Deleting a root is not possible on Fluid Attacks' platform because in the security world it is always better to keep records of everything. However, you can change its state to Active or Inactive, which would mean the following:
- Active: The repository is available and ready for our AppSec testing tool and analysts to access.
- Inactive: The repository does not exist anymore, it was changed, or it was added by mistake.
We will notify the state changes via email to all the people involved in the project (both Fluid Attacks and the customer’s users).
You can change the state at any moment. We will keep track of every change for traceability reasons.
To do this action of change of state, you must first find the branch you want to disable or move to. Once you know which one it is, go to the state column and click on the toggle of the branch that is currently active.

Here, you will get pop-up window asking why you want to disable the root.

When you click on the drop-down menu, you will get three options: Registered by mistake, moved to another group, and other.
Registered by mistake
This option is useful in case of mistakes when adding a root, but if you just need to update the URL, branch or any other root attributes, refer to Edit a Git Root.
Moved to another group
This option allows moving a root to another group along with the vulnerabilities reported to it.
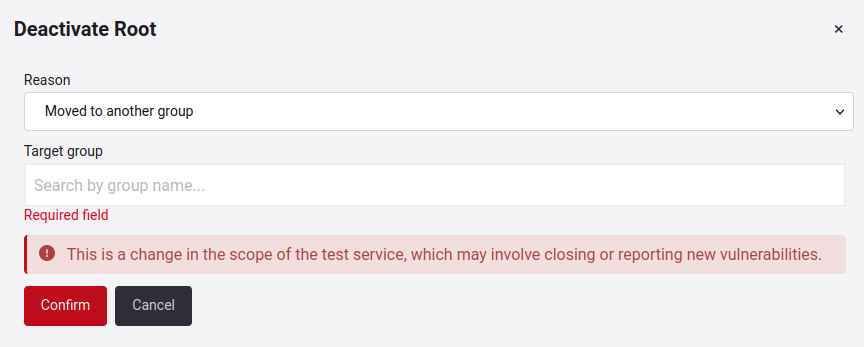
The search bar will suggest other groups with the same service type that you have access to within the organization.
Other
When neither of the previous two reasons applies, then you can use this one and type what the reason is.

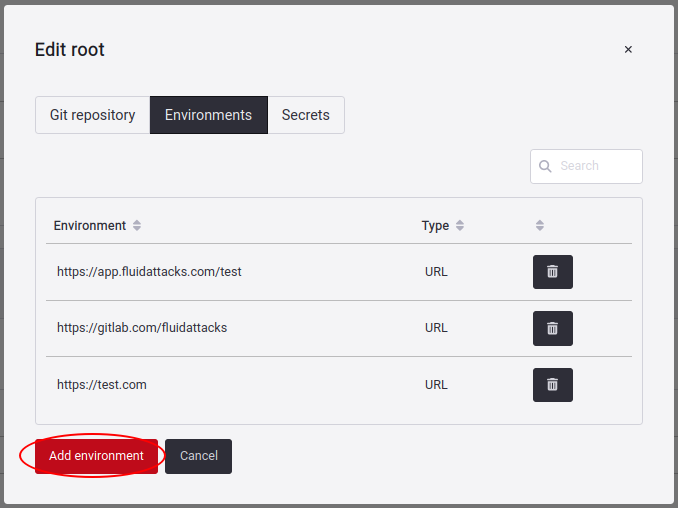
Manage Environments
Here you see the Environments linked to the Git Roots.
Know your Environments table

- URL: URL address.
- Has Secrets? If that URL has secrets to access the environments.
There is also a downward-facing arrow on the left, which, upon click, it shows you the creation date and the Git Root corresponding to that registered environment.

Note: You can also see in the table when a URL has been excluded, indicated by the exclusion label.Edit Environments
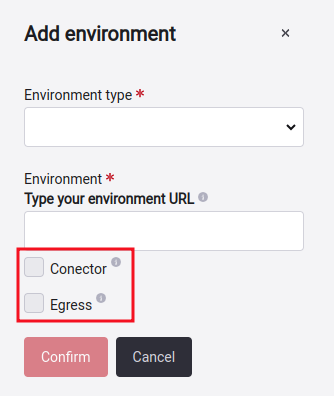
Here you will get a pop-up window where you will have to select which environment URL Type you want to add, which can be: Mobile, CSPM, and URL.
- CSPM: You enter the credentials to access AWS, Azure, or GCP platform. For more information click on the following link.
- Mobile: You can add files with APK extension (Android Package).
- URL: Here you enter the URL where you have deployed your application.
You can also specify how to access this input: Connector or Egress. If you want to know more about these two, you can click here.
Also remember that you can also delete any environment by clicking on the trash icon.

Note: When a request to a web service to add an environment does not return a response with the code 200, it may indicate a problem with the operation. HTTP response code 200 usually means that the request was processed correctly. If this code is not received, there are several reasons why the environment could have problems. Possible causes include:
- Authentication or authorization errors
- Data validation errors
- Connection or infrastructure problems
- Internal server errors
Exclude Environments
Warning: Keep in mind that excluding subpaths implies they won't be considered in vulnerability analysis. Also, remember that if you exclude the main path, the associated subpaths will also be automatically excluded. Additionally, you won't be able to activate a subpath if the main environment is inactive.Note: Make sure the main path exists before excluding a specific path.Add the subpath you want to exclude just like you would with a regular environment. If you have any questions about how to do this, you can refer here for more detailed information.

Once you have added the subpath, click the Confirm button.

If the addition is successful, you will observe its presence in the Environments tab. Additionally, you'll find a toggle button named Exclusion status that indicates whether it's included or not.
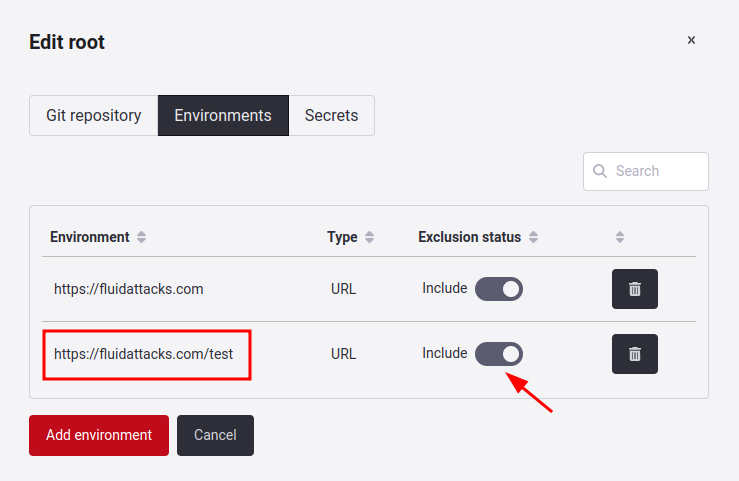
By clicking on the toggle, you can exclude that specific subpath. A confirmation window will appear for this action.
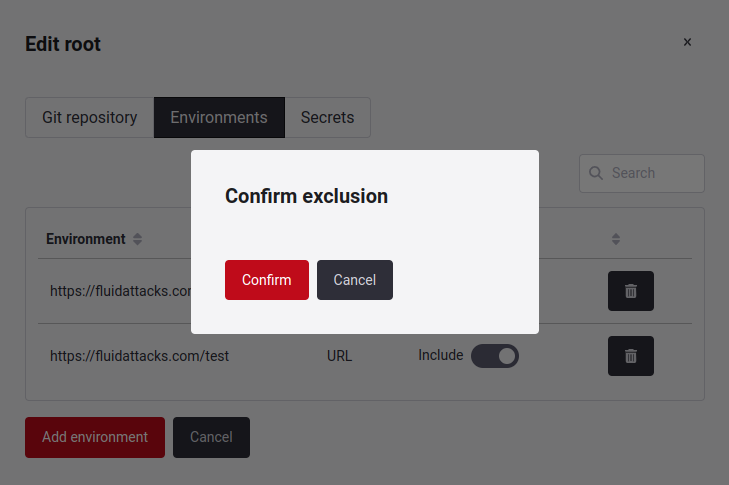
You will see that the exclusion has been successfully applied. If you want to include it again, click on the toggle switch, and it will be reactivated.

Manage IP Roots
An IP address is the unique identifier of a device on the Internet or a local network. When you provide Fluid Attacks with an IP address, Continuous Hacking assesses the security of all web applications accessible through this target. If your group uses black-box testing services, you will have IP Roots and URL roots in Scope section.
Know your IP roots table

You will find in this table the following information:
- Address: Your IP address to which you want to validate.
- Nickname: The identifier name of that IP.
- State: There are two states: Active and Inactive. Active means that the root is being tested and Inactive means that the root is no being tested. The same reasons are validated to deactivate a root IP as in a Git Root if you want to see more, click here.
Add an IP root

A pop-up window will appear, asking you to enter the details of the root (in this case, IP address) you want to add.

Here are the definitions of the details you need to enter:
- Address: IP address where the environment to be assessed is deployed.
- Nickname: An alternative name to easily identify the IP root in the future.
Once the IP address is added, it will be listed below IP Roots. There, it is shown whether it is active.

Edit an IP Root

You can assign a nickname to the IP Roots; however, it is not possible to use the same name for another Root.
Deactivate an IP Root
Manage URL Roots
URL roots are dynamic environments that have already been deployed to a web server.
Know your URL Roots table

- Host: The domain name or IP address.
- Path: The path that will give to validate the URL.
- Port: The port number that helps give access to the URL.
- Protocol: The protocol is using the browser.
- Query: The query component serves to identify a resource within the scope of the URI's scheme.
- Nickname: The identifier name of that URL.
- State: There are two states: Active and Inactive. The same reasons are validated to deactivate a root IP as in a Git Root if you want to see more, click here.
Add a URL root

The following pop-up window will appear, asking you to enter the details of the URL you want to add.
The details you need to enter are defined as follows:
- URL: Address where the environment is deployed.
- Nickname: An alternative name to easily identify the URL root in the future.
The URL roots you add will be listed below URL Roots. There, it is shown whether it is active.

Edit a URL Root

You can assign a nickname to the URL Roots; but, it is not possible to use the same name for another URL.
Deactivate a URL Root
Exclude subpaths in URL Roots
Caution: Keep in mind that excluding subpaths means they won't be considered in vulnerability analysis.Select the root URL that has the subpath you want to exclude. A pop-up window will appear. Click on the third option labeled Excluded sub paths.

By clicking on that tab, select the Add subpath button, and a box will appear. Once you type the subpath to exclude, press the Confirm button.

Once the subpath is added, you also have the option to remove that action, by clicking on the trash can icon to perform this action.
Manage secrets
You can select a root from Git Roots. You will immediately see a pop-up window with three tabs, the third one being Secrets.
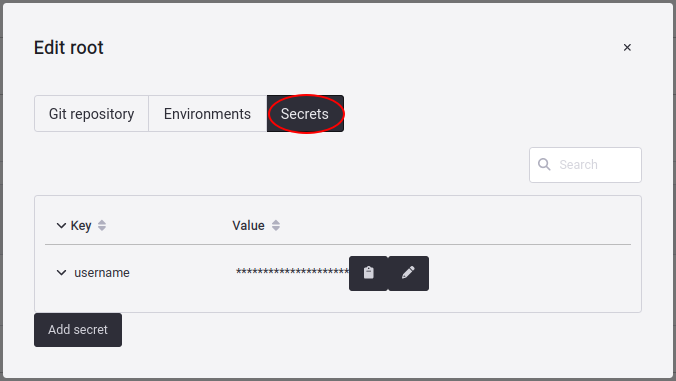
To add a new secret, you have to access the Secrets section and click on the Add secret button.
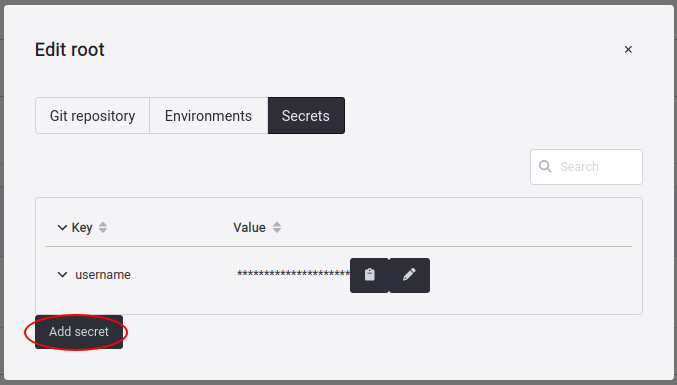
The secret must consist of key and value. Additionally, you can include a short description.

When you click Confirm, the secret is made accessible to our hackers on Fluid Attacks' platform. You can also delete or edit all the secrets you add by clicking on the corresponding button.

From Environment URLs and URL Roots you have to select the URL where you want to add, delete or edit secrets and follow the same procedure described above.
Note: You also have the option to add credentials/secrets for CSPM environments (AWS,GCP or Azure) directly when adding these environments. For more information, you can access the following link.