See where vulnerabilities are and more details
See the list of vulnerabilities detected

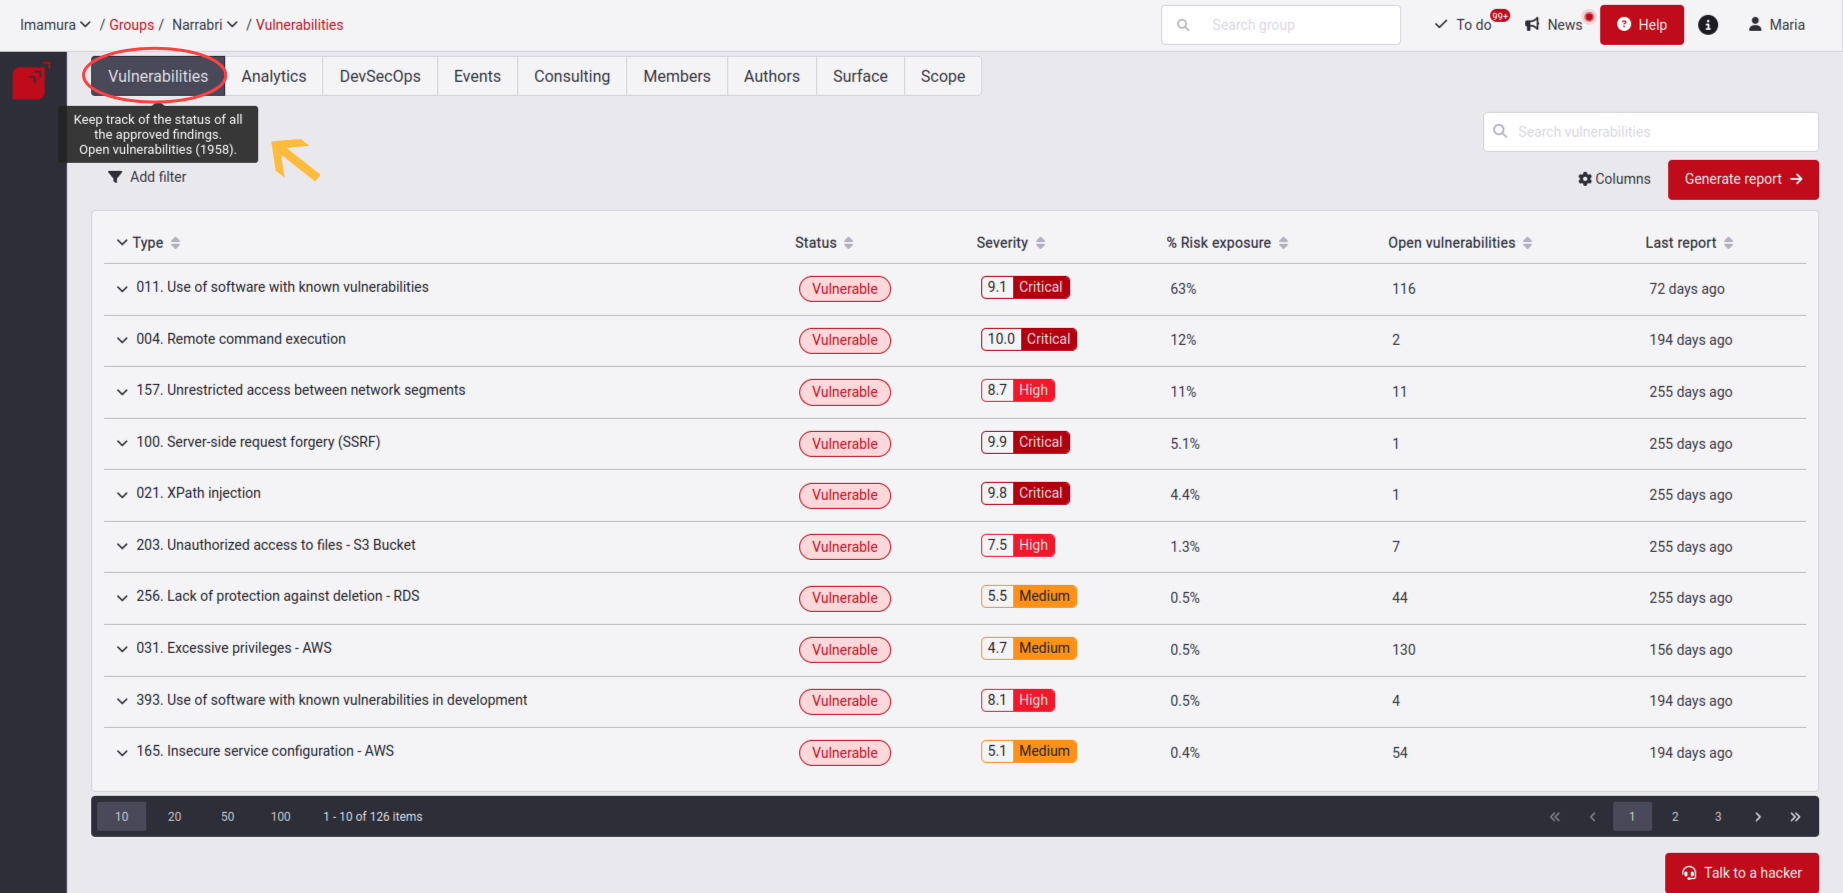
 If you hover your mouse cursor over the title of the Vulnerabilities tab, you will be able to view the cumulative count of all currently active vulnerabilities within that group.
Know your vulnerabilities table
In this table, you will see comprehensive information about the vulnerabilities reported in your group. This table comprises distinct columns, allowing you to turn specific columns on or off via the column filter button based on your preference for the displayed information. In total, there are thirteen columns which are described below:
- Type: The name of the type of vulnerability from our standardized set whose characteristics are met by the vulnerability found in your system.
- Status: The condition of the group regarding this type of vulnerability, the values are Vulnerable if the vulnerability is still present and Safe otherwise.
- Severity: The maximum CVSS v3.1 (Common Vulnerability Scoring System) temporal score among the open vulnerabilities in this type of vulnerability.
- % Risk Exposure: The contribution that this type of vulnerability is making to the CVSSF units for this group. It is given as a percentage and only open vulnerabilities are taking into account.
- Impact (0-1000): This column displays a prioritization indicator for remediation, integrating CVSS, EPSS (Exploit Prediction Scoring System) and asset criticality.
- Open vulnerabilities: The total number of locations where the type of vulnerability was found and is still vulnerable; that is, not yet remediated.
- Last report: The number of days elapsed since we found a vulnerability of that specific type, regardless of its vulnerable or safe status.
- Age: The number of days elapsed since the type of vulnerability was found in your system for the first time.
- Remediation %: The percentage of closed vulnerabilities of that type.
- Reattack: The status of the reattacks for the type of vulnerability, which is Pending if at least one requested reattack is due to one of the vulnerabilities of this type; otherwise, it is just a hyphen.
- Release Date: Date when the typology was reported.
- Treatment: List the Treatments that this typology has.
- Description: A definition of the type of vulnerability.


Spot newly reported vulnerabilities
A newly reported vulnerability type will be designated with a "New" label. This label will remain active for the new finding during seven days, after which it will disappear.
Search the vulnerabilities table
-
Type: This option allows you to search for vulnerabilities based on their type.
-
Repository Nickname: You can use this option to search for vulnerabilities associated with a specific repository by its nickname.
-
Locations: Use it to search for vulnerabilities based on their locations.
Hide and show columns in the vulnerabilities table
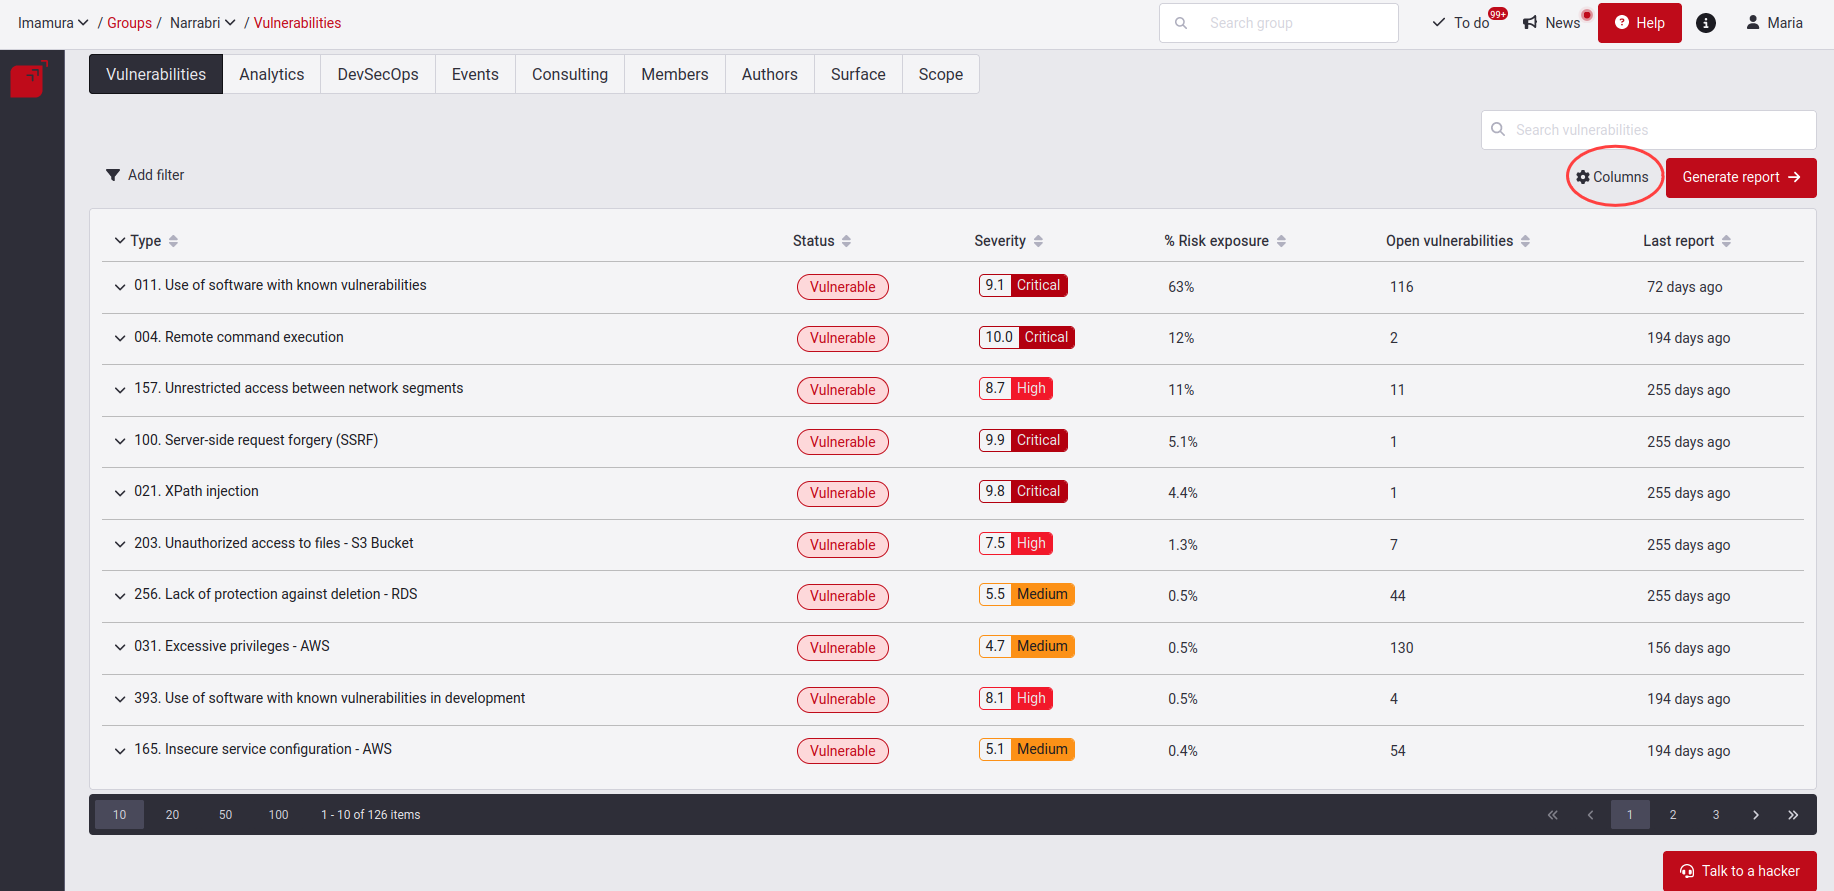
As a result, a pop-up window will appear, allowing you to show and hide columns as needed.

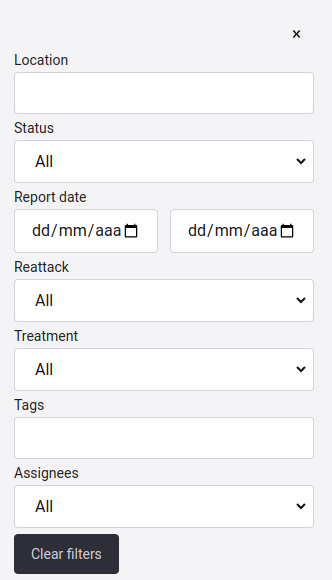
Filter the vulnerabilities table

Note: Keep in mind that the filters you apply will be visible in the table. These applied filters will persist in the Vulnerabilities sections across various groups within the same organization or even in different organizations.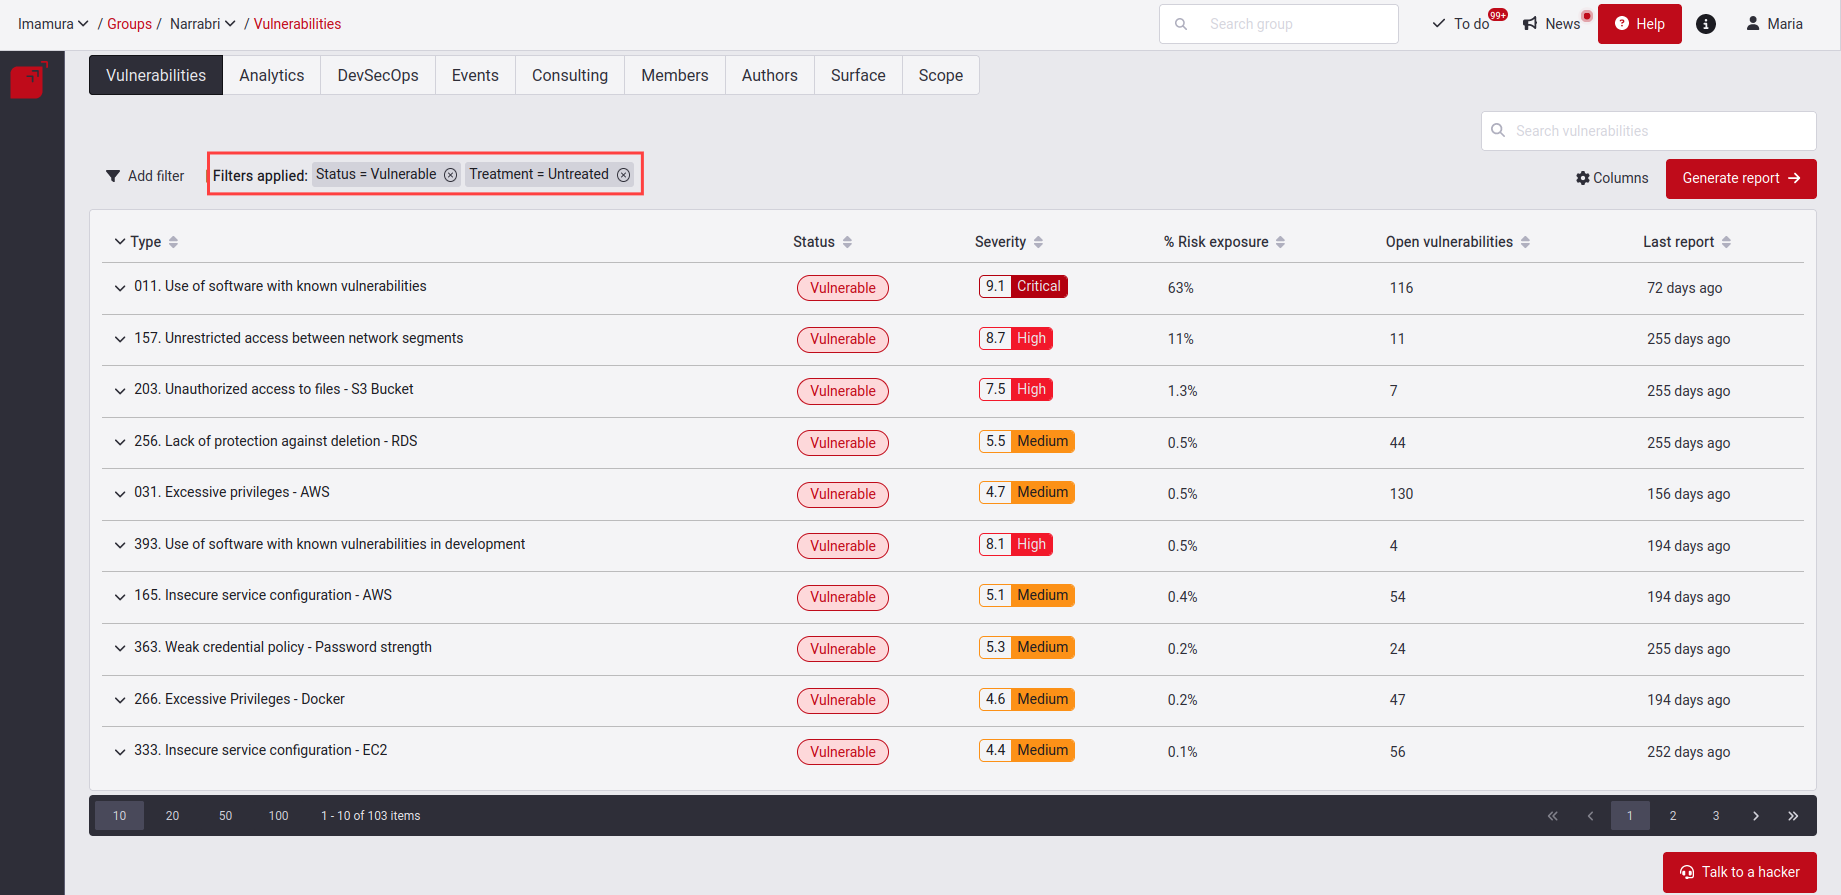
Generate reports
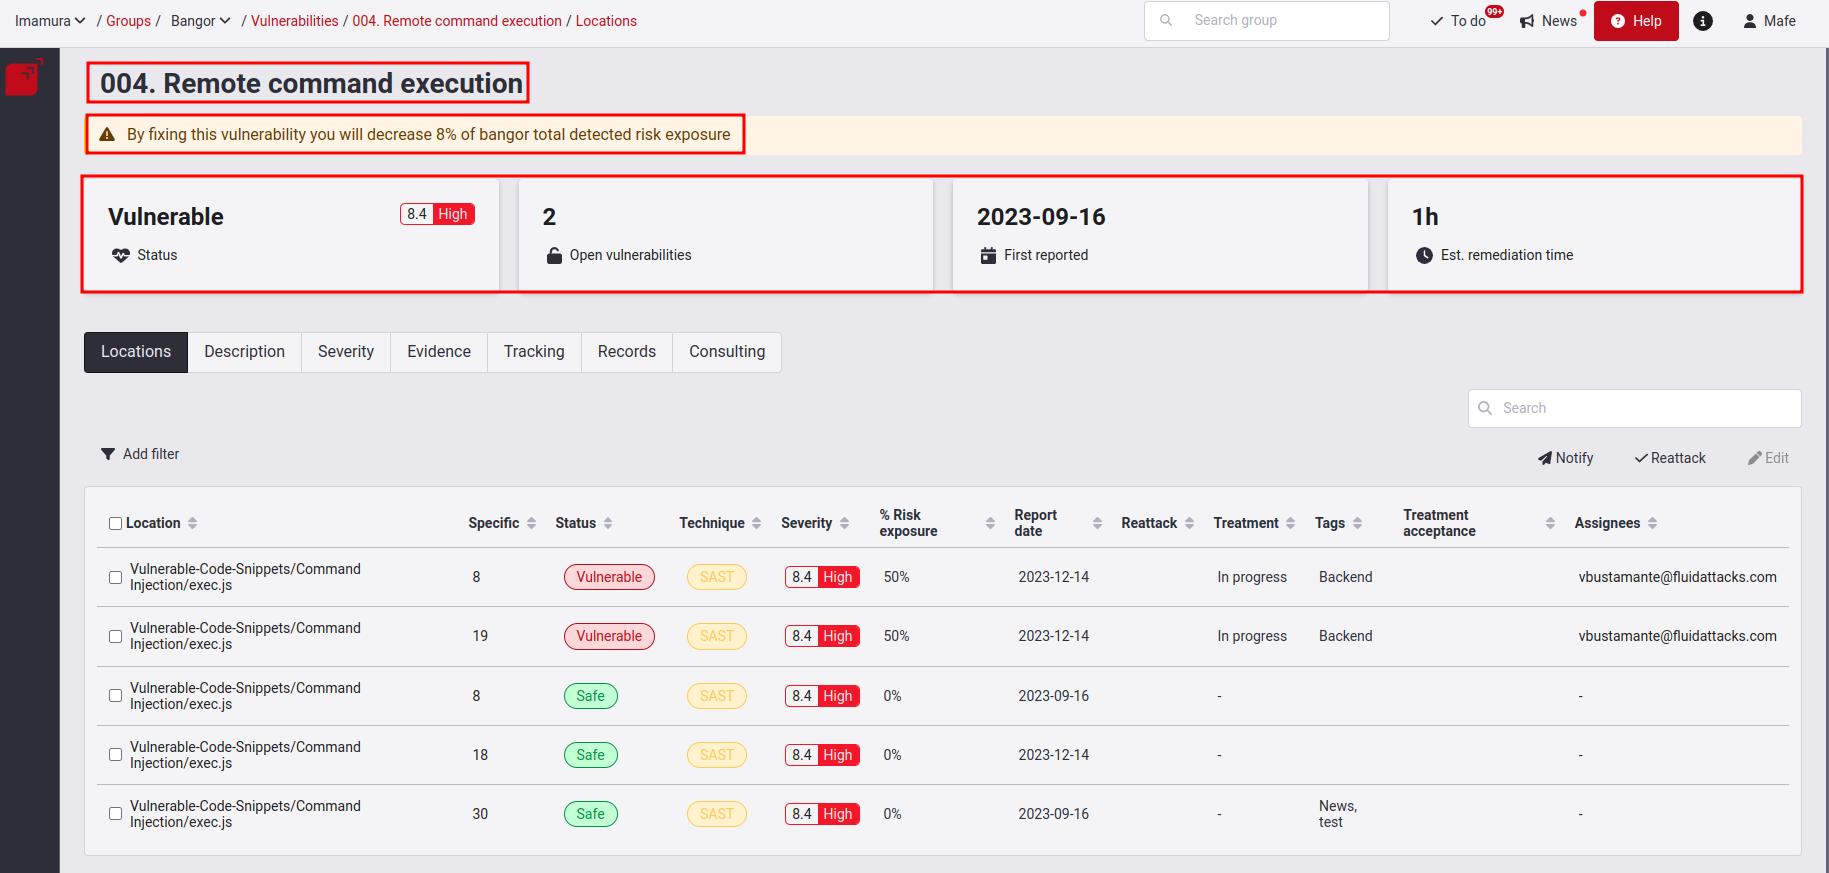
See where vulnerabilities are located
The header is the main entry point for comprehensively understanding the Locations section. Below, we detail the fundamental elements included in this header.
-
Title: Name of the type of vulnerability you have selected.
-
Percentage of Risk Exposure: This shows you the percentage of risk that can be reduced by fixing this vulnerability.
-
Status: Whether the group is Safe or Vulnerable depending on the presence of this reported type of vulnerability. Additionally, this element shows the severity score, according to the CVSS.
-
Open vulnerabilities: How many locations in your system still have that type of vulnerability. In the table, you can precisely find which files and code lines are affected.
-
First reported: The year, month and day we first identified and reported that type of vulnerability for the group in question.
-
Est. remediation time: The MMTR (Mean Time to Repair). This represents the number of hours on average that we estimate it will take you to remediate the selected type of vulnerability.
-
Location: The files where this type of vulnerability has been reported. They can be understood as individual vulnerabilities of that type.
-
Specific: In what lines of code, inputs (e.g., password field) or ports each vulnerability was detected.
-
Status: Whether the location is Safe from the type of vulnerability reported or remains Vulnerable to it.
-
Technique: The testing technique used to detect the vulnerability, which can be SAST, DAST, SCA, CSPM, MPT, SCR, or RE.
-
Severity: The CVSS v3.1 (Common Vulnerability Scoring System) temporal score given to the vulnerability.
-
% Risk Exposure: Represents the contribution that this vulnerability is making to the metric CVSSF for this type of vulnerability. It is given as a percentage and is set to zero if the vulnerability is safe.
-
Impact (0-1000): This column displays a prioritization indicator for remediation, integrating CVSS, EPSS (Exploit Prediction Scoring System) and asset criticality.
-
Report date: The dates when the vulnerability in that location was reported.
-
Reattack: Whether a reattack has been requested and is pending, is on hold, has been verified (open) or verified (closed). If this cell is blank, it should be interpreted that a reattack has not been requested.
-
Treatment: The defined Treatment for each vulnerability, which could be in progress, temporarily accepted, permanently accepted or Zero Risk.
-
Tags: Any tags that you have given each vulnerability to identify it.
-
Treatment Acceptance: The locations that have accepted treatment.
-
Assignees: Locations that have an assigned.

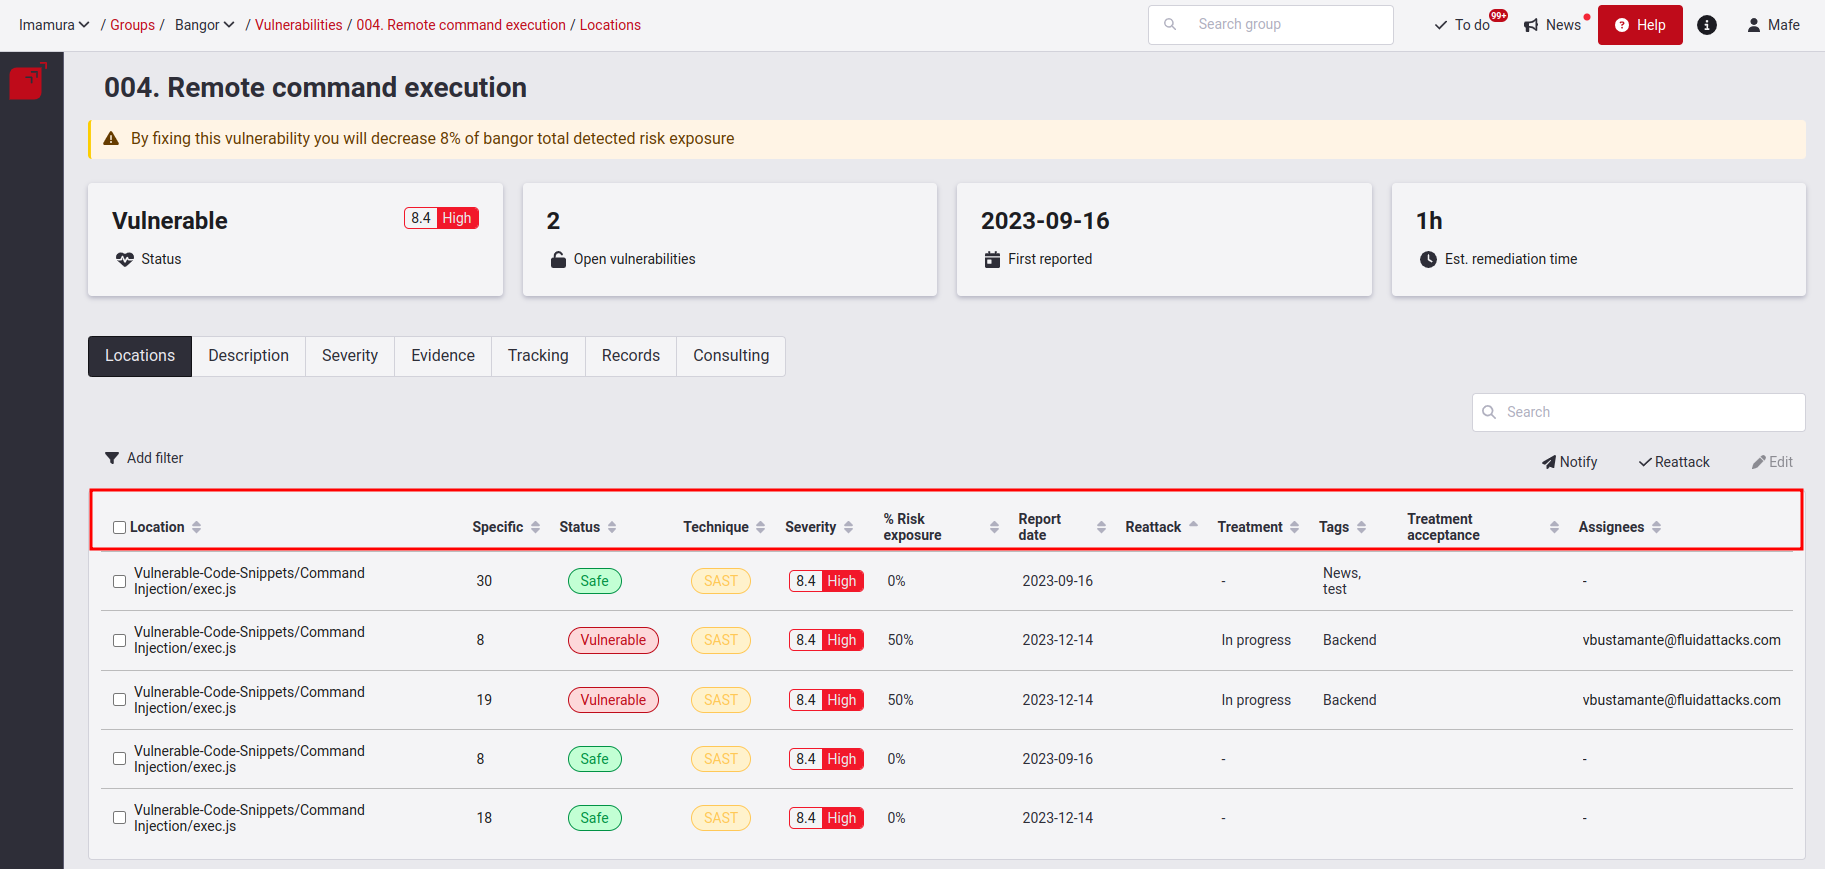
Use the search bar to look for information within the rows of the table.See inside a vulnerability
We will now explain each of these tabs and the information they contain. Also, remember that you can also view this window in the To do section.
See the details of a specific vulnerability
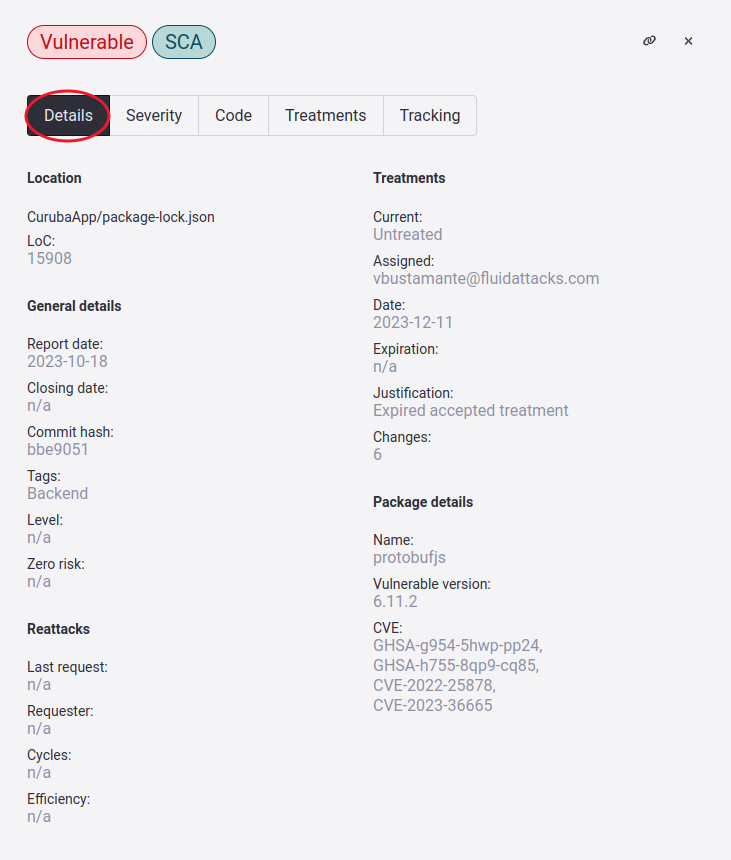
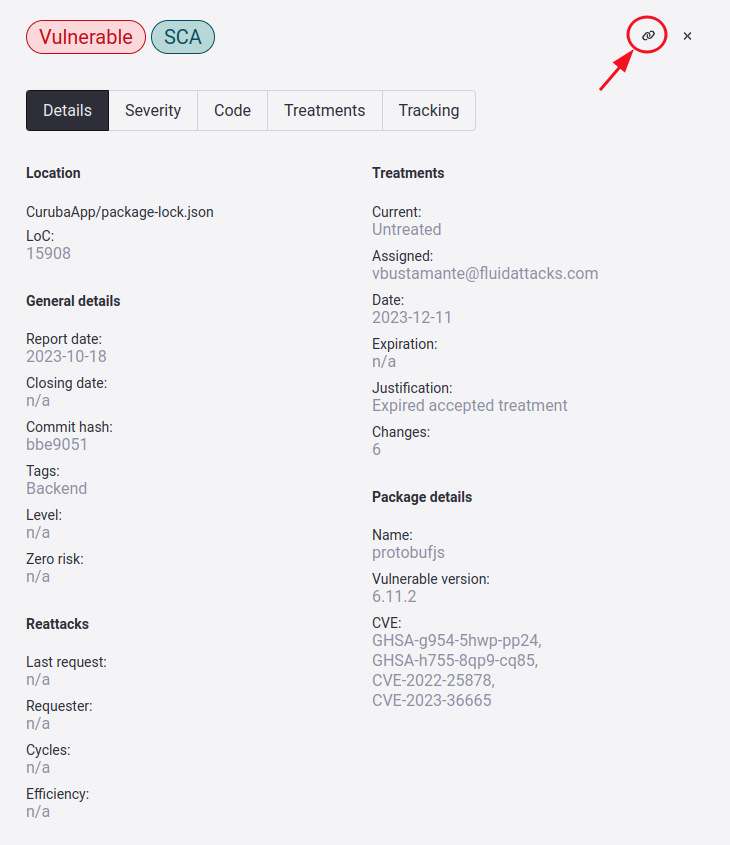
Here we explain the information of each item:
-
Location:
- Locations: Path where the vulnerability was found
- LoC / Port / Input: Specific line of code, port number, or input field that presents the vulnerability
-
General details:
- Report date: The date the vulnerability was reported.
- Closing date: The date the vulnerability was closed
- Commit hash: Commit ID where the vulnerability was found
- Tags: Vulnerability identification tags
- Level: The user's rating of the vulnerability that indicates how important/critical it is
- Zero risk: Whether this location has this treatment applied
-
Reattacks:
- Last request: Date of last time a re-attack was requested
- Requester: The name of the person requesting the reattack
- Cycles: Total of how many reattacks have been requested
- Efficiency: Percentage of efficiency in the solution of vulnerabilities
-
Treatments:
- Current: Current treatment of vulnerability
- Assigned: The person assigned the vulnerability
- Date: Date stipulated in the application of the treatment
- Expiration: Date stipulated in the application of the treatment Temporarily Accepted
- Justification: The justification given when the Temporarily Accepted treatment was applied
- Changes: The number of times the treatment of that vulnerability has changed
-
Package details: This information will be visible only in SCA vulnerabilities, specifically F 011 and 393
- Name: Name of package that is vulnerable
- Vulnerable version: The version of the package
- CVE: CVE identifier.
Learn the severity of a specific vulnerability
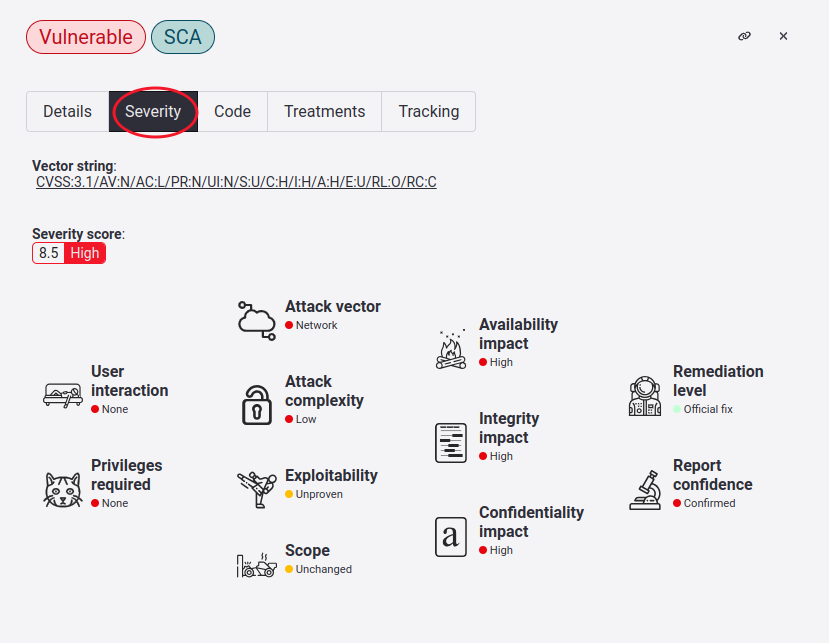
There is also a link in the given vector string, where you are redirected to the CVSS v3.1 calculator and get the assigned severity score, allowing you to understand this better.
See the vulnerable line of code
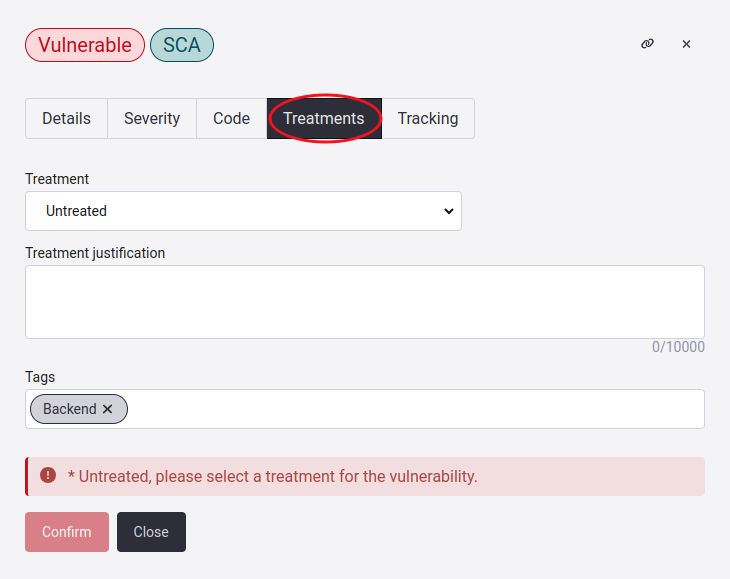
Edit Treatment for a vulnerability
Clicking on the following link, you can visit the dedicated article, where you will understand the different types of treatments and how to fill in the other fields that compose this section.
See the history of a specific vulnerability
![]()
Get the link to share the details of a vulnerability
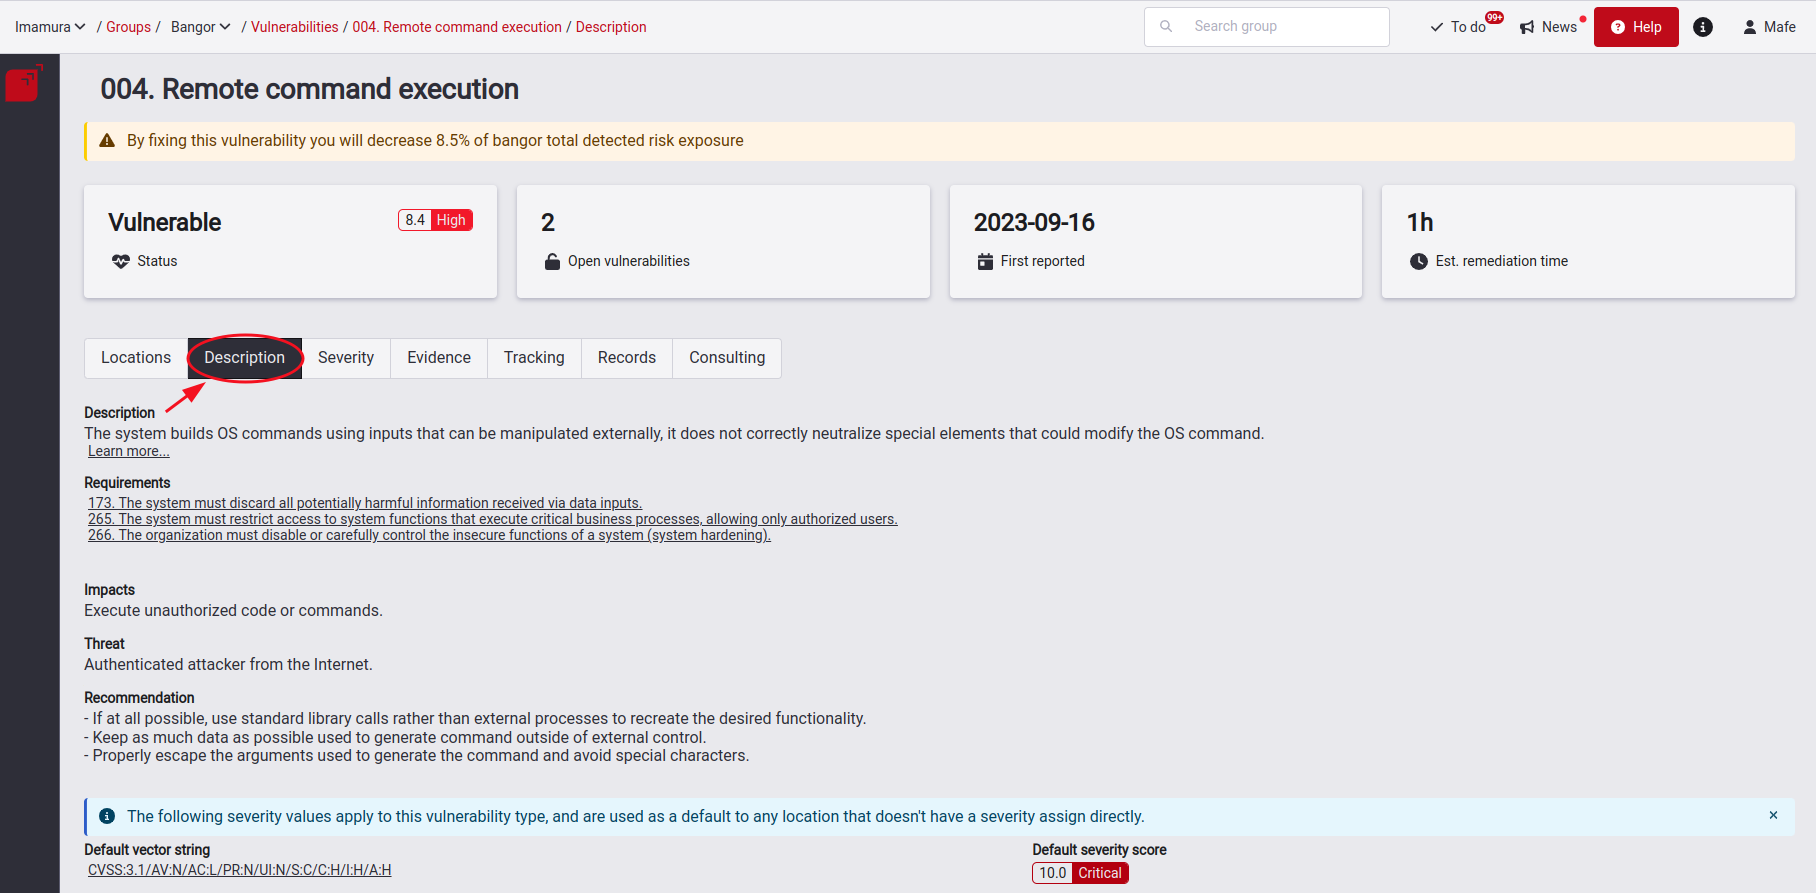
See the description of a type of vulnerability
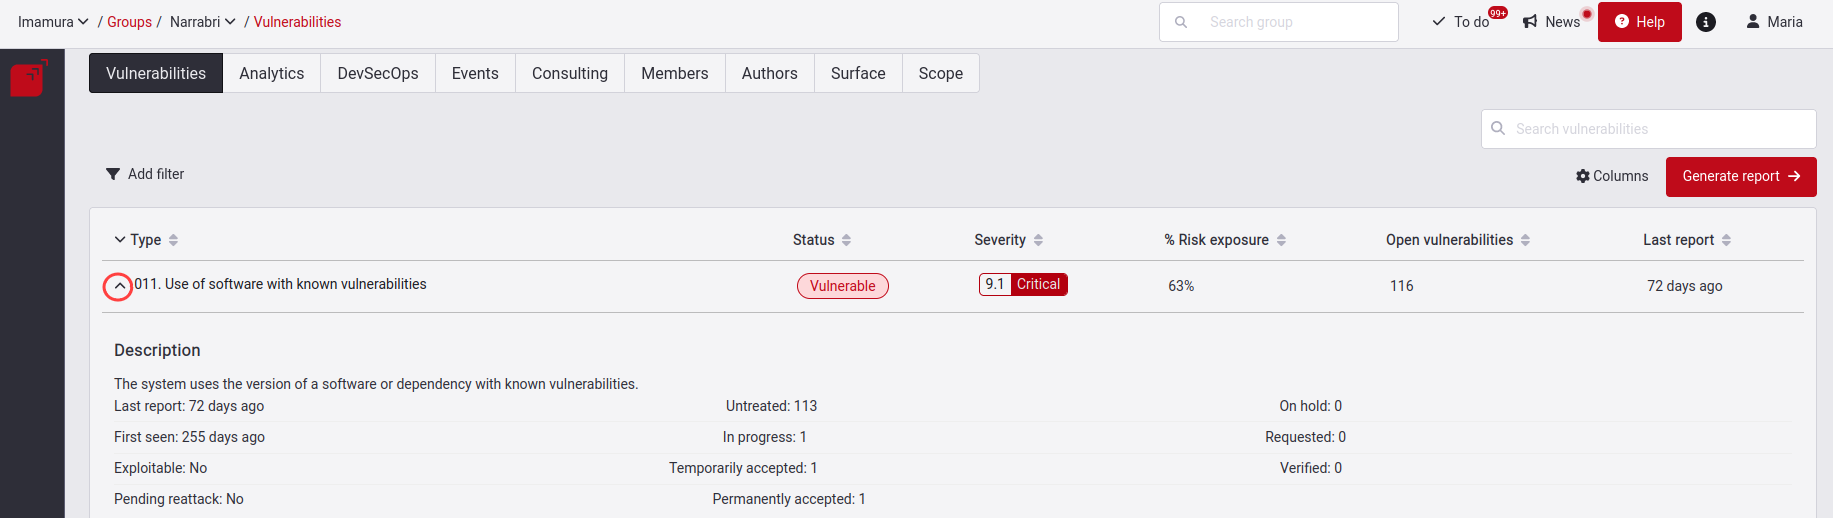
When you open a type of vulnerability and open its Description section, you find concise technical information about the type of vulnerability. This information includes what this type of vulnerability entails, the security requirements that you may not be complying with, the potential dangers associated with it, and the recommendations that you can follow to remediate or mitigate the risks.
See the severity of a type of vulnerability
Role required: User, Vulnerability Manager or User Manager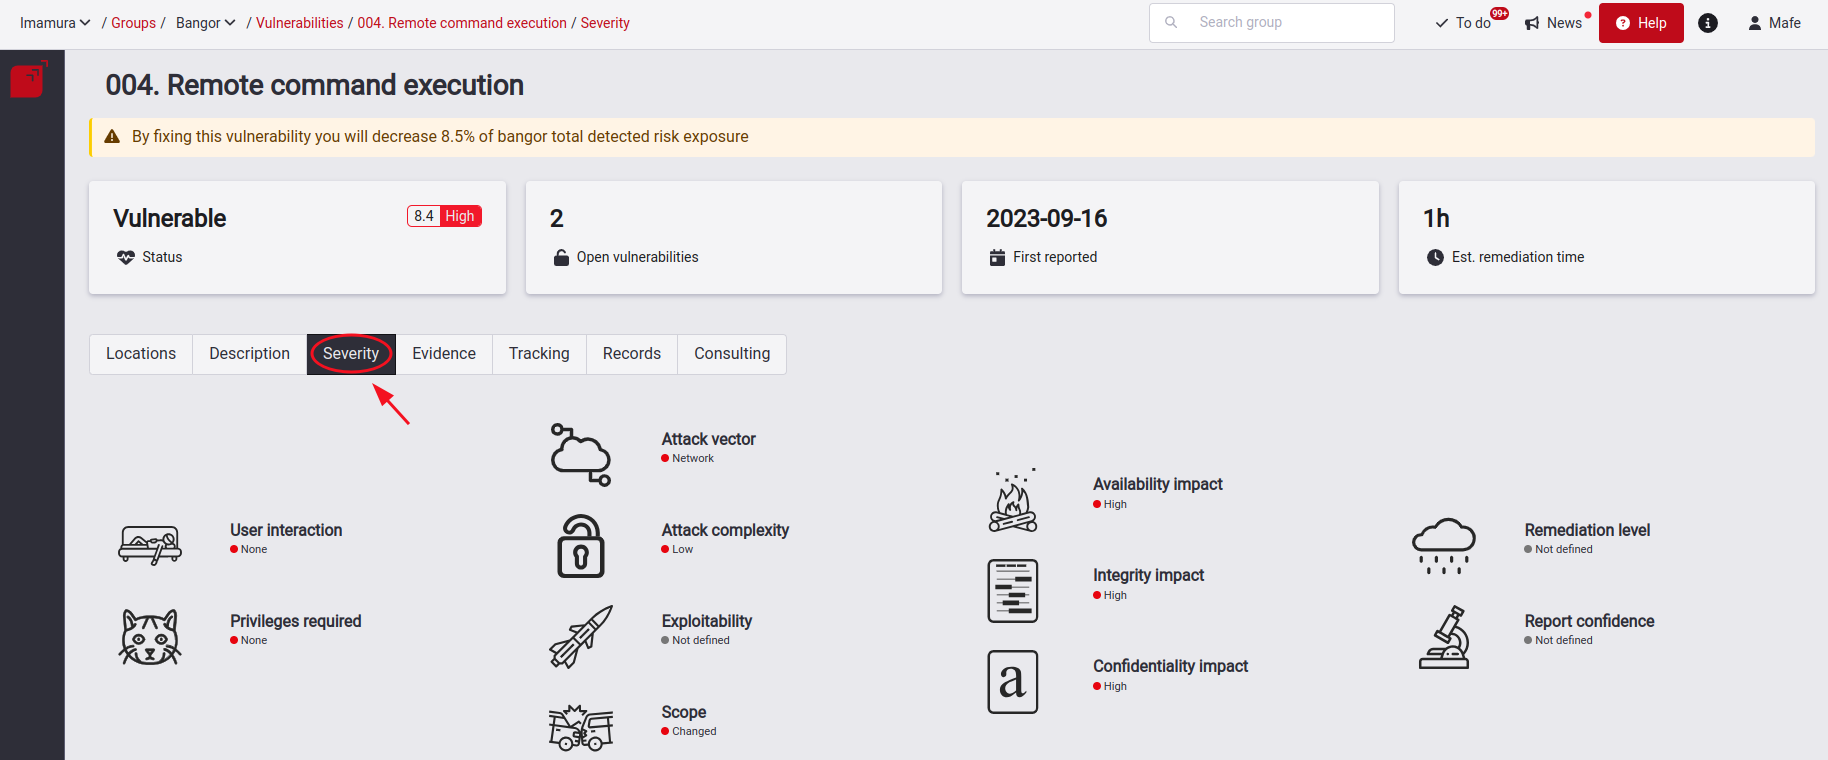
See evidence of exploitability
See the timeline of a type of vulnerability
![]()
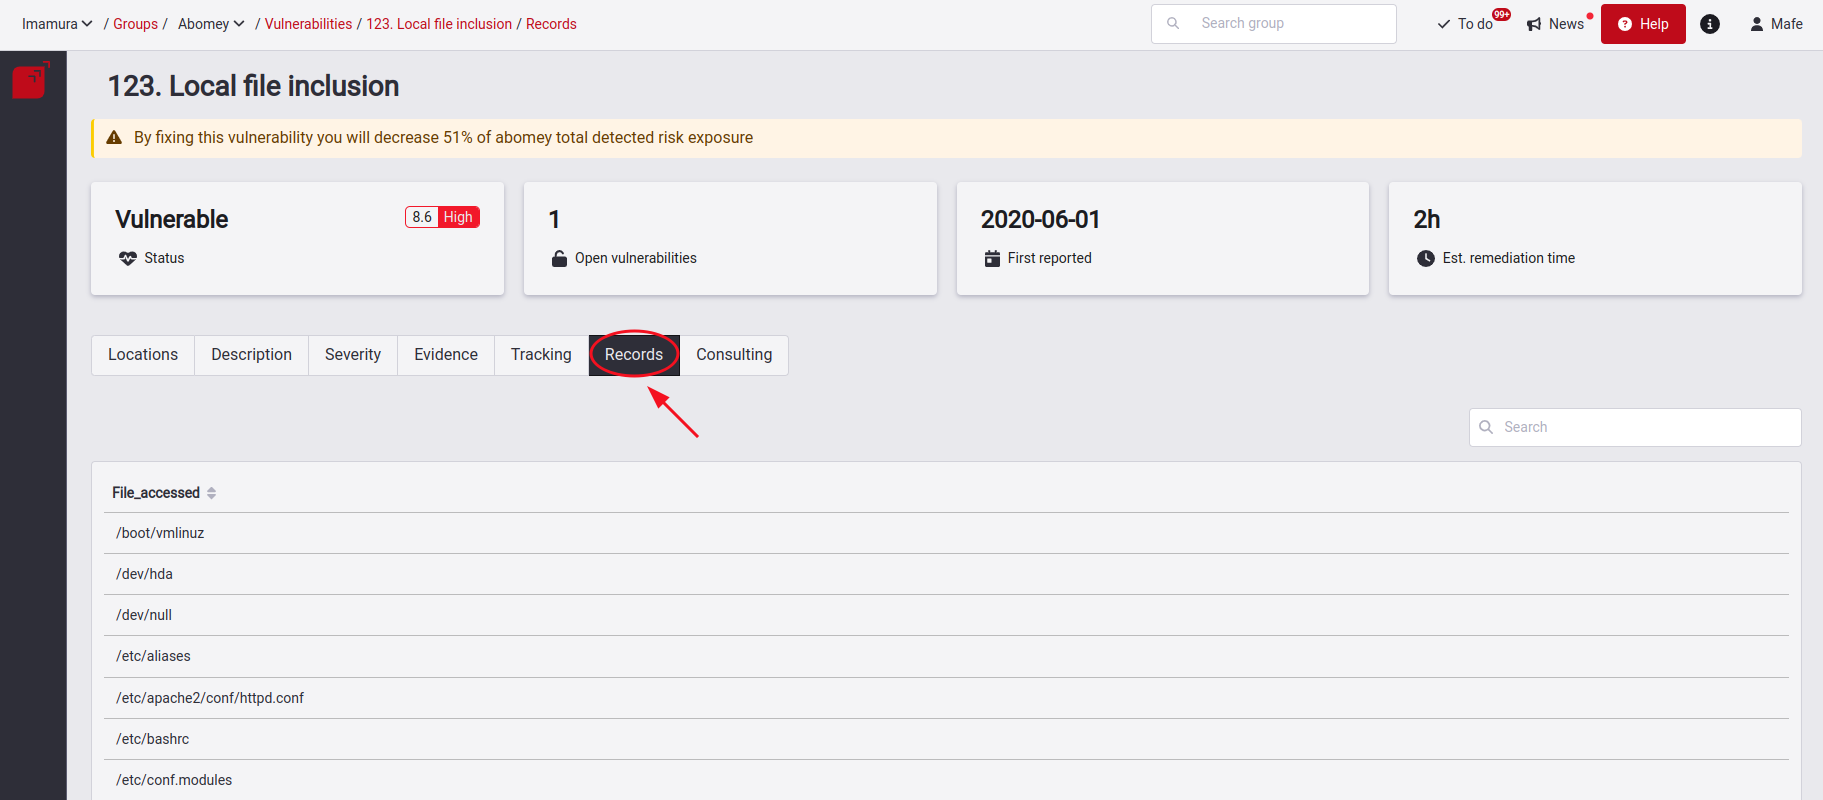
See affected records
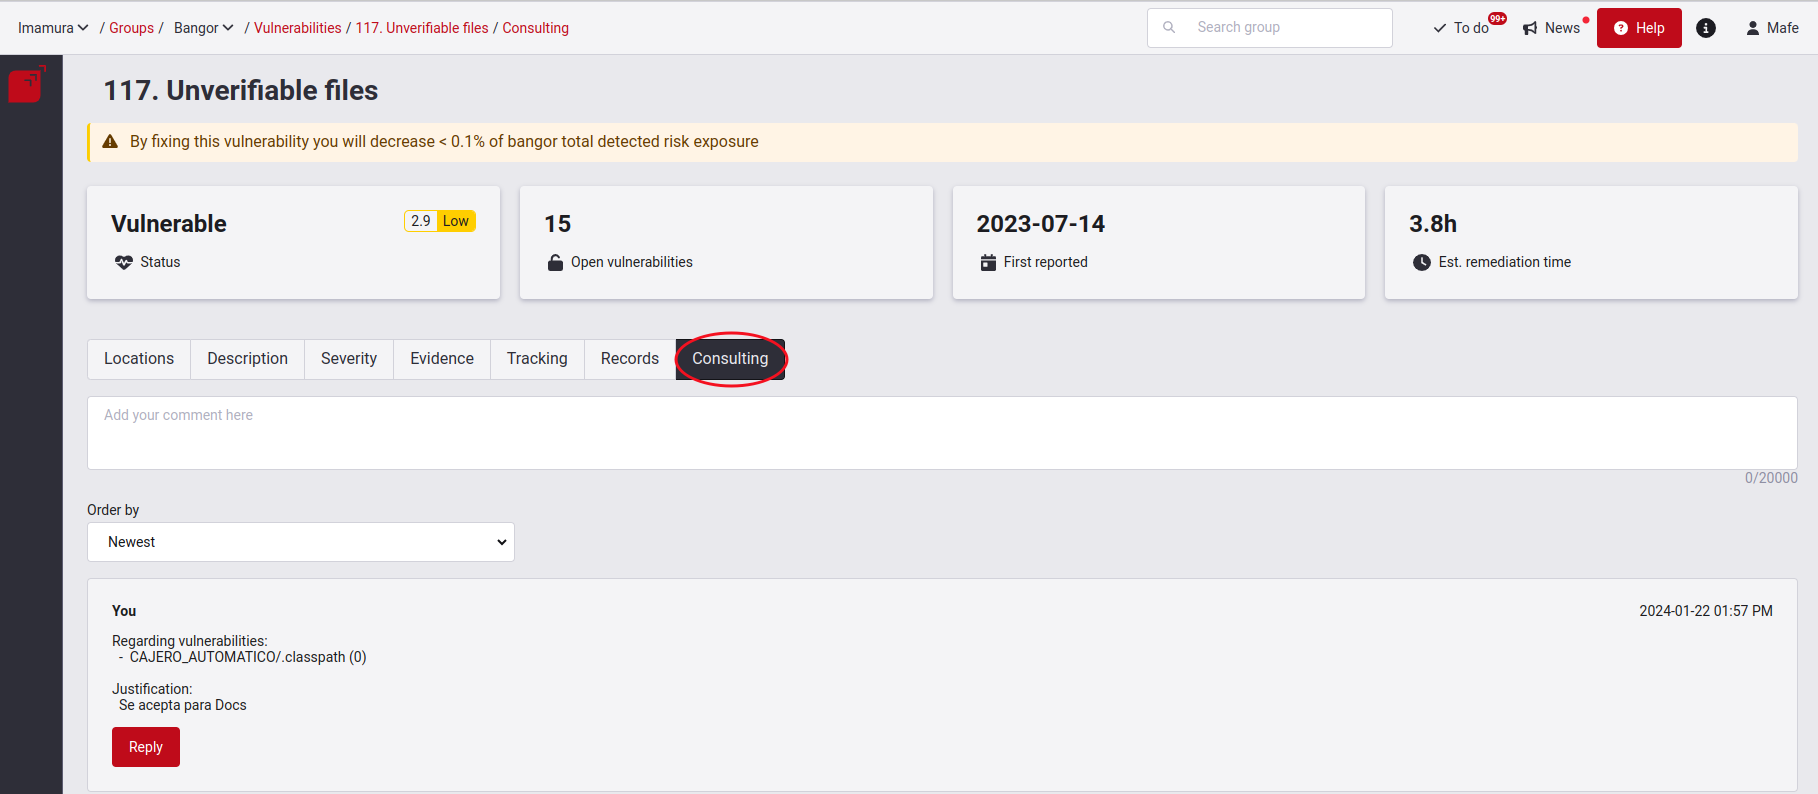
Comment on a type of vulnerability
Enter a type of vulnerability to find its Consulting section. This is a forum-like space where you can share your doubts, comments or thoughts with the Fluid Attacks team or your work team. It allows any member to post and respond. You can find this tab in three different sections on our platform; the one in the Locations section is specifically for vulnerability level consulting. If you want to explore this section further, we invite you to follow this link.
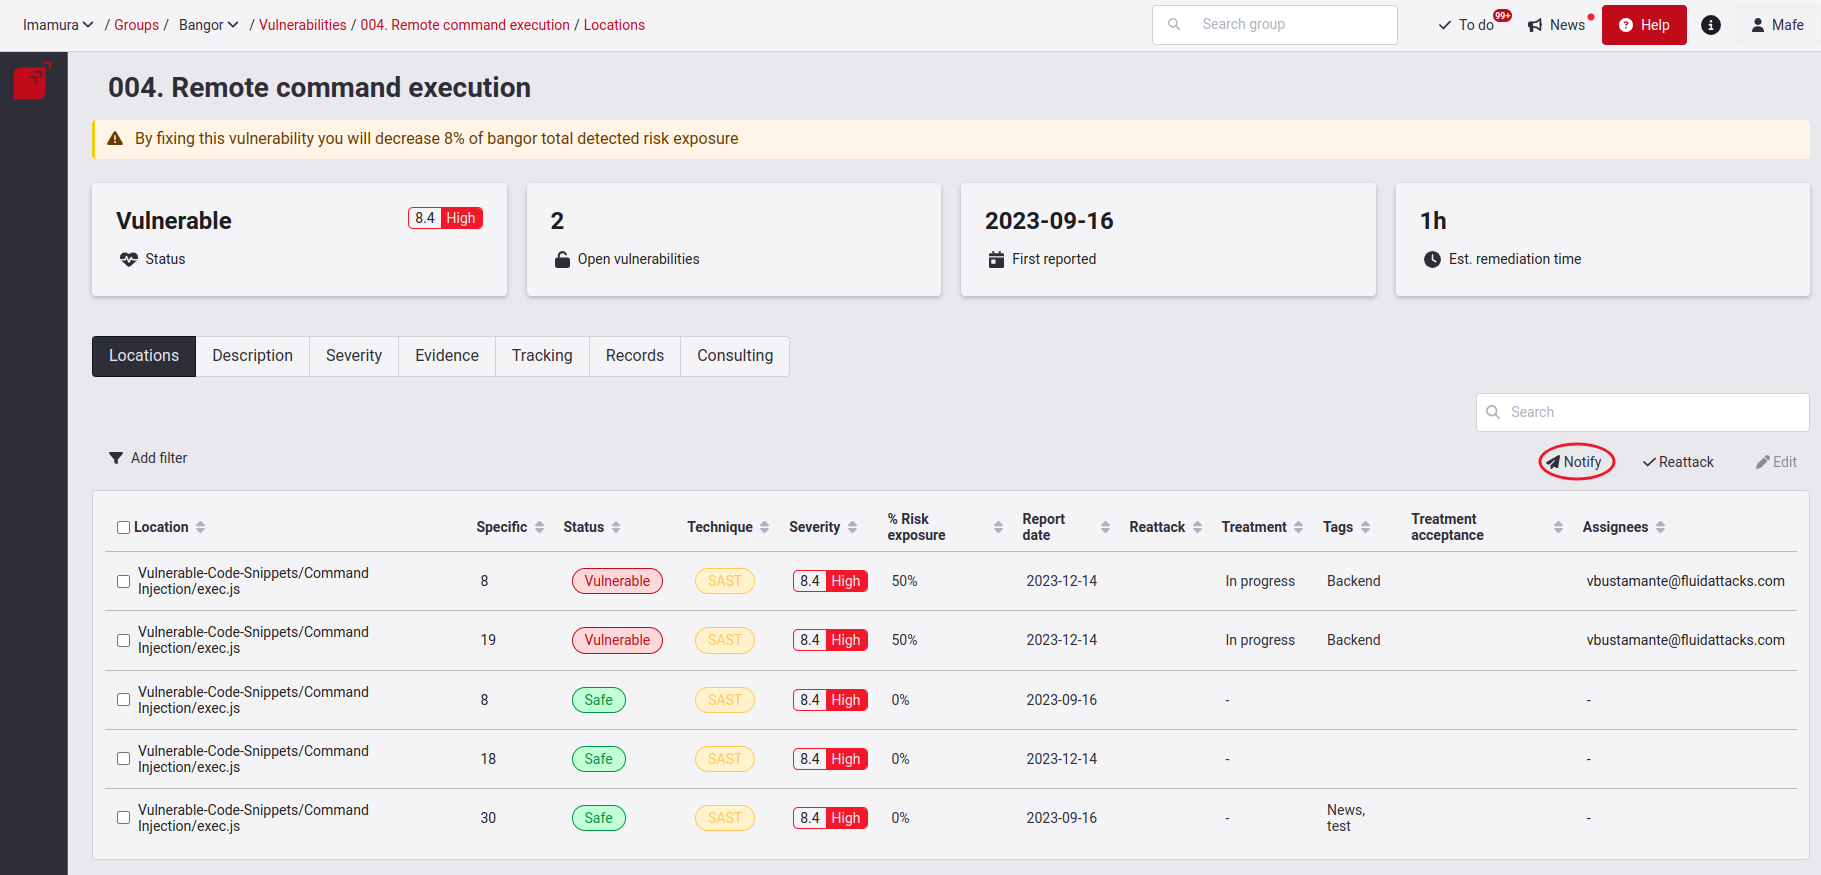
Get notified of a type of vulnerability
To receive this email, click on the Notify button.
You will get a confirmation pop-up window if you want to receive the notification.
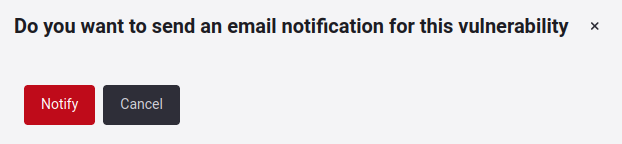
When you click Notify, you will get an email called Vulnerability Alert, which has information about this locations.
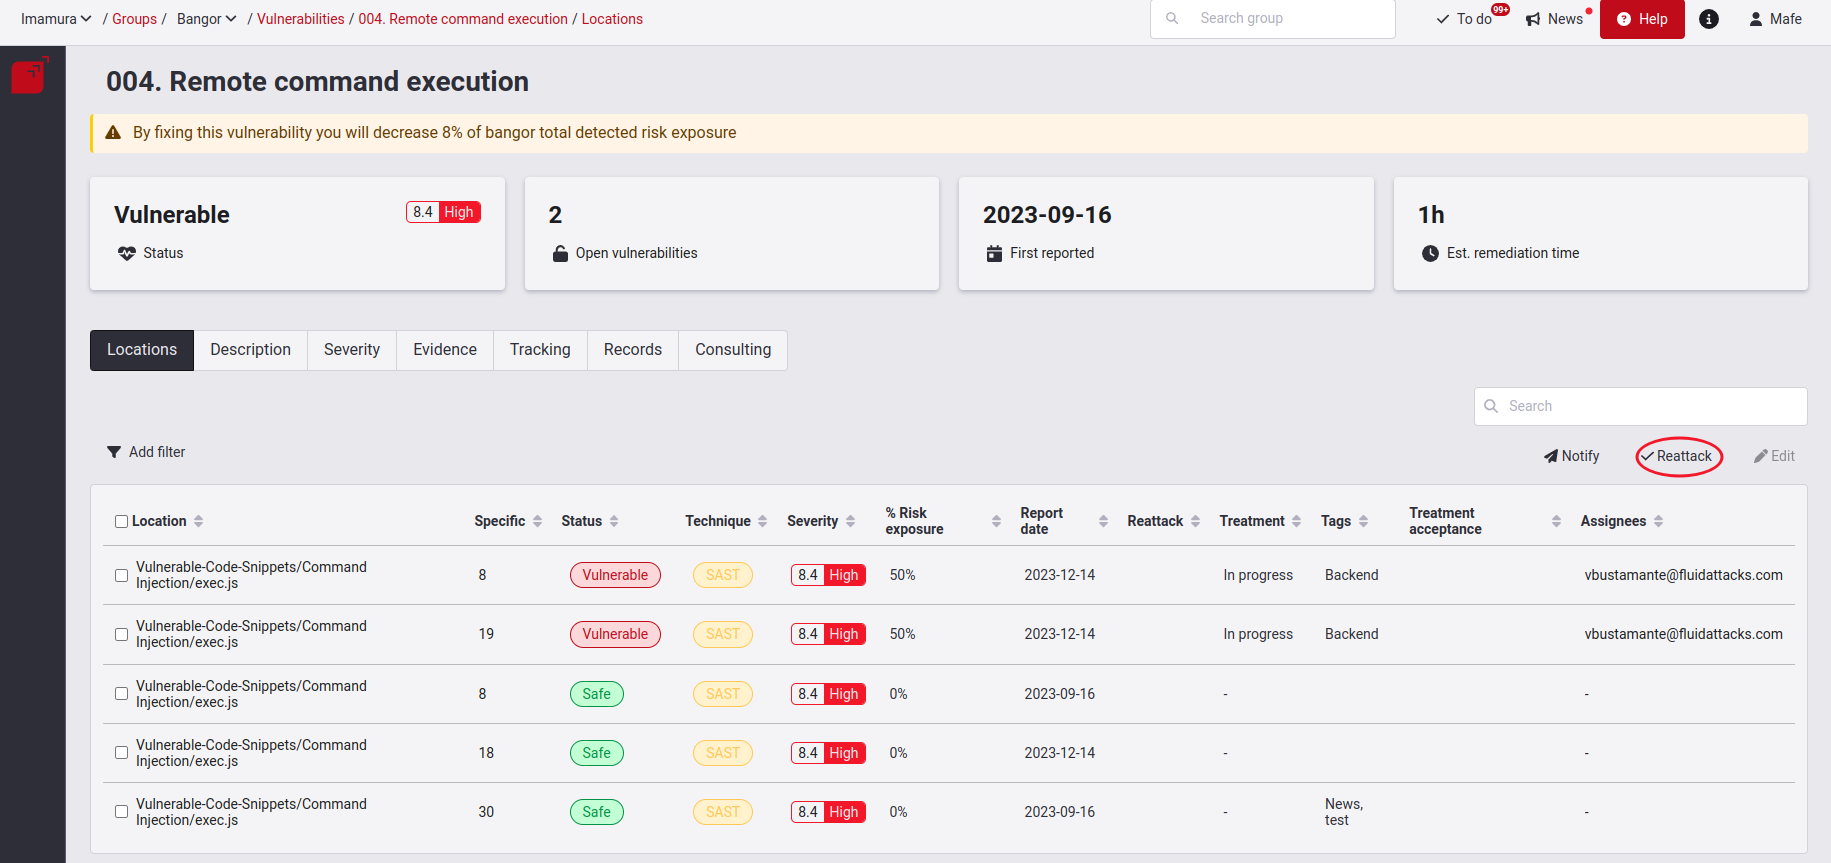
Request reattacks
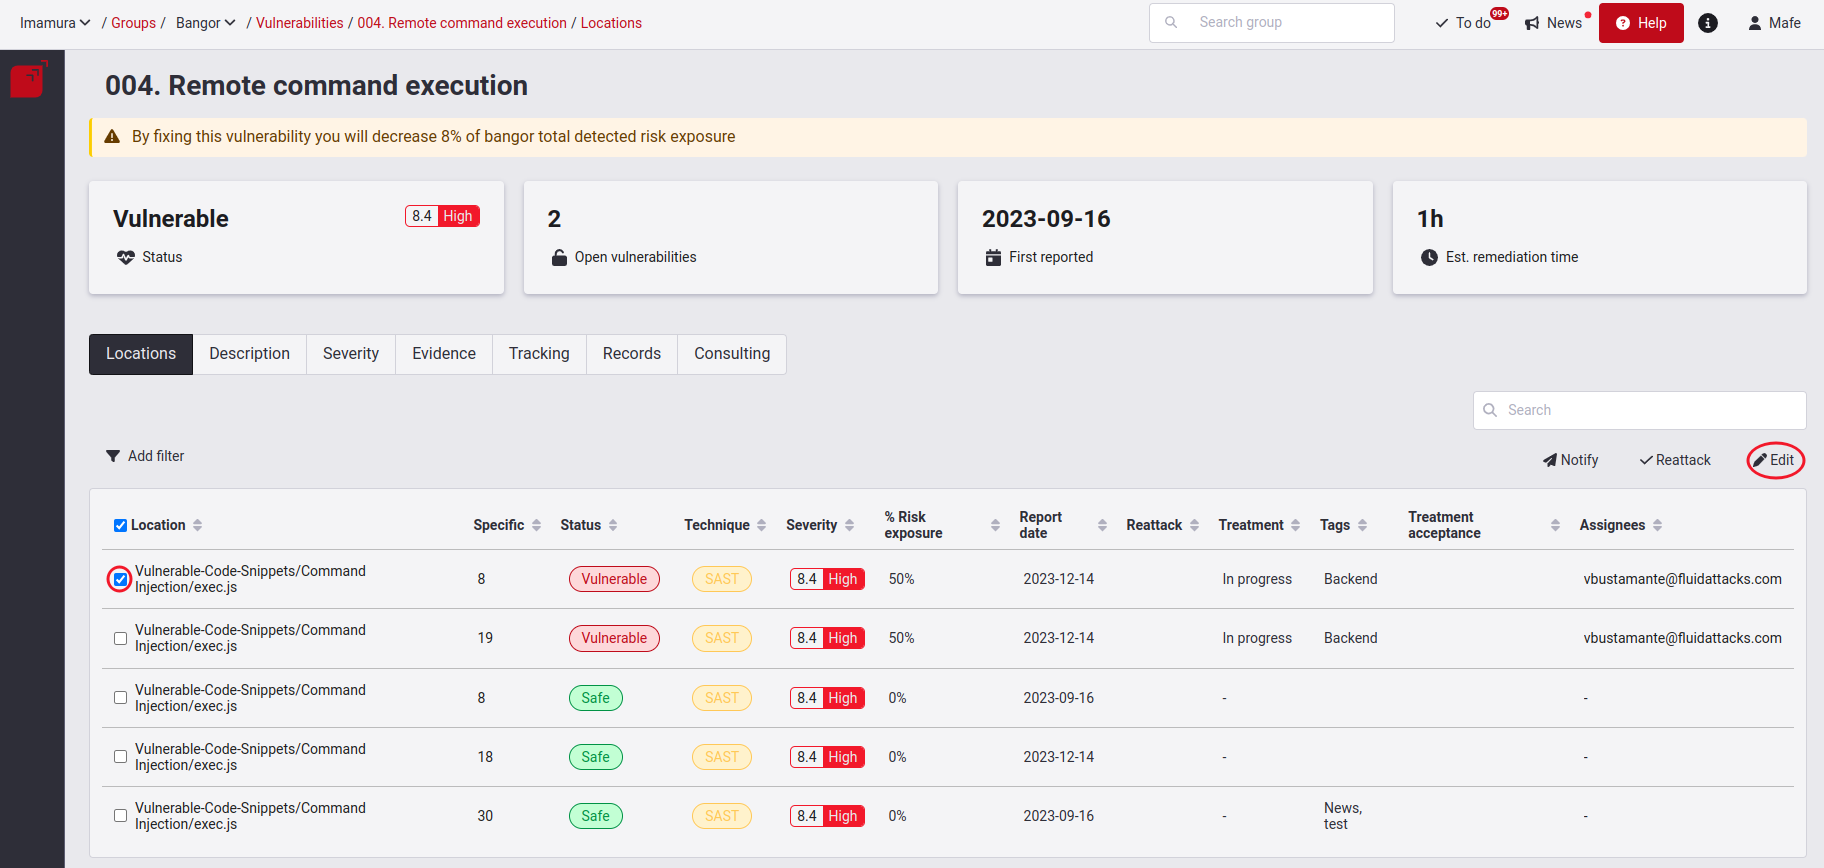
Edit Treatment, assignee, BTS link and more
Now, we will provide an explanation on how to edit a location. First, you must select which vulnerability you want to edit, followed by clicking on the Edit button.
You will get a pop-up window where you can edit the vulnerability.
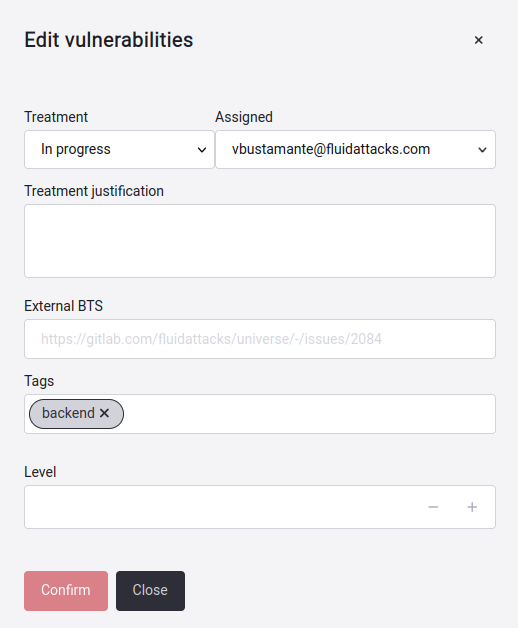
To save the changes you have made, click on the Confirm button.