OIDC federation
Last updated: Jul 17, 2026
OpenID Connect (OIDC) federation lets your CI/CD pipelines authenticate to Fluid Attacks without storing a long-lived secret. Your provider mints a short-lived, signed token for each job, and Fluid Attacks verifies it against a trust you define once.
How it works
- Your CI/CD provider issues a signed OIDC token for each job, describing the workflow that requested it (repository, project, or pipeline).
- In your organization, you define a trust: the issuer to trust and the token claims that must match for a run to be accepted.
- You enable the trust for the groups that should use it.
- Your scan names its group with
--groupand presents the token. Fluid Attacks verifies the signature and claims, then authenticates the run as your group.
Set up a trust
This walkthrough lets GitHub Actions in the repository acme/web
authenticate as the group acme-web.
Swap in your own organization, group, and repository as you go;
the issuer and claim names differ per provider, so if you use GitLab CI or
Azure DevOps, take the values from Provider reference.
You must be an organization administrator.
1. Open the OpenID Connect settings
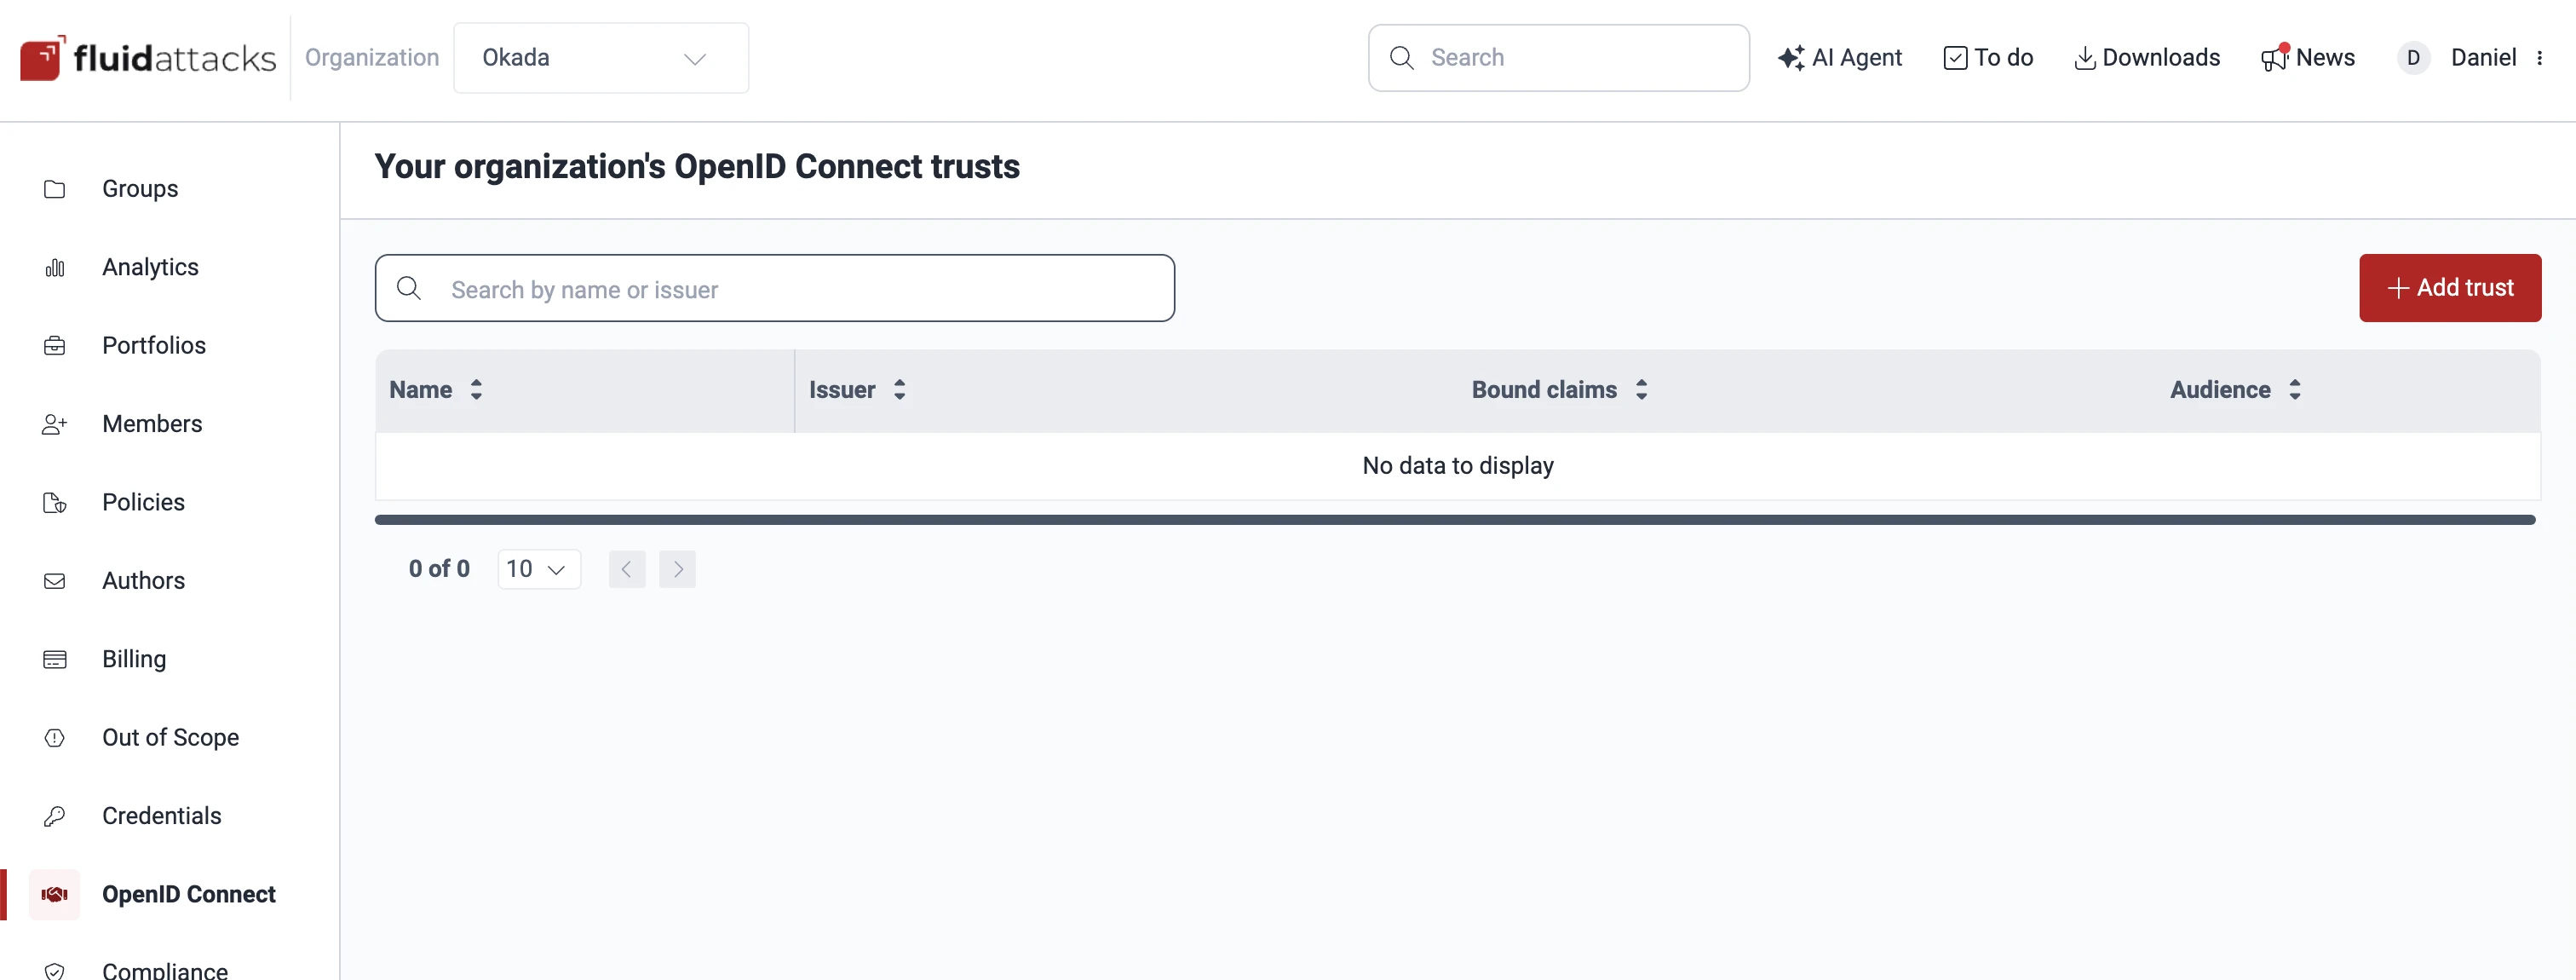
In your organization, go to OpenID Connect and select Add trust.
2. Choose your provider
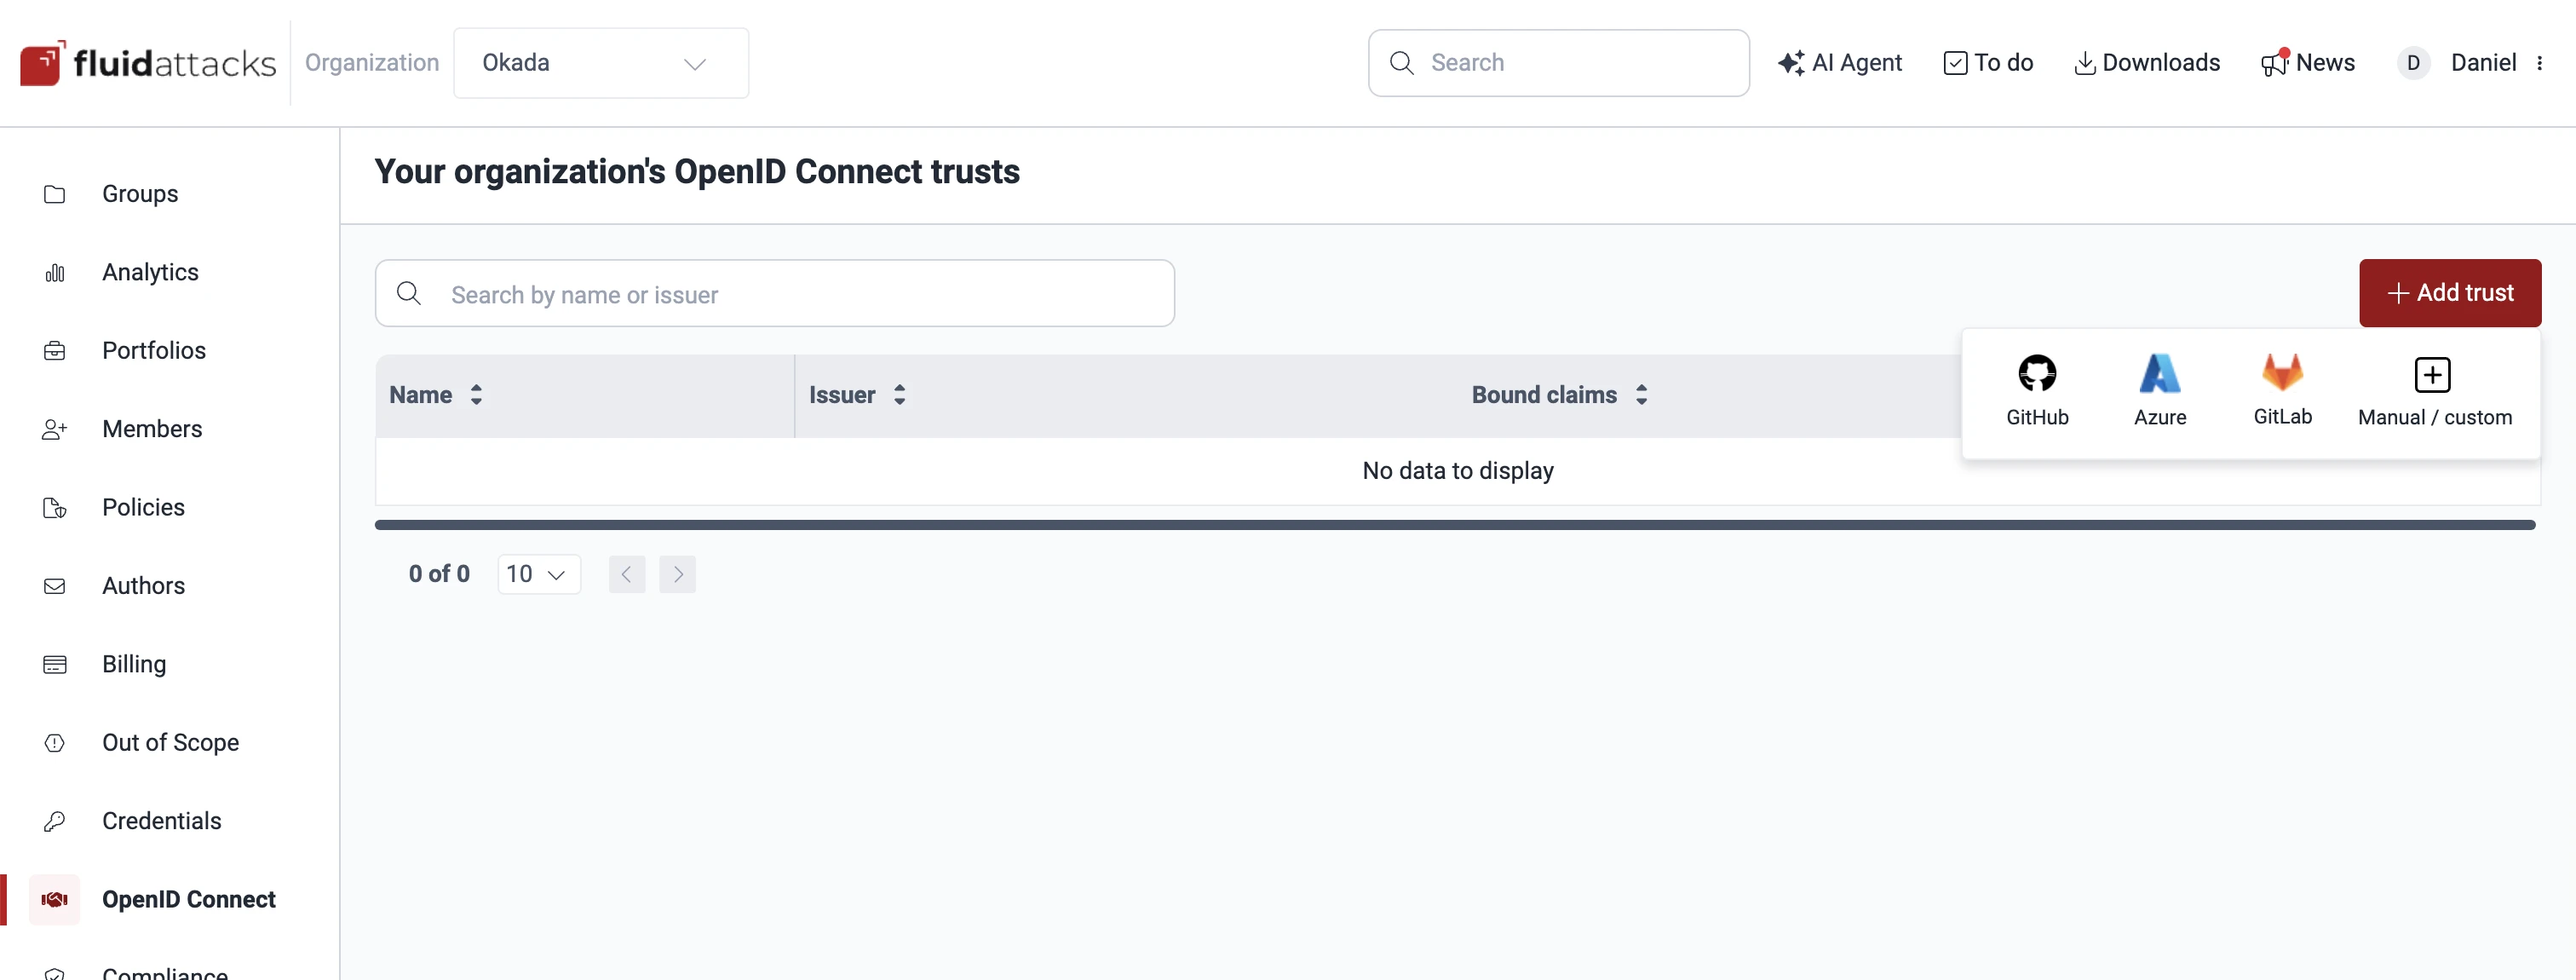
Select GitHub to pre-fill the GitHub Actions issuer and a recommended claim. Choose Manual / custom for a provider that is not listed.
3. Fill in the configuration
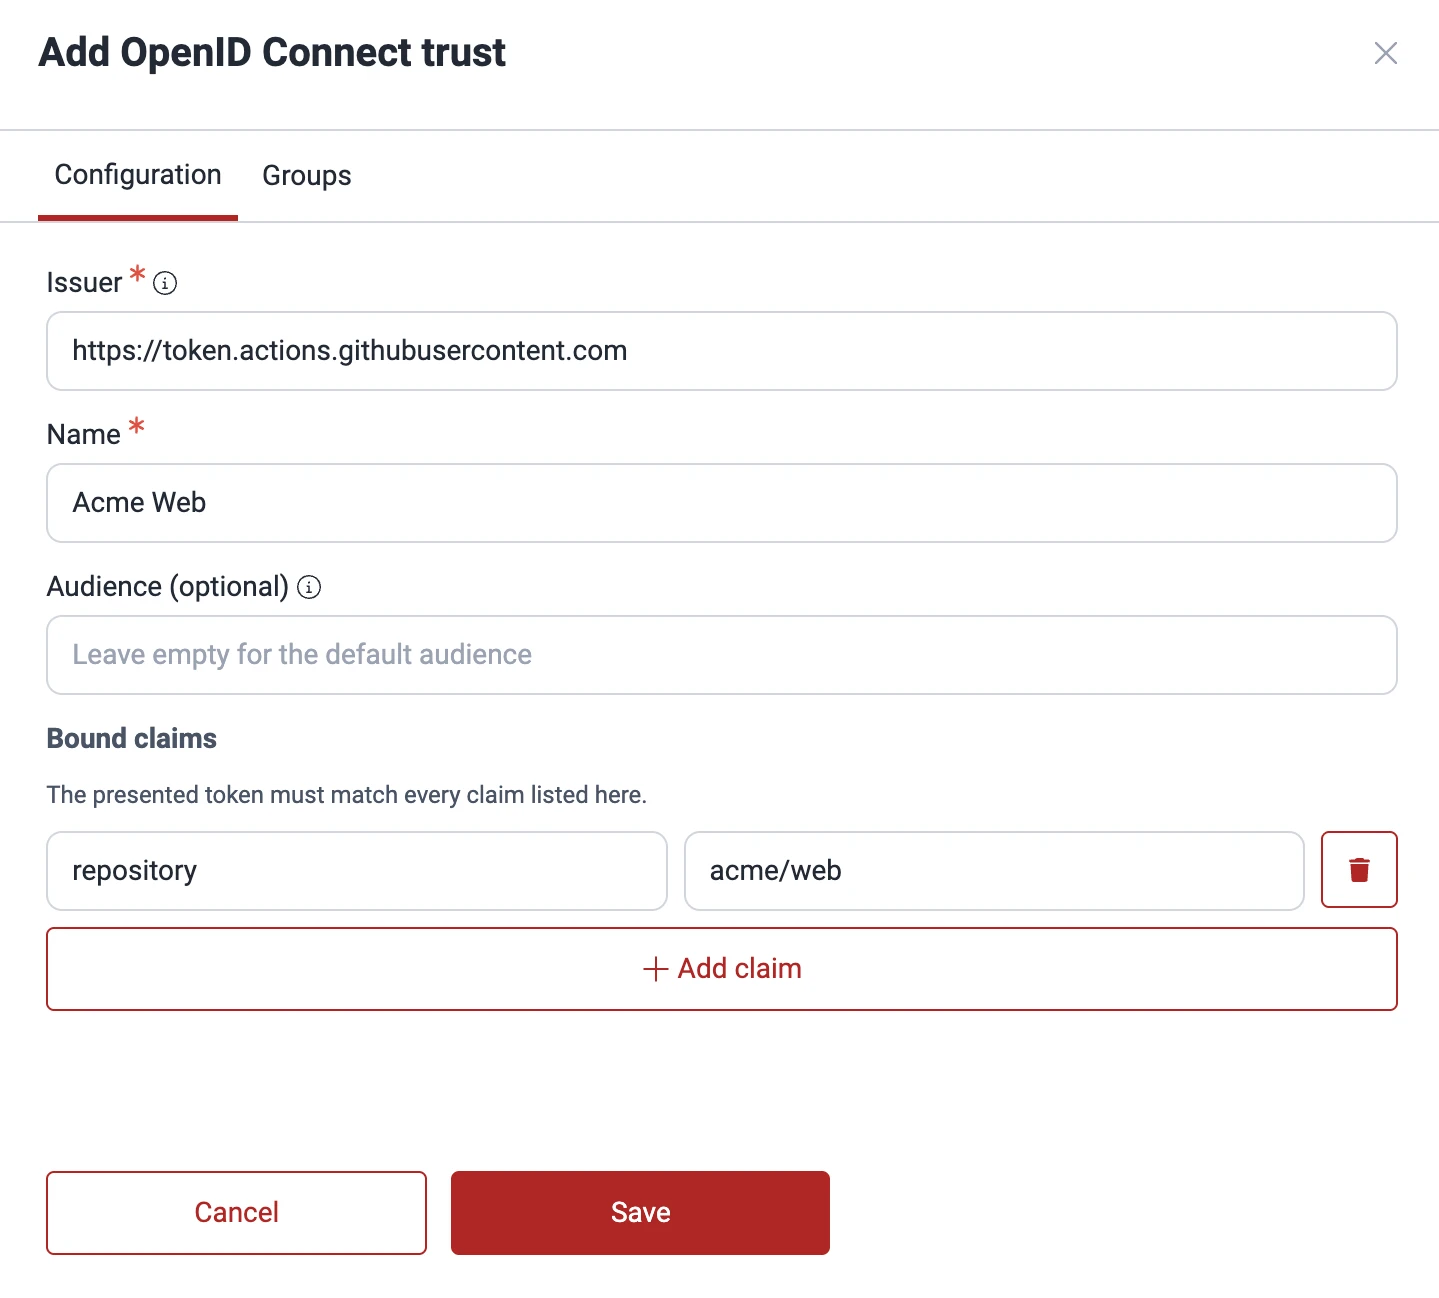
On the Configuration tab, complete the fields:
| Field | Value for this example | Where to get yours |
|---|---|---|
| Issuer | https://token.actions.githubusercontent.com | Fixed for GitHub Actions (pre-filled) |
| Name | GitHub Actions | Any label you choose |
| Audience | (leave empty) | Leave empty; the platform applies https://app.fluidattacks.com |
Bound claim repository | acme/web | Your owner/repo, from the repository URL |
To trust every repository in your organization instead of one,
use the claim repository_owner with value acme.
For the full list of claims you can bind, see
GitHub's OpenID Connect documentation.
4. Enable it for your group and save
Open the Groups tab, select acme-web, and select Save.
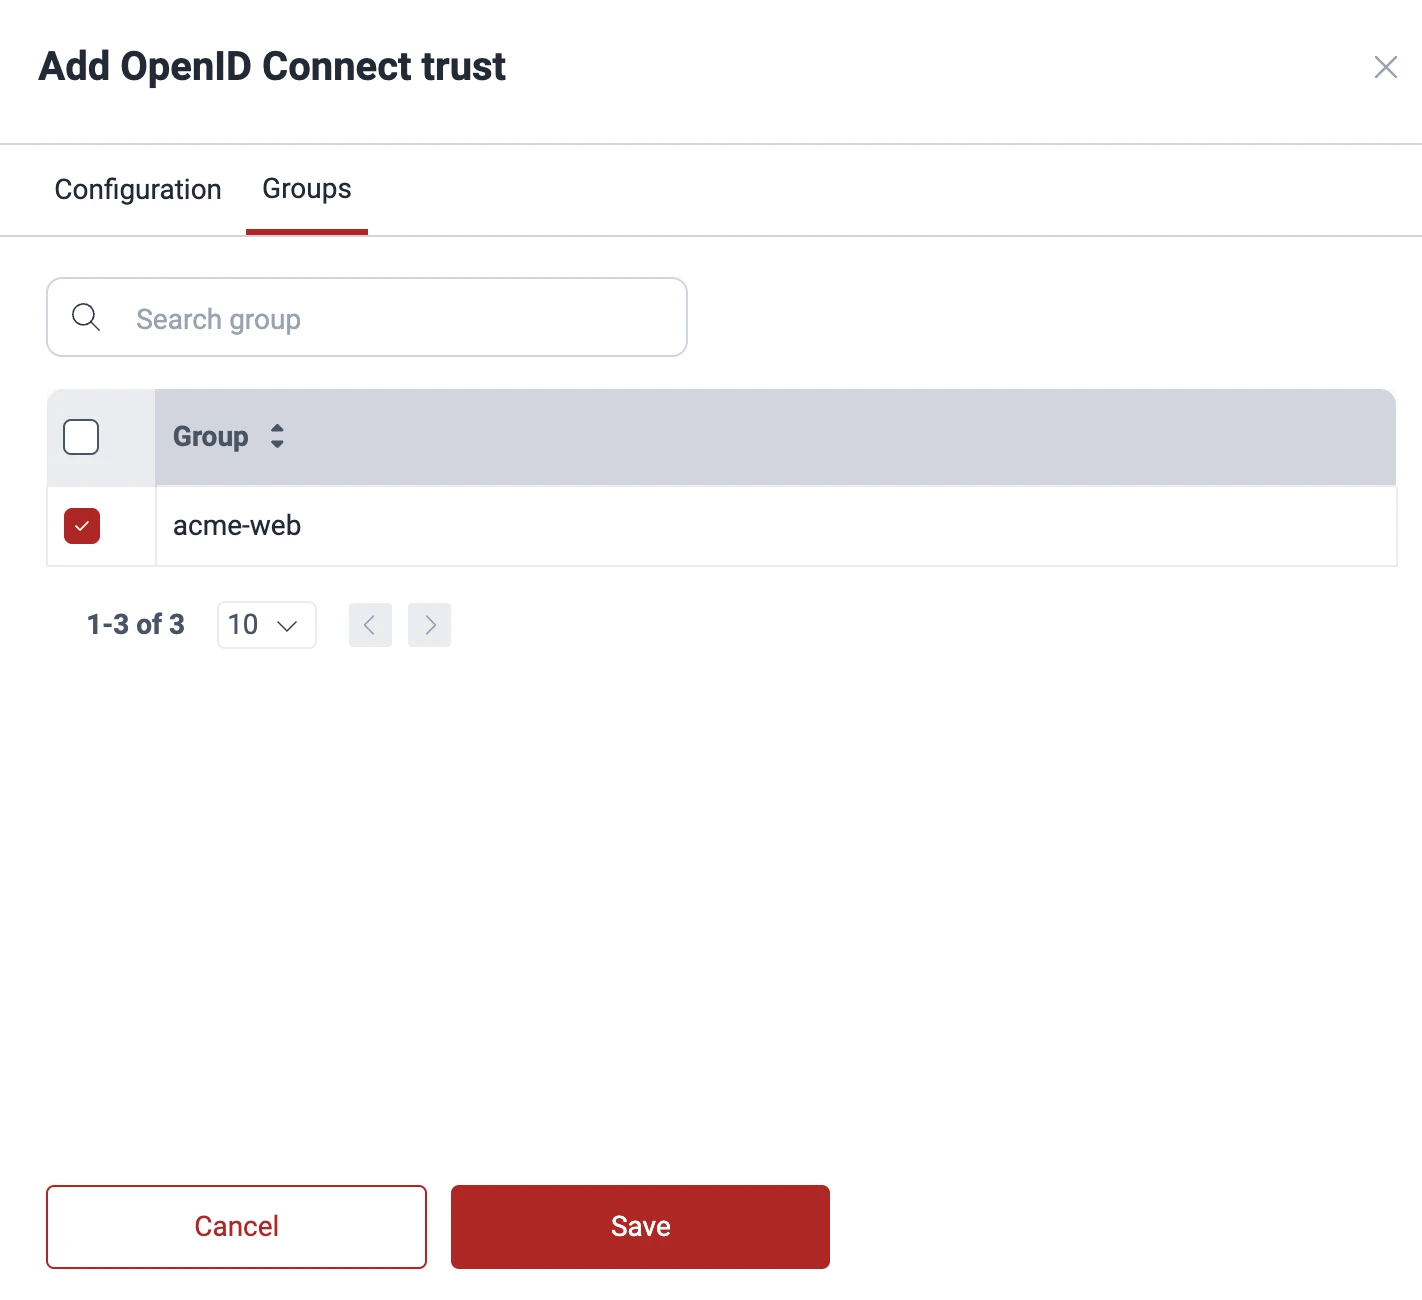
A trust applies only to the groups you enable it for. Enabling or disabling it takes effect on the next run.
Trust requirements
The verifier enforces a safe configuration:
- The issuer must be an
httpsURL that exposes a valid OpenID discovery document (/.well-known/openid-configuration) reachable without a redirect. - Tokens must be signed with an asymmetric algorithm (RSA, ECDSA, or EdDSA).
Unsigned tokens (
none) and symmetric (HMAC) signatures are rejected. - A trust must bind at least one claim — an issuer-only trust is not allowed, so that only your repositories can authenticate.
- By default, the token's audience (
aud) must behttps://app.fluidattacks.com. Providers that mint a fixed audience (such as Azure DevOps) set that value on the trust instead.
Provider reference
The values to enter in step 3 for each supported provider, plus the pipeline configuration that mints the token.
GitHub Actions
GitHub issues an OIDC token to any workflow granted the id-token: write
permission. See
GitHub's OpenID Connect documentation.
In your pipeline — grant the permission; ss requests the token automatically:
# .github/workflows/ss.yml
permissions:
  id-token: write
  contents: read
jobs:
  secretScan:
    runs-on: ubuntu-latest
    steps:
      - uses: actions/checkout@v4
      - run: curl -fsSL https://public.fluidattacks.com/ss/install.sh | sh
      - run: ss scan --group my-group --strict .
In Fluid Attacks — add a trust with these values:
| Field | Value |
|---|---|
| Issuer | https://token.actions.githubusercontent.com |
| Bound claim | repository = my-org/my-repo |
| Audience | (leave default) |
Bind repository to a single repository,
or repository_owner to trust every repository in your organization.
GitLab CI
GitLab issues an OIDC token through the id_tokens keyword. See
GitLab's ID token documentation.
In your pipeline — request a token with the Fluid Attacks audience:
# .gitlab-ci.yml
secretScan:
  image: ubuntu:latest
  id_tokens:
    INTEGRATES_OIDC_TOKEN:
      aud: https://app.fluidattacks.com
  script:
    - curl -fsSL https://public.fluidattacks.com/ss/install.sh | sh
    - ss scan --group my-group --strict .
In Fluid Attacks — add a trust with these values:
| Field | Value |
|---|---|
| Issuer | https://gitlab.com |
| Bound claim | project_path = my-group/my-project |
| Audience | (leave default) |
For a self-managed GitLab instance,
set the issuer to your instance URL (for example, https://gitlab.example.com).
Azure DevOps
Azure DevOps issues an OIDC token through a workload identity federation service connection. See Microsoft's workload identity federation documentation.
In your pipeline — obtain the federation token from your service connection
and expose it as the INTEGRATES_OIDC_TOKEN environment variable before the scan.
In Fluid Attacks — add a trust with these values:
| Field | Value |
|---|---|
| Issuer | https://vstoken.dev.azure.com/<organization-id> |
| Bound claim | sub = sc://<org>/<project>/<service-connection> |
| Audience | api://AzureADTokenExchange |
Replace <organization-id> with your Azure DevOps organization GUID.
Azure DevOps tokens carry the fixed audience api://AzureADTokenExchange,
so the trust sets that value explicitly.
Azure DevOps uses the classic vstoken.dev.azure.com issuer. If your token's
iss claim differs, set the trust issuer to match the value in your token.
Other providers
Any provider that implements OpenID Connect can federate with Fluid Attacks. Choose Manual / custom when adding the trust and provide:
- the provider's issuer URL (
https, with a reachable discovery document), - one or more bound claims that scope the trust to your workloads, and
- the audience your provider mints, if it is not
https://app.fluidattacks.com.
Then expose the provider's OIDC token to the scan
as the INTEGRATES_OIDC_TOKEN environment variable.