Adding secrets with Azure
Here you can find all the information required by a customer to enroll an Azure cloud account to start using the CSPM DAST module.
You will need two credentials to use the Azure CSPM DAST module.
- Azure Subscription ID
- Azure Client ID
- Azure Client Secret
- Azure Tenant ID
Manual configuration from Azure portal
Get Azure subscription ID
You can find your Azure subscription ID through the Azure Portal by following these steps:
-
Sign In to the Azure Portal: Go to the Azure Portal.
-
Navigate to Subscriptions: In the left-hand sidebar, click on "Subscriptions." If you don't see it there, you can use the search bar at the top to search for "Subscriptions."
-
View Subscription Information: In the "Subscriptions" table, you will see a list of all the Azure subscriptions associated with your account. Copy the ID for the specific subscription which you want to find the ID.

Get Azure secrets and other necessary credentials
To get this credentials we're going to register an application with Azure Active Directory (Azure AD) and create a service principal, follow these steps:
-
Sign in to Azure Portal:
- Go to the Azure Portal.
- Sign in with your Azure account.
-
Create a New App Registration:
- In the Azure Portal, click on "Azure Active Directory" in the left-hand sidebar.
- Under "Manage," click on "App registrations."

-
Register a New Application: Click the "+ New registration" button.
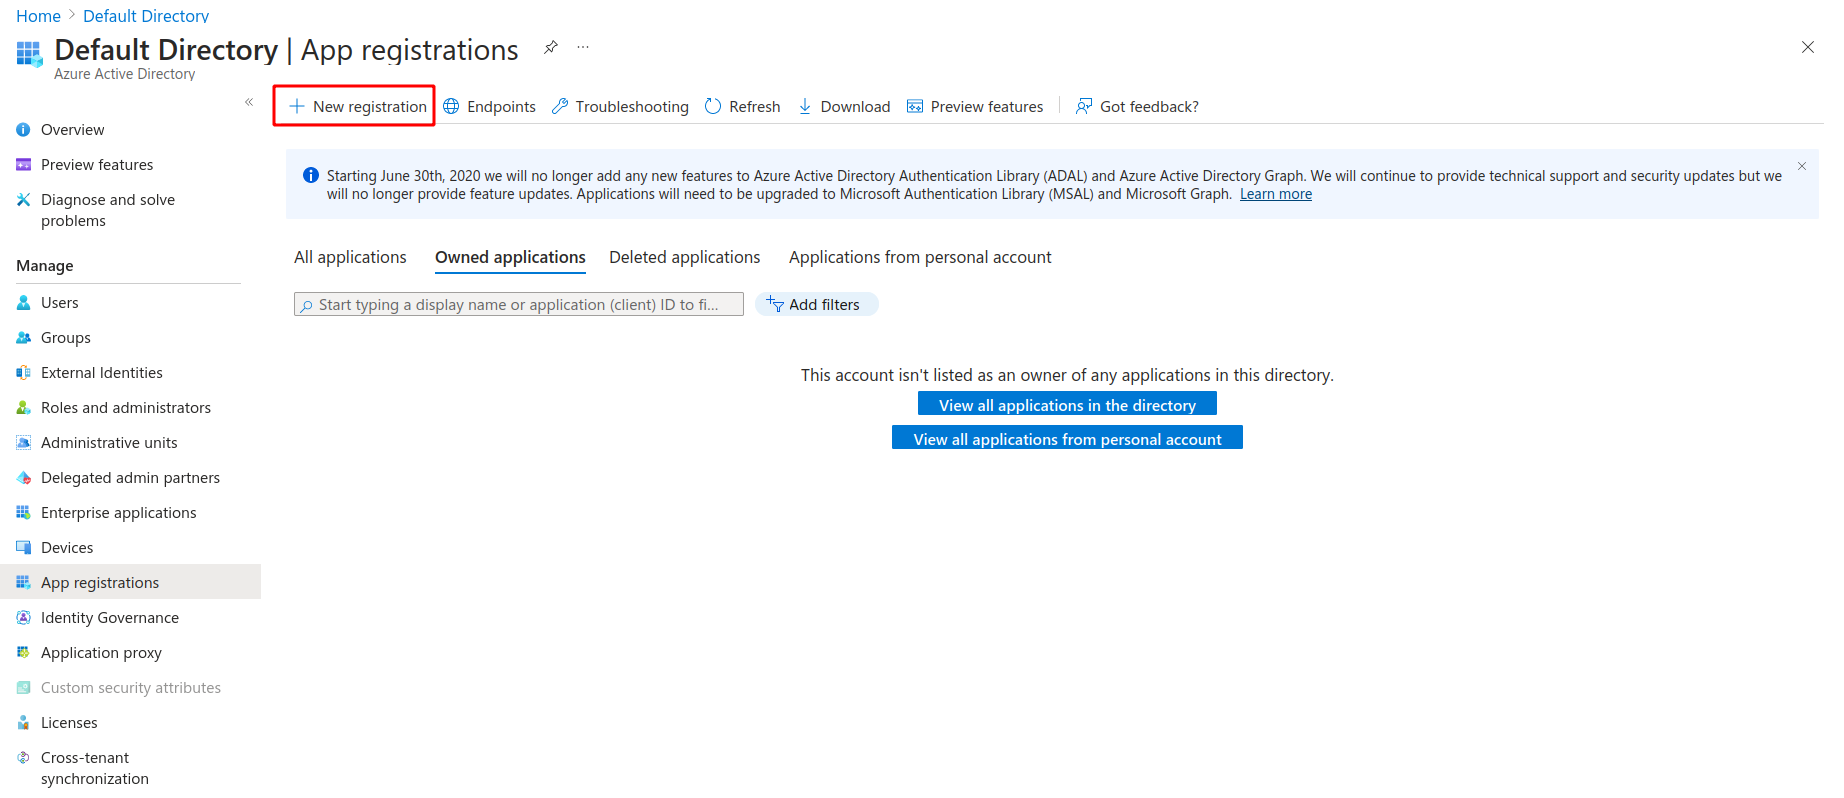
-
Configure Application Details: Provide a name for your application in the "Name" field. Choose the appropriate supported account types, depending on your use case. (Optional) In the "Redirect URI" field, specify the URL where Azure AD should send authentication responses. This can be the URL of your application. Click "Register" to create the application.

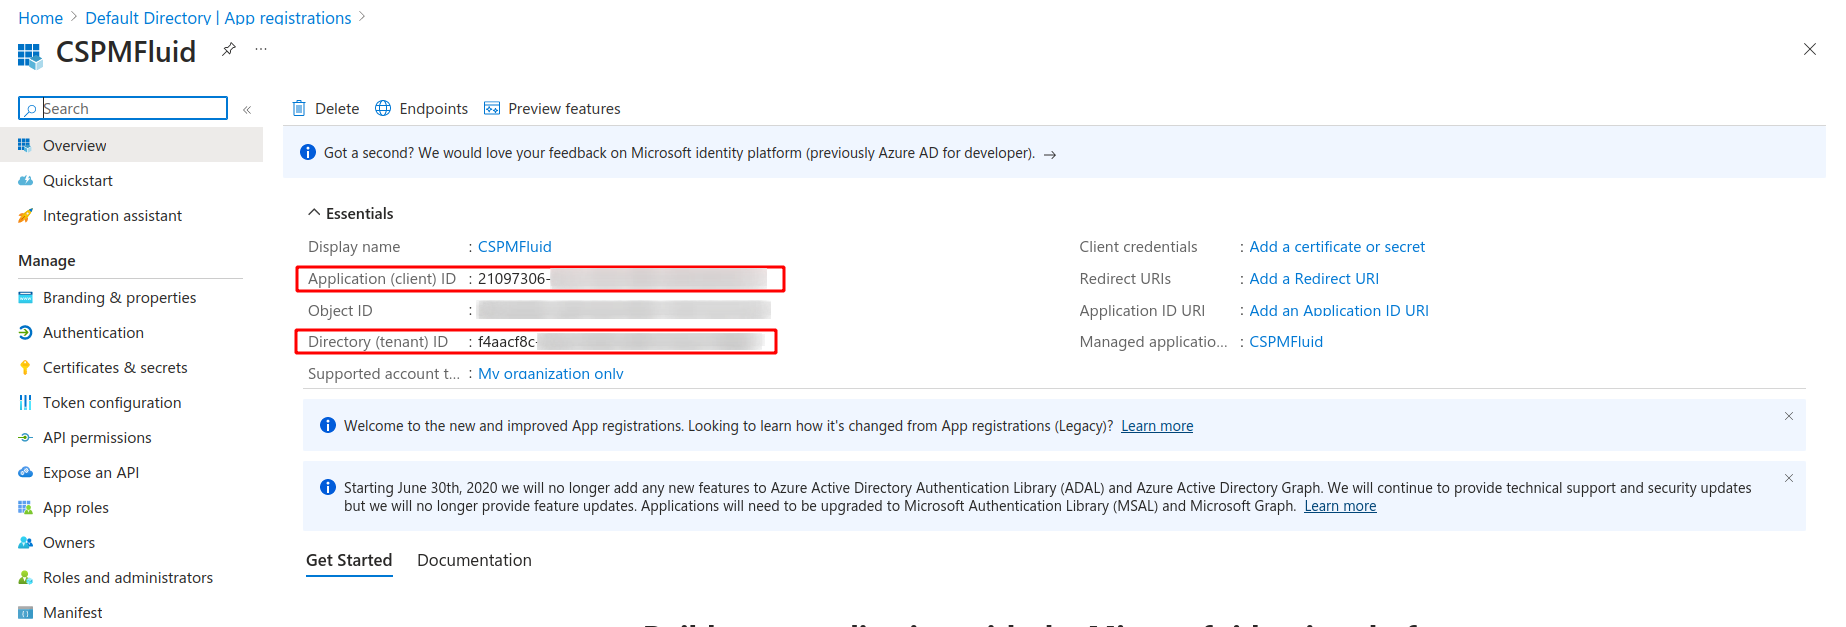
-
Application Overview: After registering, you'll be taken to the overview page for your application. Here, you'll find information about your application, including its Application (client) ID and Directory (tenant) ID
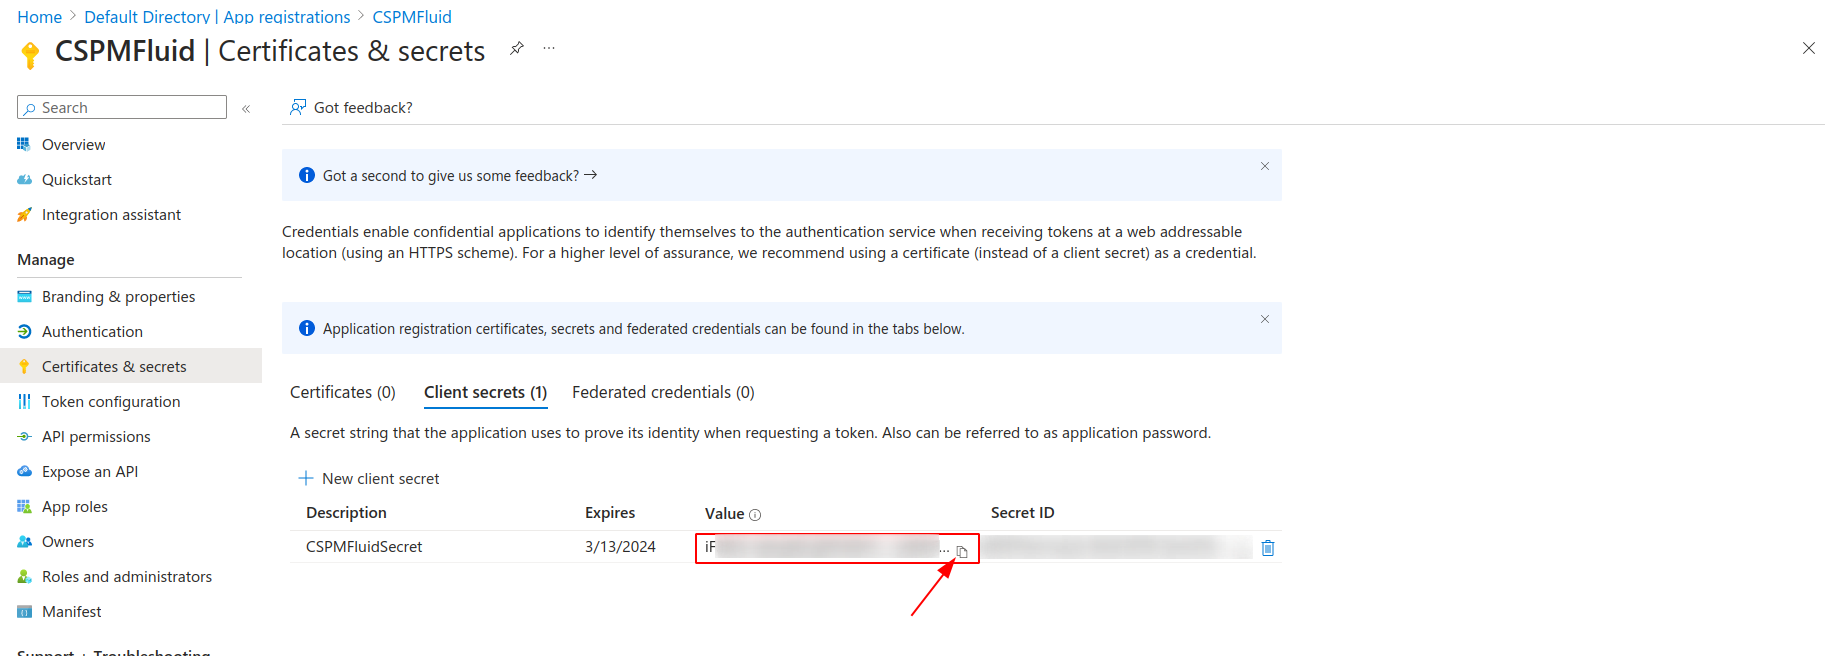
-
Create a Client Secret: Under "Certificates & secrets," you can create a client secret.
Click on "+ New client secret," provide a description, and set an expiration duration.

Make sure to copy and save the generated client secret; you won't be able to retrieve it again.
Now we need to assign a role to an application at the subscription level in Microsoft Azure, follow these steps:
-
Navigate to the Subscription: In the Azure Portal, click on the "All services" option in the left-hand menu. Search for and select "Subscriptions." Click on the subscription to which you want to assign the role to your application.
-
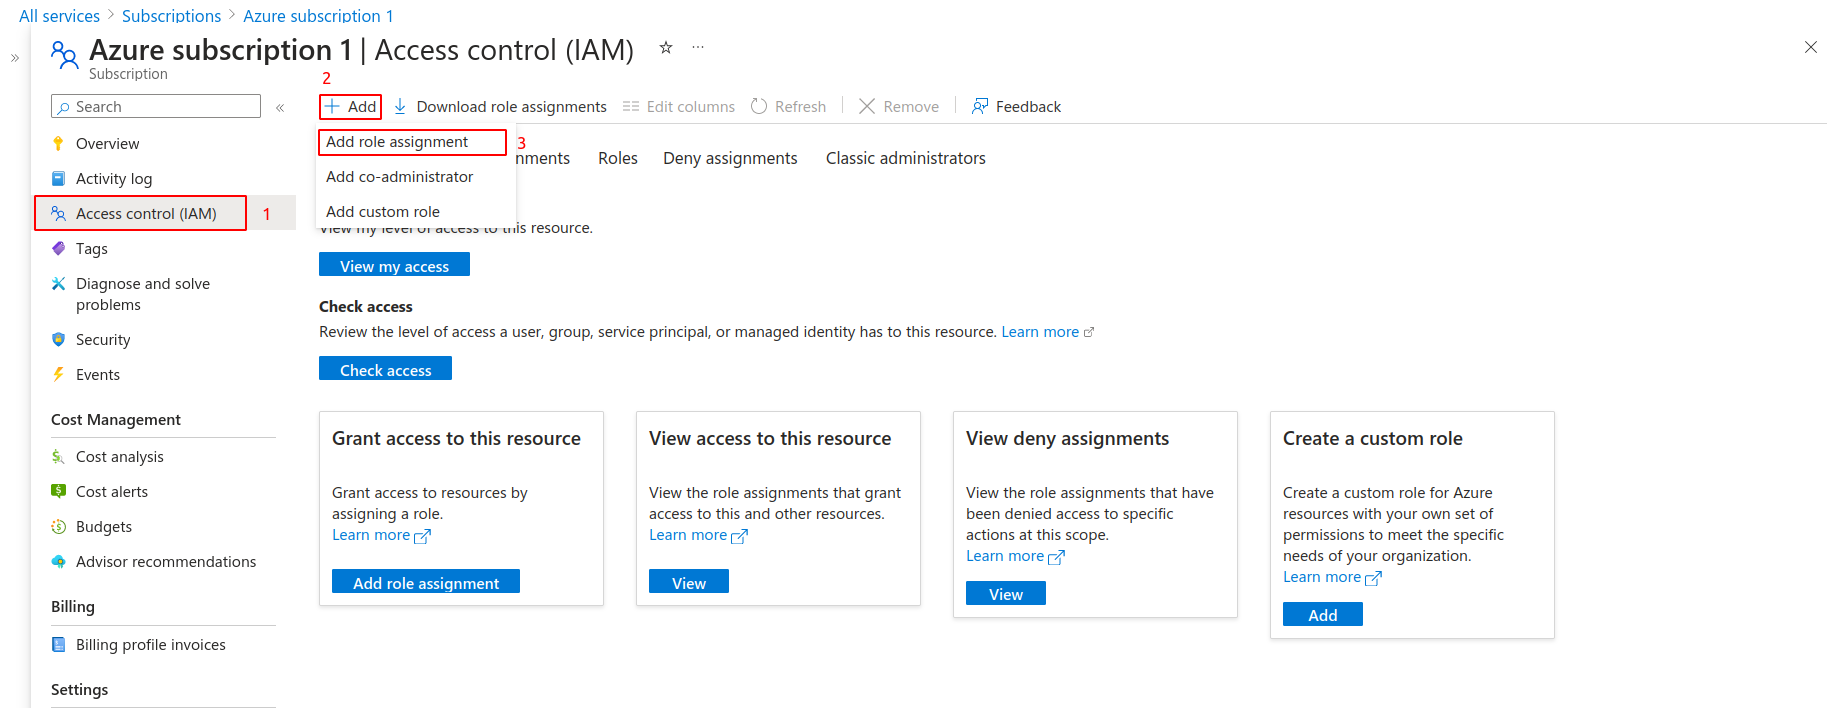
Access the Access Control (IAM) Blade: In the subscription settings, click on the "Access control (IAM)" option in the left-hand menu.
-
Add a Role Assignment: On the "Access control (IAM)" blade, click the "+ Add a role assignment" button.
-
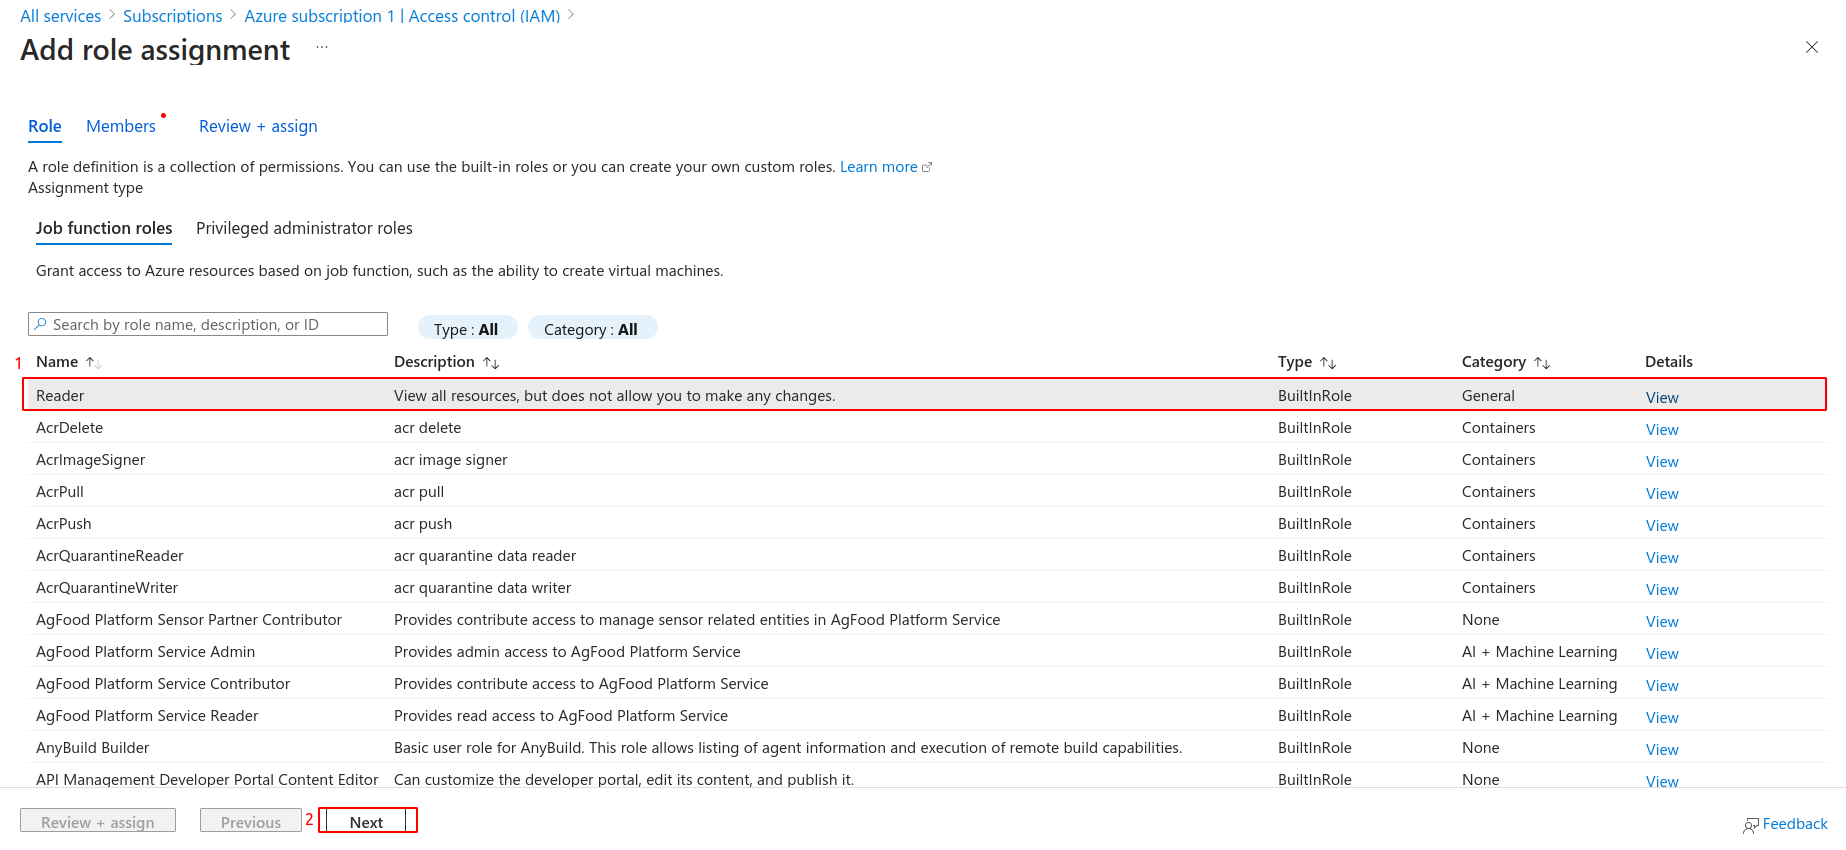
Select Role: In the "Add role assignment" pane, you'll need to select the role you want to assign to your application. You can either choose a built-in role (such as Owner, Contributor, Reader, etc.) or a custom role if you've defined one.
-
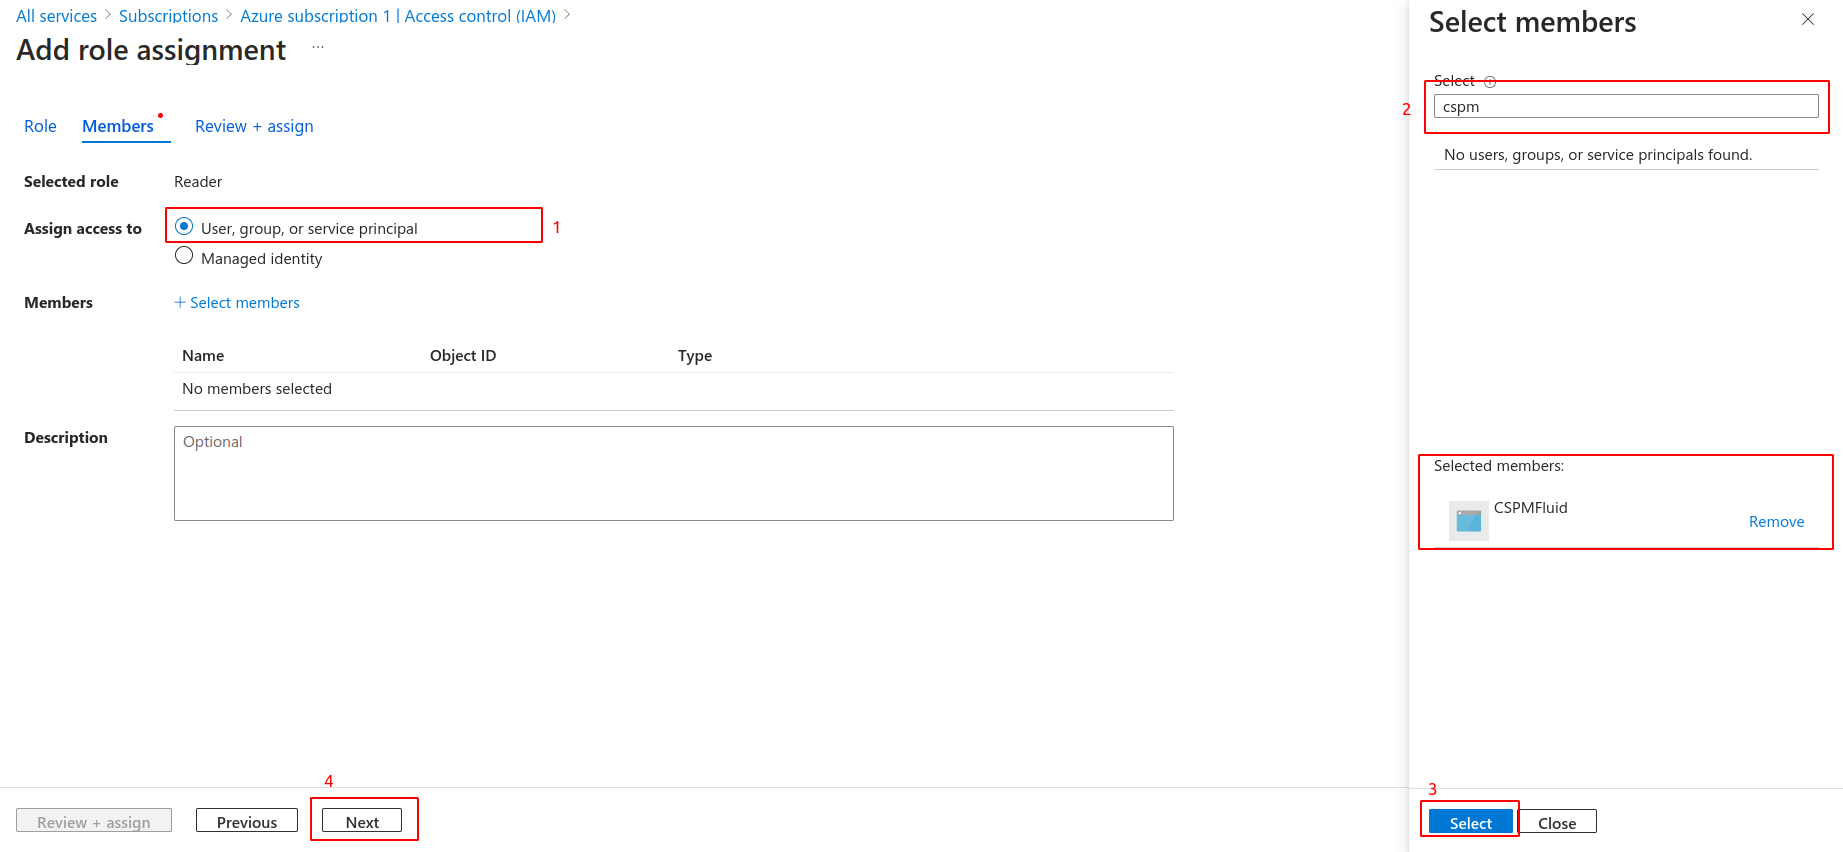
Select the Application: Under the "Assign access to" section, click on the "Select members" button. In the "Select" pane, switch to the "Applications" tab. Search for and select your application by name.
-
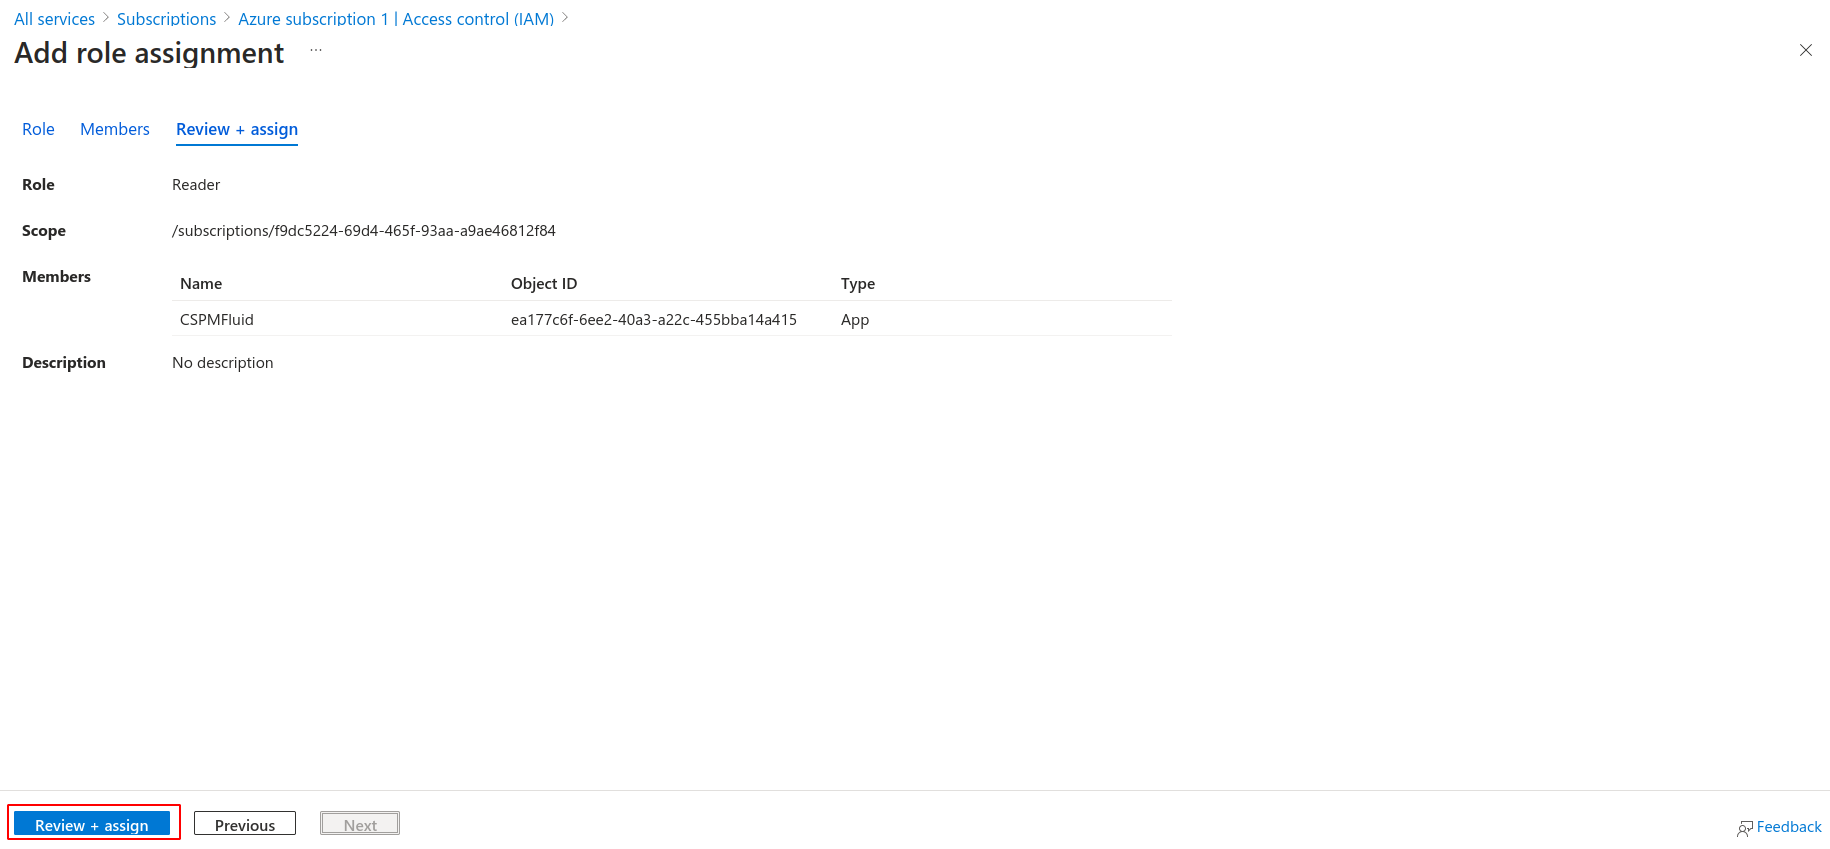
Review and Confirm: After selecting the application, review the role assignment details. Confirm that you are assigning the correct role to the correct application.
-
Assign Role: Click the "Save" button to assign the selected role to your application.
-
Verify Role Assignment: Once the role assignment is complete, you should see the application listed in the "Role assignments" tab with the assigned role at the subscription level.
Azure setup on Fluid Attacks' platform
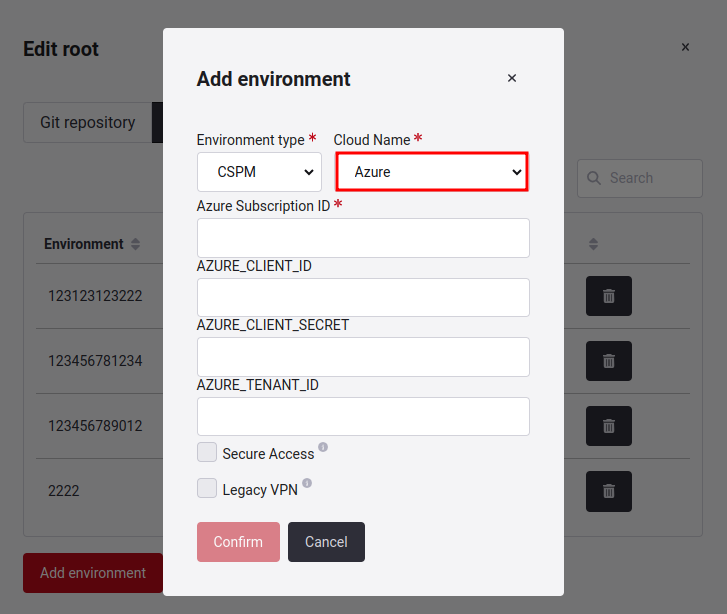
When you select the option to add Azure secrets, you must fill in the following fields: Azure Subscription ID, AZURE_CLIENT_ID, AZURE_CLIENT_SECRET and AZURE_TENANT_ID.
To obtain these values you can refer to the Azure Enrollment section.
- Azure Subscription ID: The Azure Subscription ID is a unique identifier used to identify and manage a Microsoft Azure subscription, providing access to Azure's cloud platform resources and services.
- AZURE_CLIENT_ID: The ID that represents the client in azure platform.
- AZURE_CLIENT_SECRET: The password to enter this environment is composed of alphanumeric characters.
- AZURE_TENANT_ID: Directory ID, is a unique identifier representing the Azure Active Directory (Azure AD). It is used for authentication and authorization purposes when interacting with Azure resources and services within that tenant.