Vulnerability management
Last updated: Jun 30, 2026
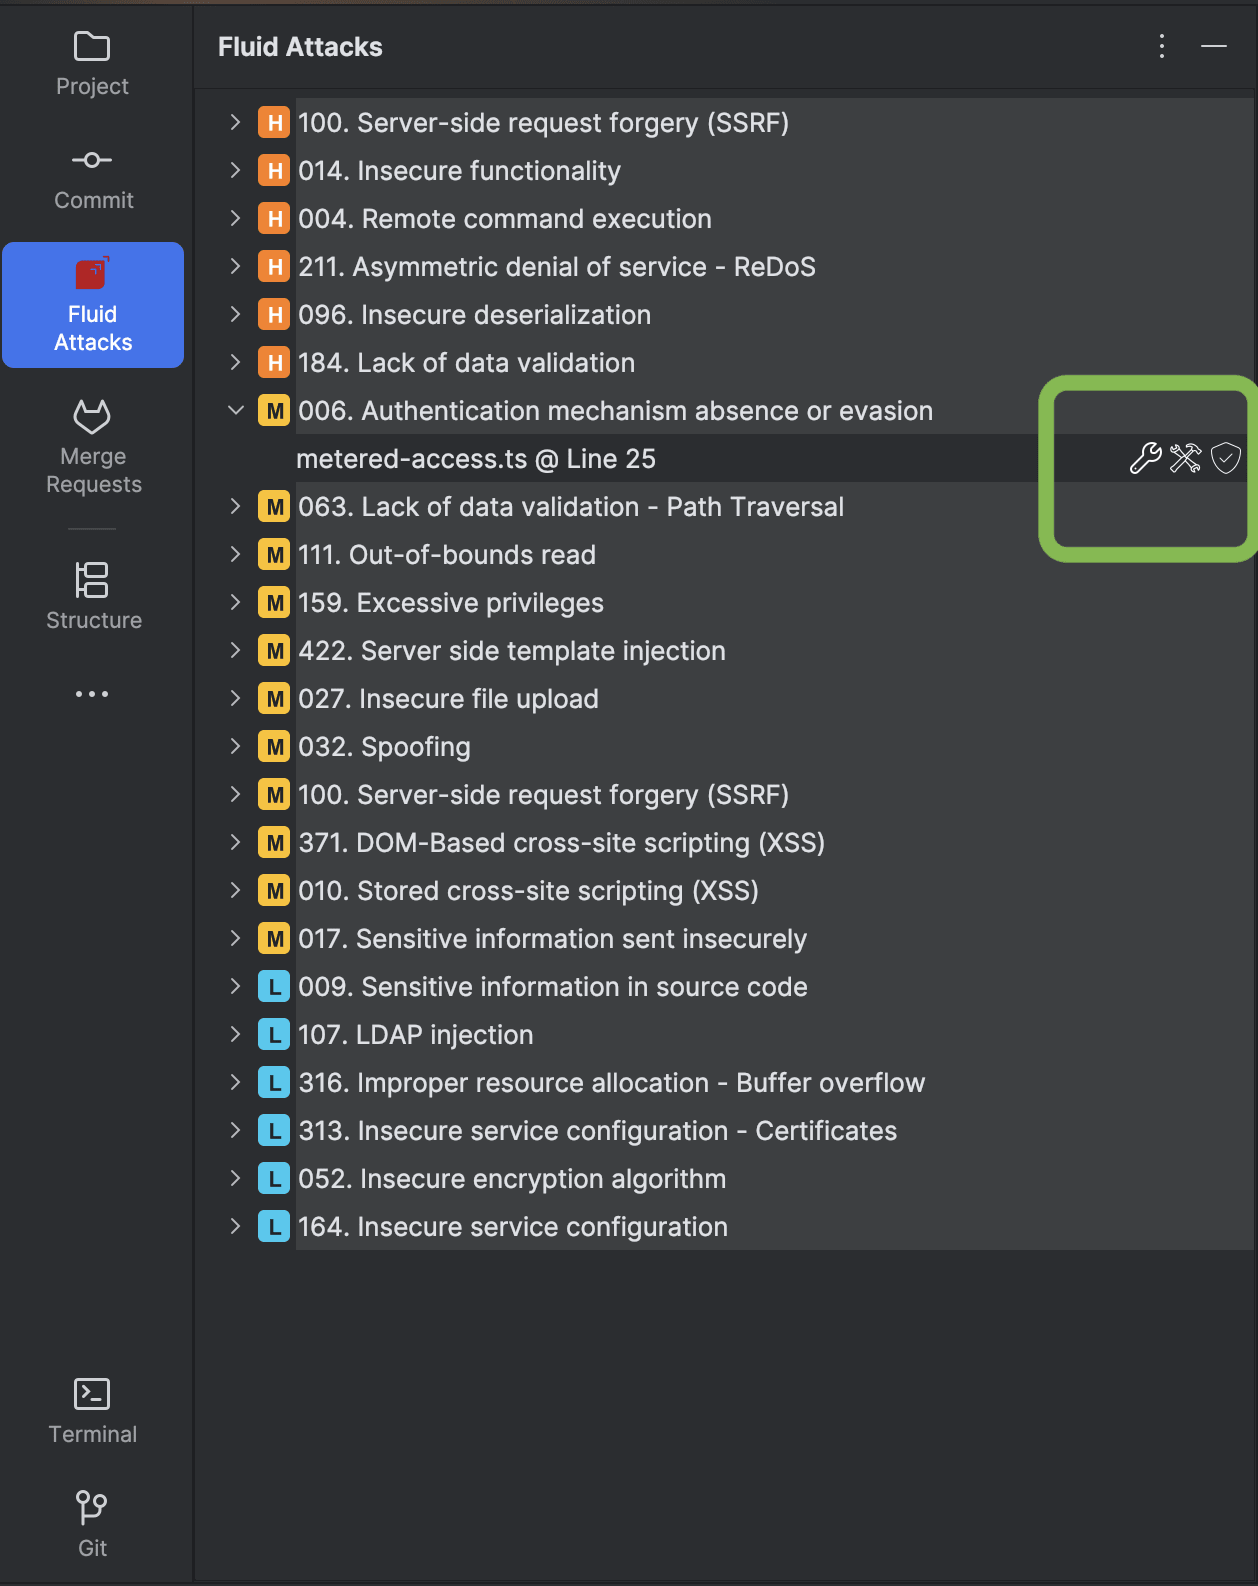
To access the functions of the IntelliJ IDEA integration, click on the Fluid Attacks plugin in the IDE's left-side menu.
To access the options to request reattacks and get fix suggestions, hover your cursor over a vulnerability in the tree. Action icons will appear on the right side of the row. The step-by-step instructions are in the sections below.
Not using the extension yet? Install it.
See vulnerable file and code line
You can view vulnerabilities reported in the Fluid Attacks platform from IntelliJ IDEA:
-
Click on the Fluid Attacks icon in the left-side menu. You are then presented with a comprehensive list of weaknesses detected in your code.

-
Click on the weakness of your interest to view the names and vulnerable lines of all affected files.

-
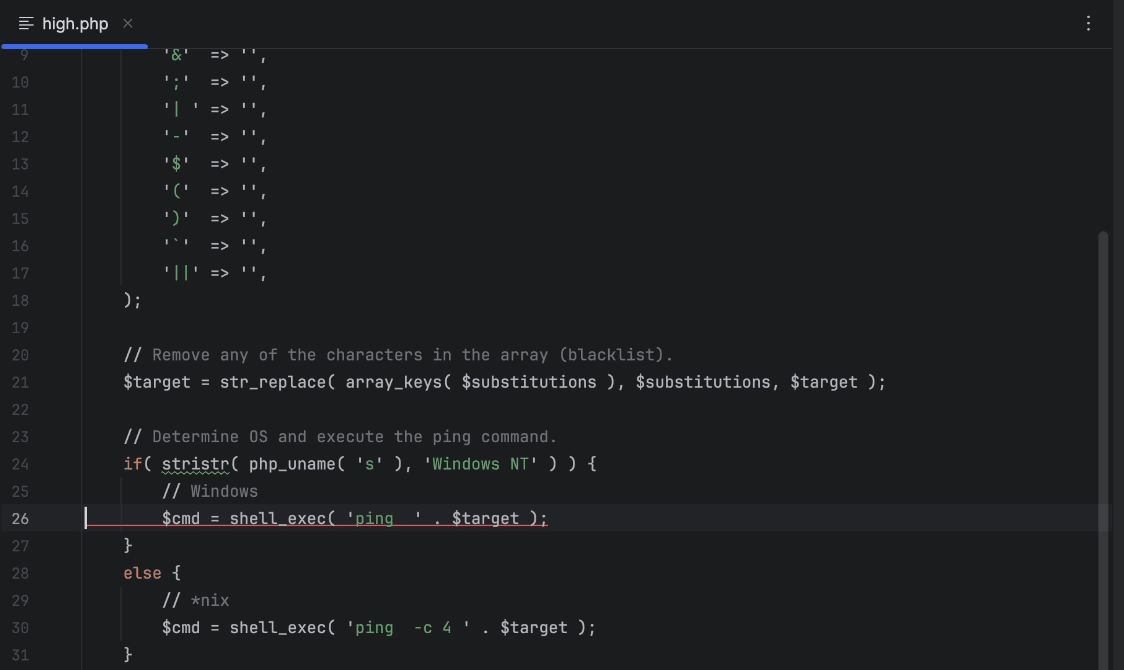
Select a file of your interest to identify the line of code where the vulnerability is present, which is underlined with red.
Get AI-generated remediation guides
Always check remediation advice generated with AI.
Fluid Attacks' IntelliJ IDEA plugin uses AI to generate fix suggestions. The Custom Fix feature generates a step-by-step guide telling you how to fix your code. Here is how you access it:
-
Click on the Fluid Attacks icon in the IDE's left-side menu.
-
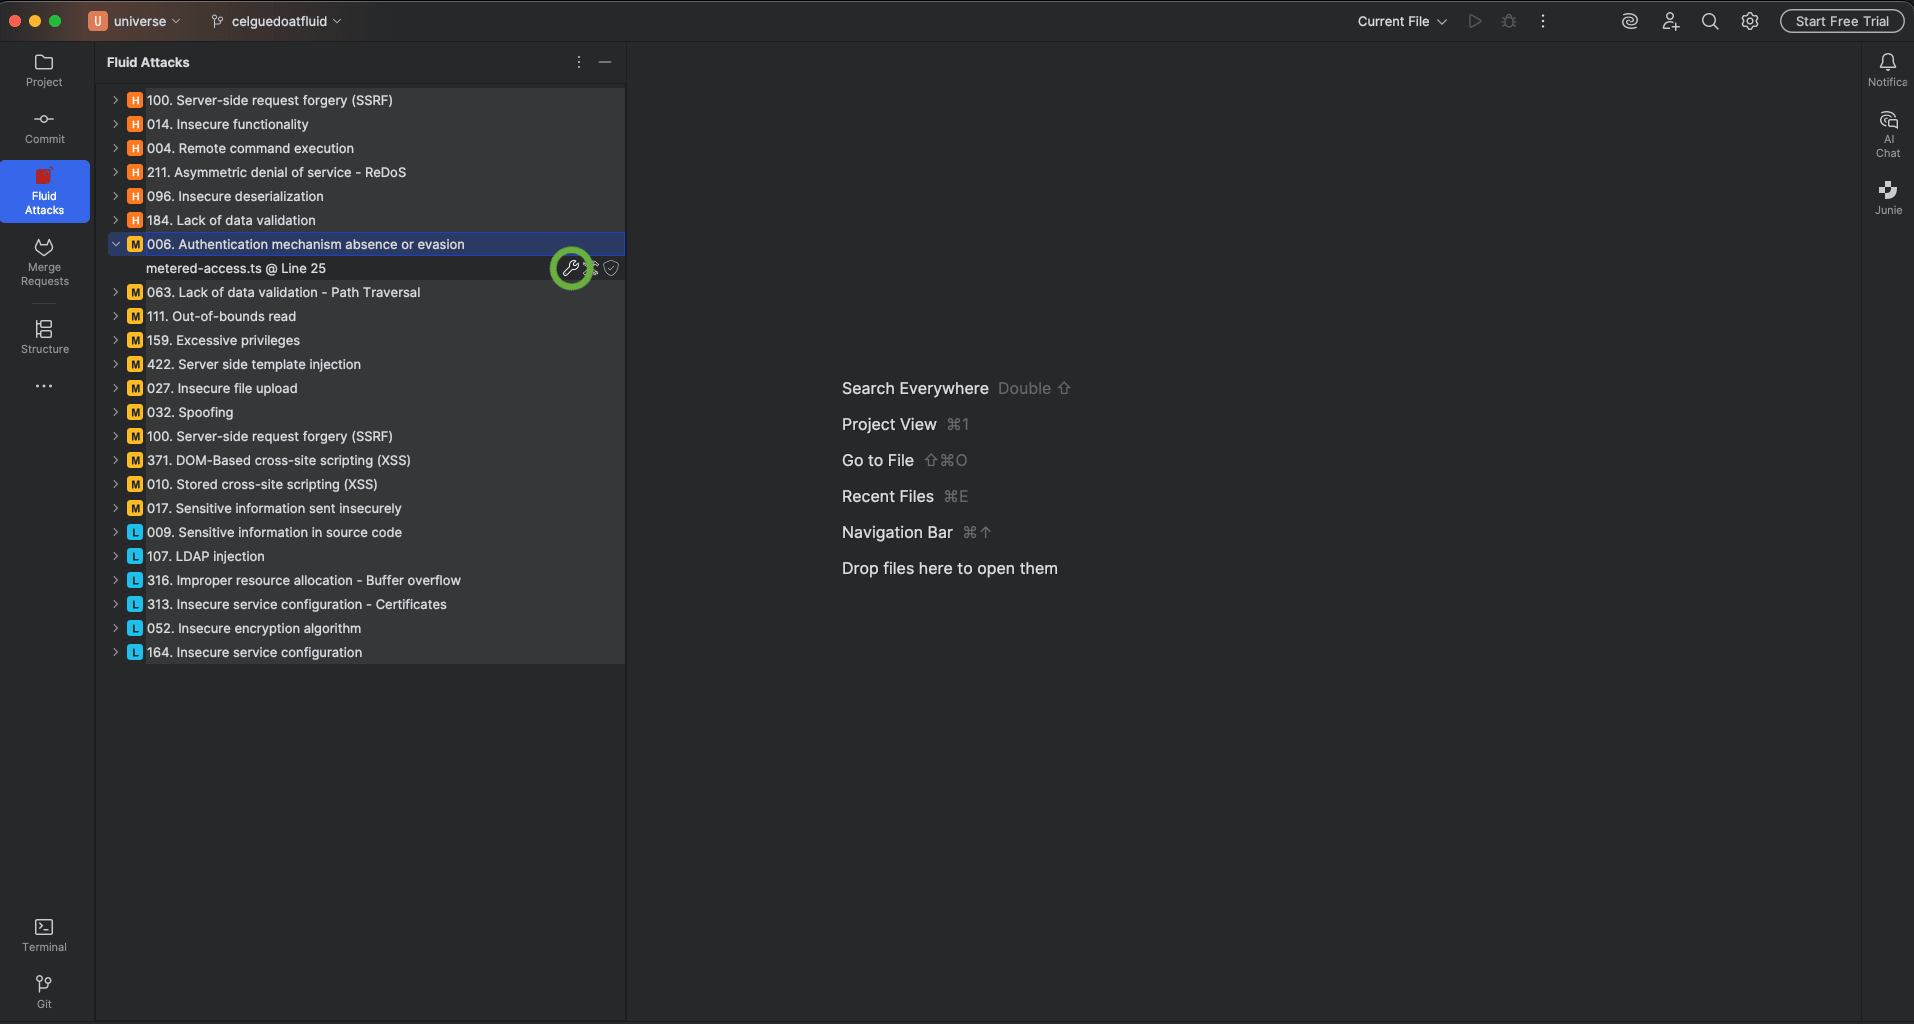
Expand the weakness you wish to explore by clicking on its name.
-
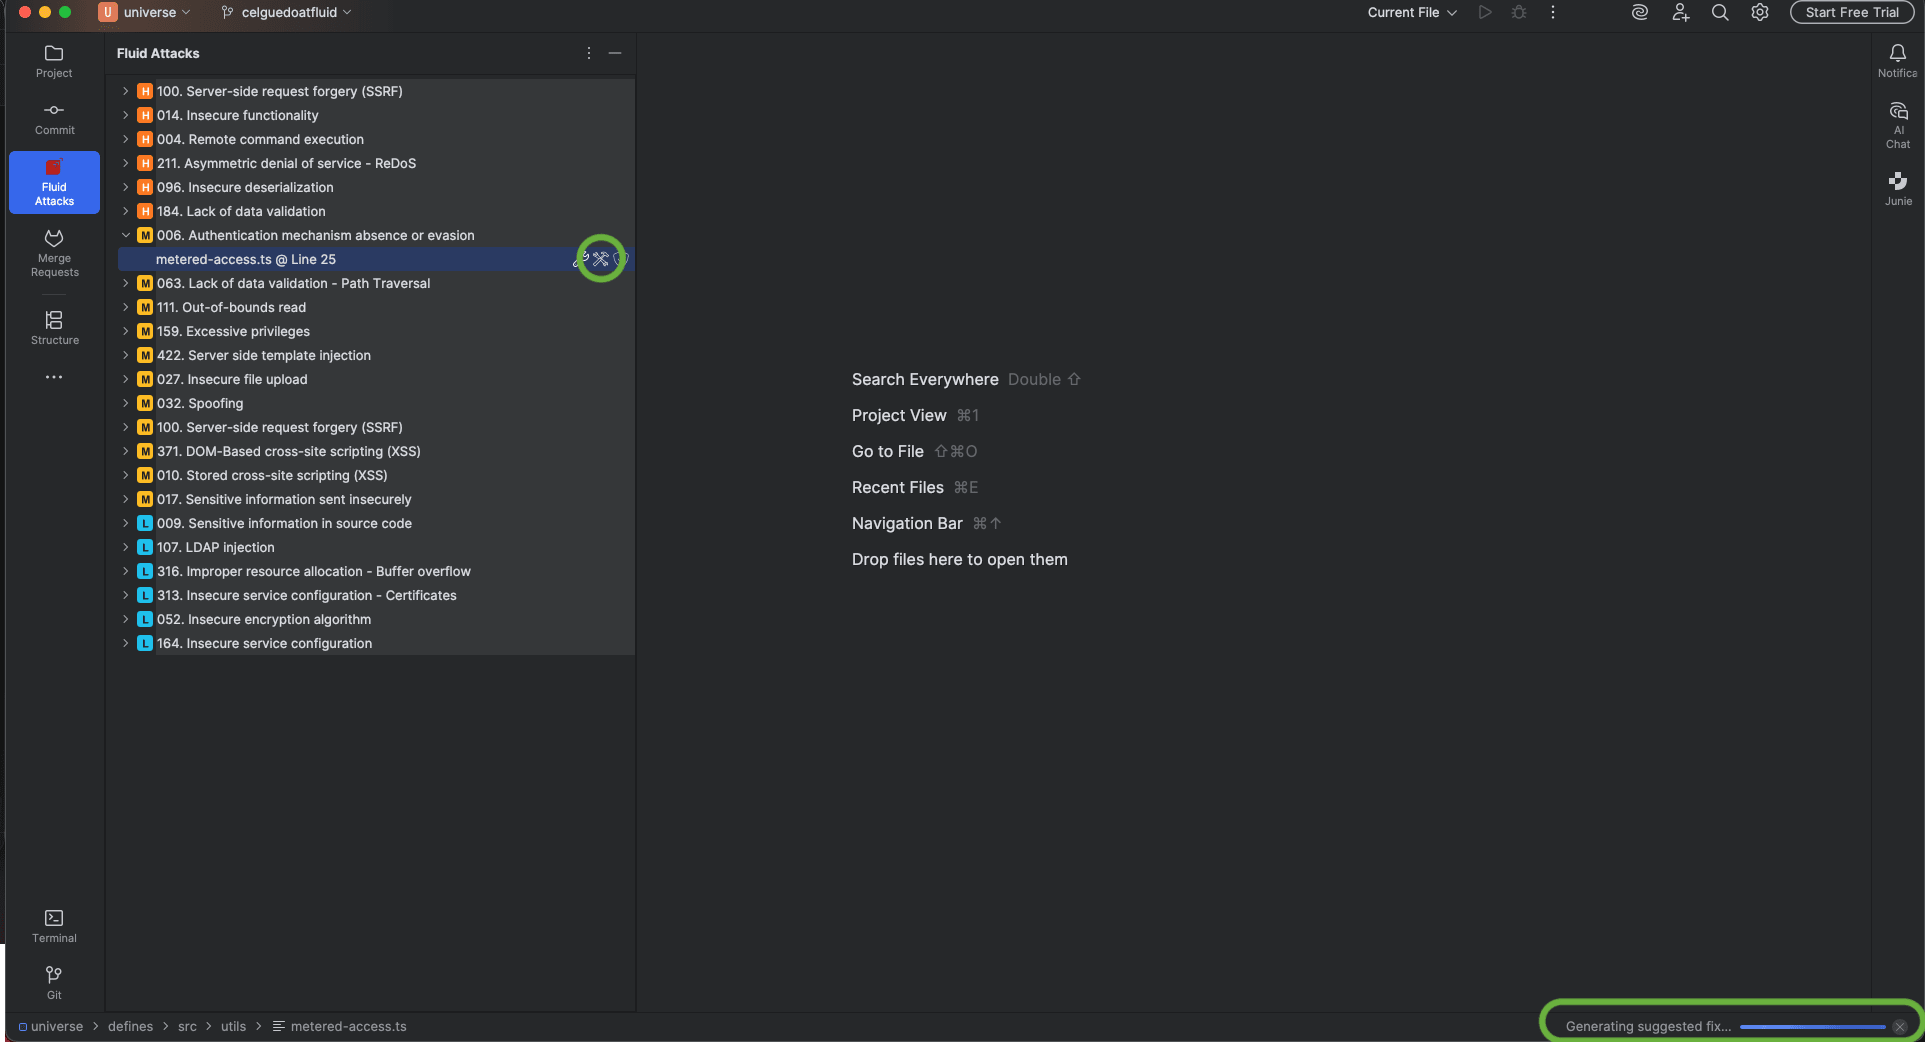
Hover over a vulnerable file to reveal the action icons. Click the Custom Fix icon (wand icon) on the right side of the row.
-
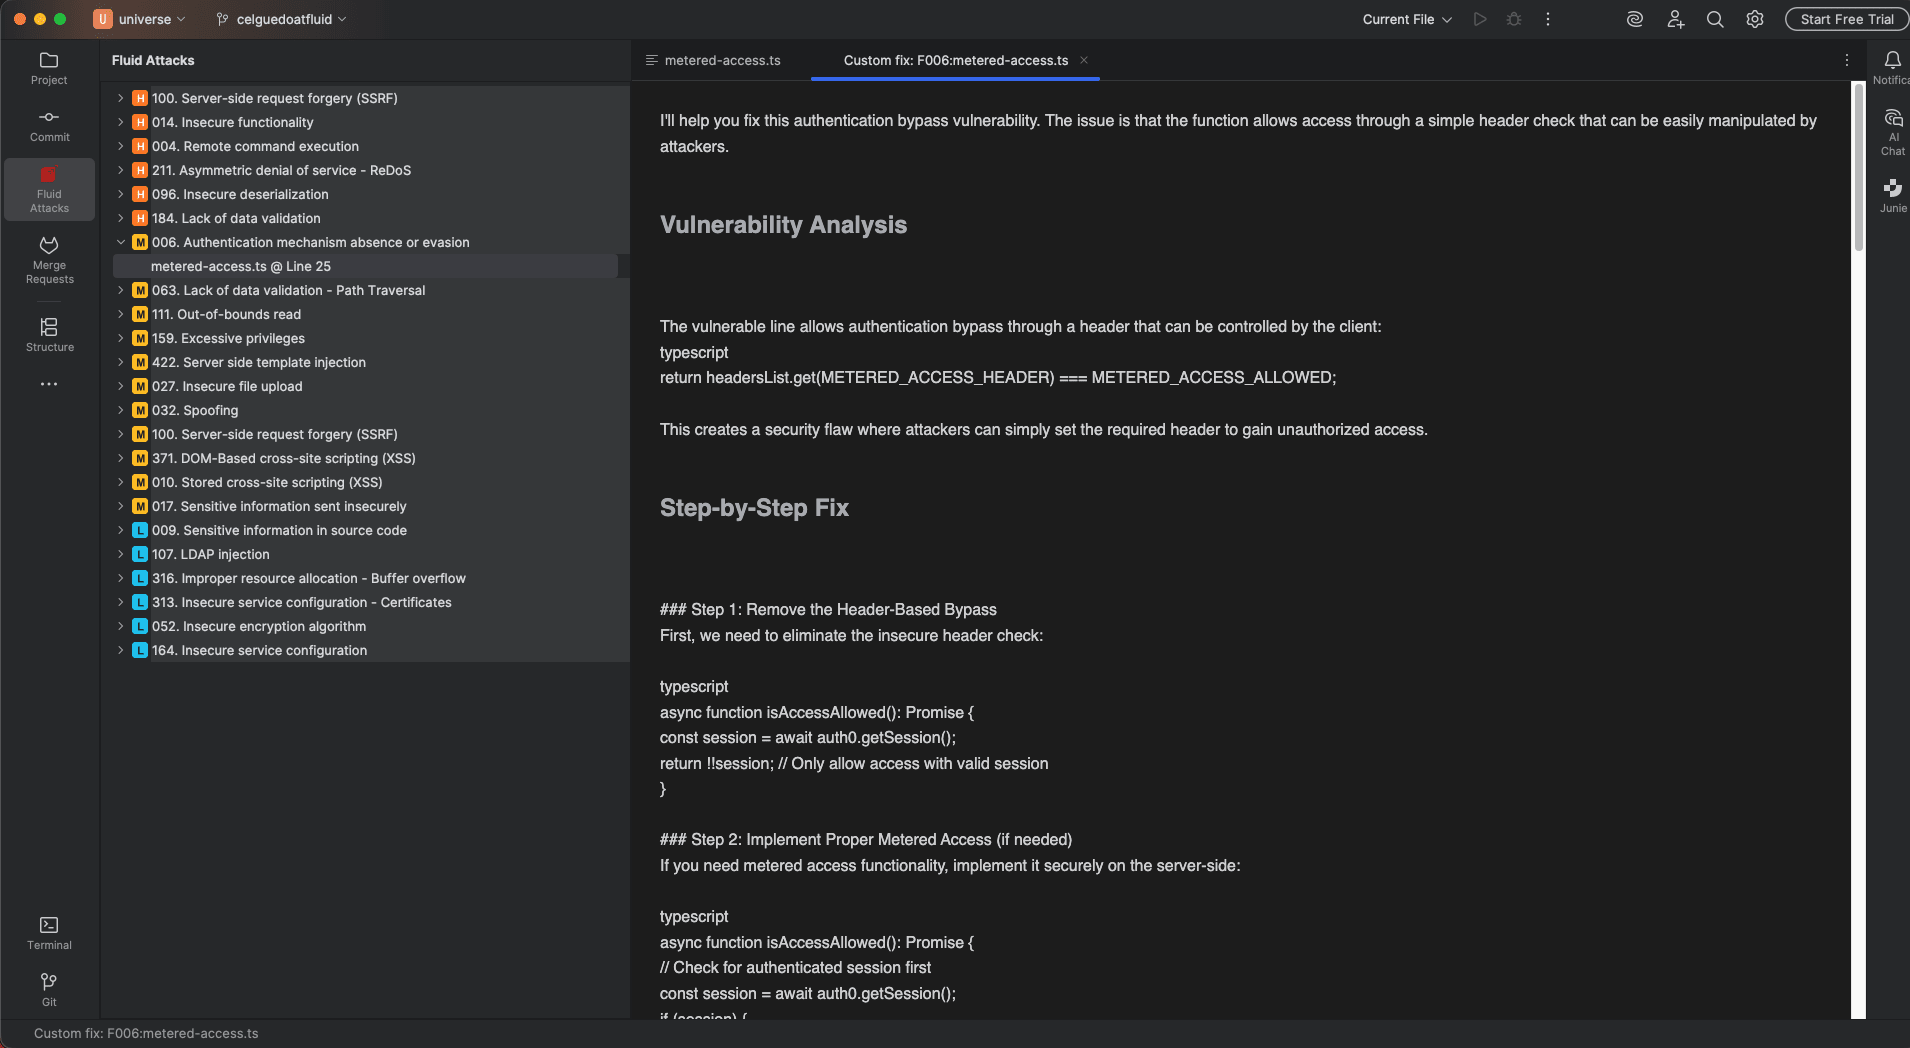
The corresponding editor tab appears and starts displaying the remediation guide.
Apply AI-generated fix suggestions
Always check remediation advice generated with AI.
The Autofix feature automatically applies suggested code fixes. Follow these steps to use it:
-
Click on the Fluid Attacks icon in the IDE's left-side menu.
-
Expand the weakness you wish to explore by clicking on its name.
-
Hover over a vulnerable file to reveal the action icons. Click the Apply Fix icon (wrench icon) on the right side of the row.
Apply SCA Fix
This feature supports JavaScript and Python projects. The following package managers are supported: npm, Yarn, Bun, pip, Poetry, Pipenv, and uv.
For software composition analysis (SCA) vulnerabilities, the plugin can apply an automated dependency fix:
- Click on the Fluid Attacks icon in the IDE's left-side menu.
- Expand the weakness you wish to fix by clicking on its name.
- Hover over a vulnerable file to reveal the action icons. Click the Apply SCA Fix icon on the right side of the row.
Request reattacks
Once you fix your code, you may request reattacks to verify the effectiveness of your remediation efforts:
-
Click on the Fluid Attacks icon in the IDE's left-side menu.
-
Expand the weakness you wish to explore by clicking on its name.
-
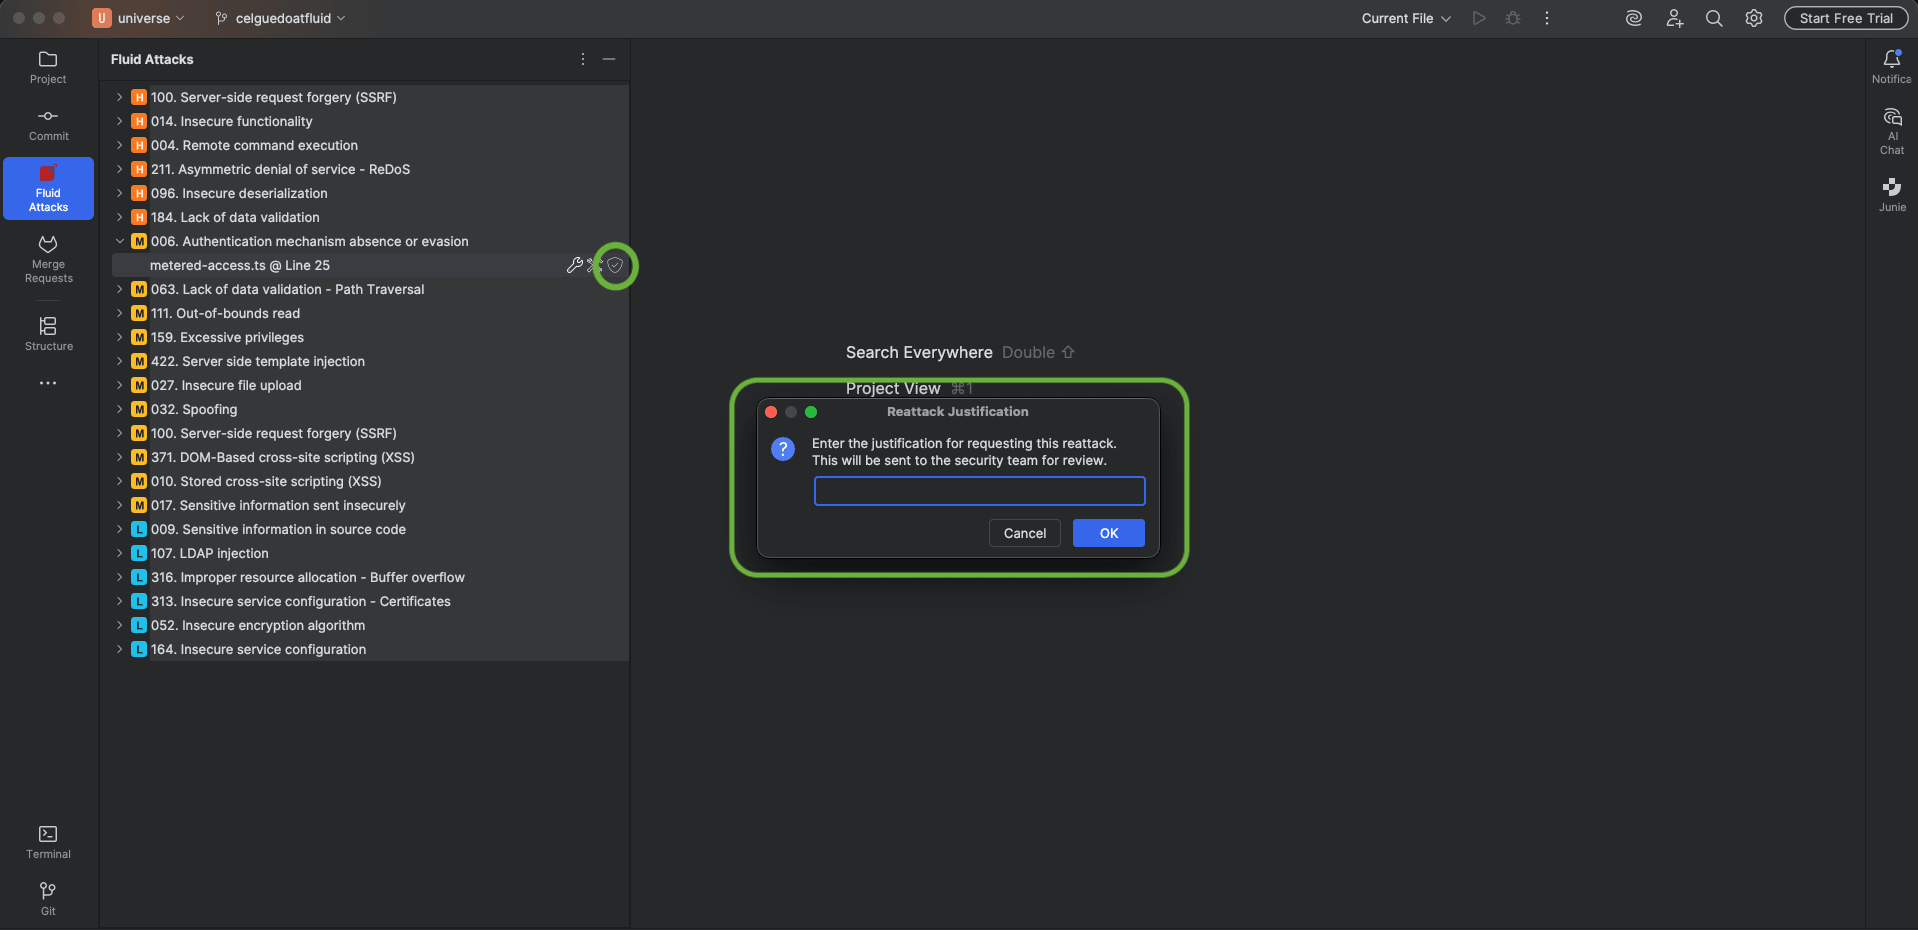
Hover over a vulnerable file to reveal the action icons. Click the Reattack icon (shield icon) on the right side of the row.
The reattack icon is the only action available for dependency (SCA) vulnerabilities. Check reattack error solutions if you run into a problem.
Use actions from the editor
You can also access vulnerability actions directly from the code editor without using the Fluid Attacks panel:
-
Open a file that contains vulnerable code.
-
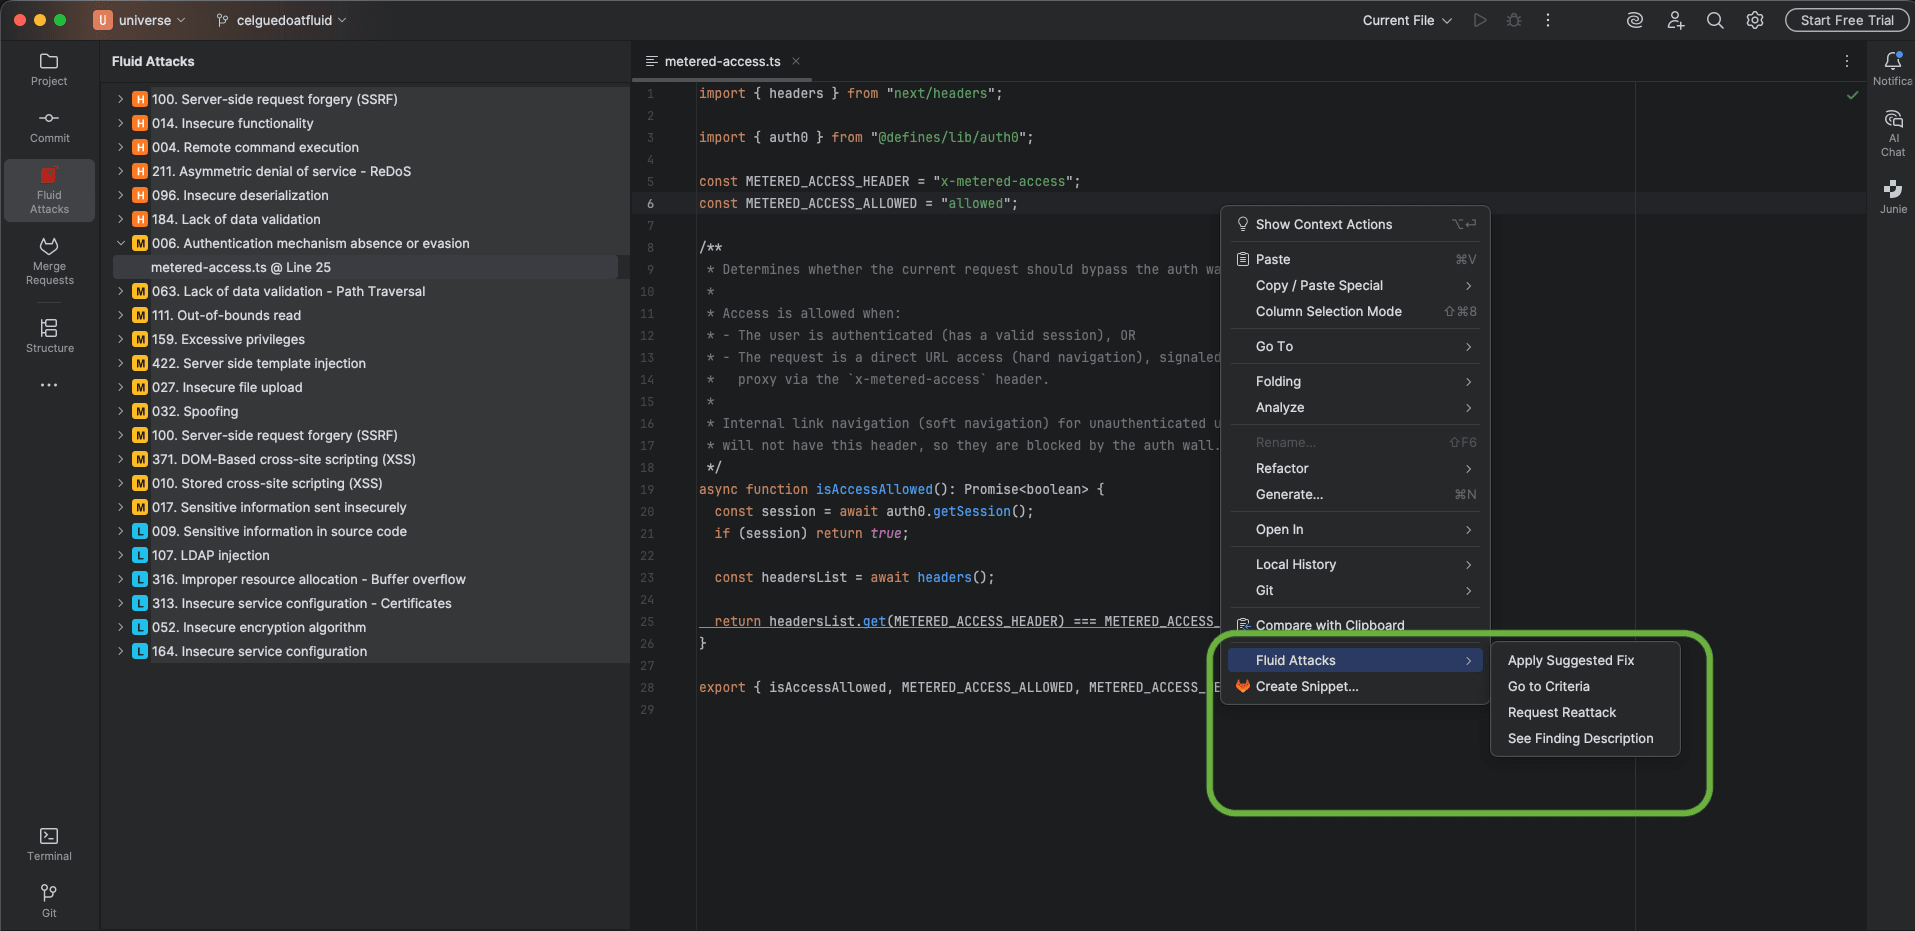
Right-click on the vulnerable line (underlined in red).
-
In the context menu, look for the Fluid Attacks actions:
- Apply Suggested Fix — available only for non-SCA, auto-fixable vulnerabilities.
- Apply SCA Fix — available for SCA vulnerabilities where a fix is available.
- Request Reattack — request a reattack for the vulnerability at the cursor position.
- Go to Criteria — opens the Fluid Attacks database page for the vulnerability type.
- See Finding Description — displays vulnerability details in a side panel.
Search for vulnerabilities in your apps for free with Fluid Attacks' automated security testing! Start your 21-day free trial and discover the benefits of the Essential plan. If you prefer the Advanced plan, which includes the expertise of Fluid Attacks' pentesting team, fill out this contact form.