CI Gate installation
Last updated: Jul 21, 2026
The Docker tag new for the CI Gate image was removed on 11/07/2024. If
you currently use this tag, please switch for latest to preserve support and
avoid disruption.
You can use Fluid Attacks' CI Gate on any x86_64 or aarch64 machine in which Docker is installed. Access to Internet is required, as CI Gate must connect to the API. You can also integrate this security gate into your CI/CD to ensure your software is built and shipped without vulnerabilities previously reported via Fluid Attacks' platform.
In order to use CI Gate, there are some requirements:
-
Make sure you have a Group token. This token can be generated in the platform's DevSecOps section (Organization > Groups > GroupName > DevSecOps), where you will find the CI Gate card.

-
Click on the Manage token button, and a pop-up window will appear where you can generate the token. If you have already generated one, click on Reveal token.
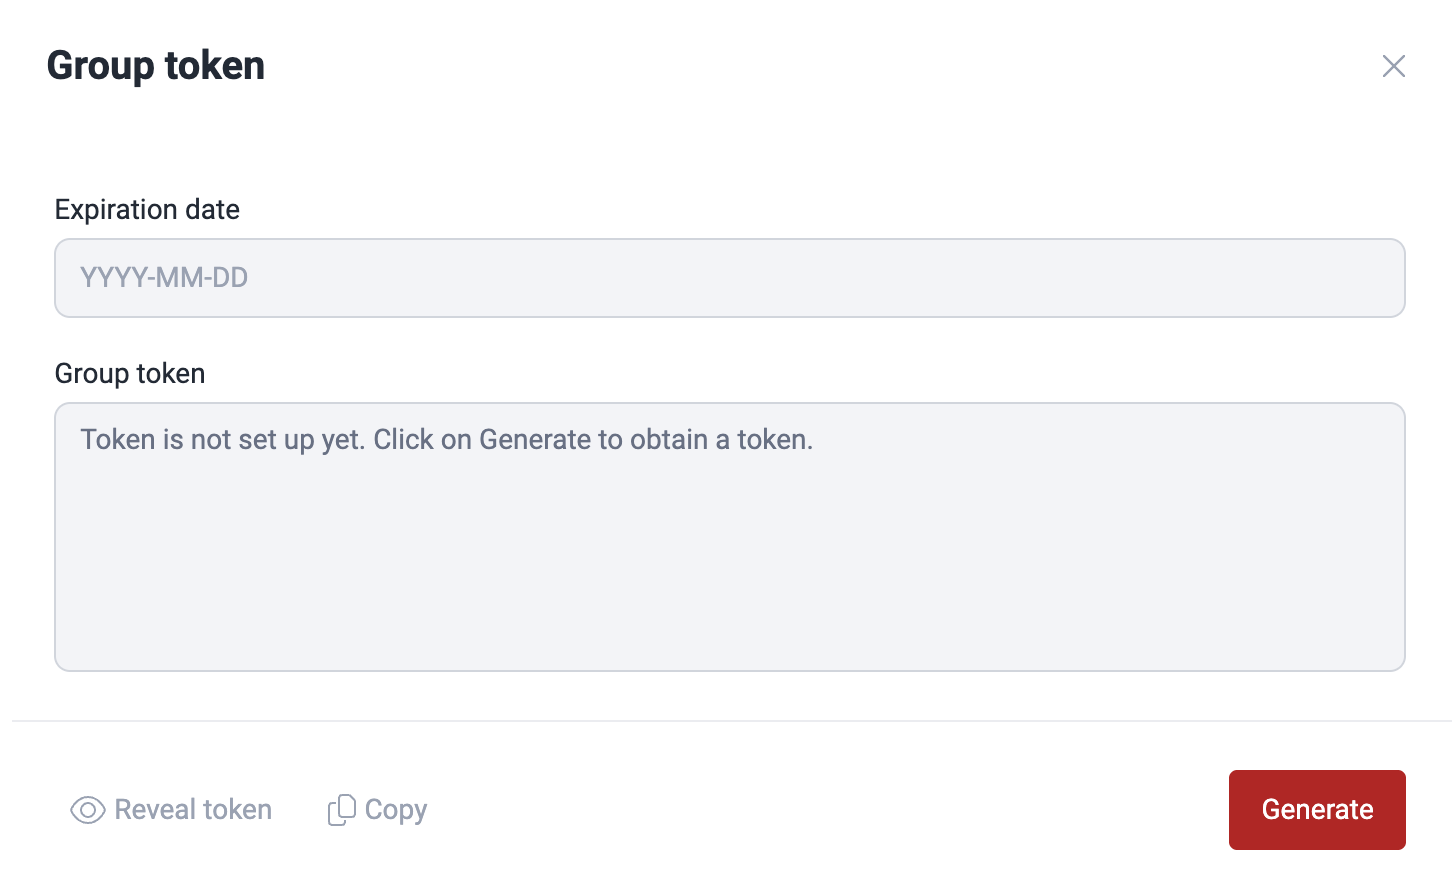
The Group token is valid for 180 days, and each token is unique and different for each group. Also, keep in mind that the generation/renewal of the Group token is the users' work. The roles that can generate this token are User, Group Manager and Vulnerability Manager.
If you want to run the CI Gate on your local machine:
- Make sure your execution environment has the required dependencies: Docker (>= 20.10.10).
- Install Docker by following the official guide.
You can also run CI Gate in one of your CI/CD pipelines on a third-party repository, such as GitHub, GitLab, Azure, and others, without installing Docker on your machine or premises. (See the general resource requirements for CI Gate)
Arguments
Since April 4,
2025, the
argument --cvss is unavailable. This argument allowed you to choose using
the CVSS v3.1 with CI Gate, but now only v4.0 is supported.
You can customize the CI Gate's behavior according to your necessities, whether in your local machine or your CI/CD pipeline. The arguments are the following:
Required
Authenticate with one of:
--token: your group's Group token (a service token), from Organization > Groups > GroupName > DevSecOps > Manage token.--group: your Fluid Attacks group, to authenticate via CI OIDC without a stored token. See OIDC federation for setup.
Optional
-
--breaking: strict mode severity customization. Vulnerable locations with a severity below this threshold will not break the pipeline. This option takes values from 0.0 (recommended) to 10.0.- If used, and the associated policy in the Fluid Attacks platform is configured, the lowest of the two values is used.
- If used,
and the associated policy in the Fluid Attacks platform is not configured,
the value passed to
--breakingis used. - If not used, and the associated policy in the Fluid Attacks platform is configured, the value set in the policy will be used.
- If not used, and the associated policy in the Fluid Attacks platform is not configured, the default value is 0.0.
-
--dynamic: retrieves only vulnerabilities found with DAST from the Fluid Attacks' platform. If not used, all types of vulnerabilities will be retrieved. -
--feature-preview: enables the feature preview mode. This mode controls from which data source the vulnerability information will be extracted:Falseuses a resolver that relies on OpenSearch.Trueuses a resolver that relies on DynamoDB.
Defaults to
False. -
--inherited: indicates the vulnerabilities detected with SCA that CI Gate must ignore when instructed to break the build:all: CI Gate ignores all vulnerabilities detected with SCA.build: CI Gate ignores the vulnerabilities in third-party components your software depends on only in the development stage.run: CI Gate ignores the vulnerabilities in third-party components your software depends on in the production stage.
-
--repo-name: Git repository nickname in the Fluid Attacks' platform. If used, only the vulnerabilities from this repository are retrieved. -
--repo-path: Path to check for in the report. Static vulnerabilities matching these will be included, with the rest being discarded. Globs are allowed within quotation marks, e.g.,path/to/productor"path/to/other/product/**"or"**/*.py".Multiple paths can be provided to CI Gate by repeating
--repo-path, e.g.,--repo-path path1 --repo-path path2 --repo-path "path3/*"and so on.CI Gate does not validate if these paths actually exist in the repository. Make sure to check them and update them regularly if the repo structure changes.
-
-O / --output: If used, this option saves the execution's output in JSON format to the file specified. -
-p / --proxy: Sets the address of the HTTP proxy that will be used during the requests.Defaults to
"". -
--static: Retrieves only vulnerabilities of the type LINES. These are related to source code and include the following techniques: SCR, SAST, and SCA.If not used, all types of vulnerabilities will be retrieved.
-
--strict/--lax: Enables/Disables strict mode, which breaks the build if there are open or untreated vulnerabilities.Defaults to
--lax. -
--verbose: Sets the level of detail of the report.-v: Shows non-compliant, vulnerable locations that would break policy1, 2, and thus, the build in strict mode.-vv: Shows vulnerable locations regardless of policy compliance.
Defaults to
-vv. -
--verify-proxy-ssl/--no-verify-proxy-ssl: Enables/Disables SSL certificate validation when requests are sent through an HTTP proxy. This is useful if the proxy uses self-signed certificates.Defaults to
--verify-proxy-ssl.
- Strict mode customization, such as severity thresholds and grace periods for
new locations, can also be set in your organization's Policies tab in the
platform. You can check the CI Gate arguments in your container by running the
following command:
docker run --rm -ti fluidattacks/forces:latest forces --help
Run CI Gate on your local machine
Here, you will find examples of running CI Gate on a local machine. Remember that you can use different arguments according to the need or context to visualize the execution.
Once Docker is successfully installed on your local machine, run the Docker image, which will help you download all of CI Gate's dependencies through this command:
docker pull fluidattacks/forces:latestTo run the container, here are some examples:
-
To check
allfindings, including static and dynamic:docker run --rm -ti fluidattacks/forces:latest forces --token <your-token> -vv -
To check
staticlocations only:docker run --rm -ti fluidattacks/forces:latest forces --static --strict --token <your-token> -
To check
dynamiclocations only:docker run --rm -ti fluidattacks/forces:latest forces --dynamic --strict --token <your-token> -
To verify the locations of a specific repository:
docker run --rm -ti fluidattacks/forces:latest forces --dynamic --strict --repo-name <nickname repo> --token <your-token> -
To break the pipeline only if vulnerabilities with a severity equal to or greater than 4.5 are found:
docker run --rm -ti fluidattacks/forces:latest forces --dynamic --strict --breaking 4.5 --token <your-token>The
--rmand--tiparameters are optional. So you can define the best way according to your context.
Run CI Gate on your CI/CD
If you want to run CI Gate from your repository's pipeline, the following are some examples.
Bitbucket Pipelines
On Bitbucket Pipelines, add these lines to your configuration file:
# bitbucket-pipelines.yml
pipelines:
  default:
    - step:
      name: Fluid-Attacks-CI-Gate
      services:
        - docker
      script:
        - docker pull fluidattacks/forces:latest
        - docker run fluidattacks/forces:latest forces --token <your-token>
GitLab
On GitLab,
add these lines to your .gitlab-ci.yml:
forces:
  image:
    name: fluidattacks/forces:latest
script:
  - forces --token <your-token> --strict --repo-name <repository name>
Azure DevOps
On Azure DevOps, add these lines to your configuration file:
jobs:
  - job: Fluidattacks Agent
    pool:
      vmImage: "ubuntu-latest"
    steps:
      - script: |
          docker pull fluidattacks/forces:latest \
            && docker run fluidattacks/forces:latest forces --token
Jenkins
On Jenkins, the configuration file should look like this:
pipeline {
  agent {
    label 'label'
  }
  environment {
    TOKEN = "test"
  }
  stages {
    stage('Forces') {
      steps {
        script {
          sh """
            docker pull fluidattacks/forces:latest
            docker run fluidattacks/forces:latest forces --token ${TOKEN} --repo-name
          """
        }
      }
    }
  }
}
GitHub
On GitHub, the configuration file should look like this:
jobs:
  forces:
    runs-on: ubuntu-latest
    container:
      image: fluidattacks/forces:latest
      env:
        TOKEN:
        REPO_NAME:
    steps:
      - name: Run Agent check
        run: forces --token ${TOKEN} --strict --repo-name ${REPO_NAME}
Harness
On Harness, include the following in the YAML file that defines your pipeline:
stages:
  - stage:
      name:
      identifier: AgentStage
      type: CI
      spec:
        cloneCodebase: false
        infrastructure:
          type: KubernetesDirect
          spec:
            connectorRef:
            namespace: default
        execution:
          steps:
            - step:
                type: Run
                name:
                identifier: RunAgentCheck
                spec:
                  connectorRef:
                  image: fluidattacks/forces:latest
                  shell: Bash
                  command: |
                    forces --token ${secrets.getValue("AGENT_TOKEN")}
Note that <stage-name>, <your-k8s-connector-id>,
<step-name>, and <your-docker-connector-id> are defined by
you, and this configuration assumes that the Group
token
is a secret named AGENT_TOKEN.
Execution logs and results
After any execution of the CI Gate, you can also check its logs on the DevSecOps tab of Fluid Attacks' platform (Organization > Groups > GroupName > DevSecOps). Get more information about this section in the article "Prevent the deployment of builds with vulnerabilities."
You can also get the report in JSON format
with the --output CLI argument.
For example,
running CI Gate with --output report.json
creates a report.json file with this structure:
{
  "findings": [
    {
      "identifier": "111111111",
      "title": "083. XML injection (XXE)",
      "status": "vulnerable",
      "exploitability": 0.94,
      "severity": 3.2,
      "url": "https://app.fluidattacks.com/orgs/my-org/groups/my-group/vulns/111111111/locations",
      "vulnerabilities": [
        {
          "type": "DAST",
          "where": "192.168.100.105",
          "specific": "3636",
          "state": "vulnerable",
          "severity": 3.2,
          "report_date": "2023-08-13 09:58:38-05:00",
          "root_nickname": "my-root",
          "exploitability": 0.94,
          "compliance": false
        }
      ]
    }
  ],
  "summary": {
    "vulnerable": {
      "dast": 1,
      "sast": 0
    },
    "overall_compliance": false,
    "elapsed_time": "0.4392 seconds",
    "total": 1
  }
}
The report file is created inside the container
and is automatically deleted when the container stops,
due to the --rm parameter.
To keep the file on your local machine,
you need to mount a volume.
For example:
docker run --rm \
  -v $(pwd):/output \
  fluidattacks/forces:latest forces \
  --strict \
  -O /output/report.json \
  --repo-name <repository nickname> \
  --token $TOKEN
Troubleshooting
-
Please make sure that your Docker engine version is >= 20.10.10.
docker --versionDocker version 20.10.10, build v20.10.10This is important because CI Gate uses a GNU libc version >= 2.34, and the default seccomp profile of Docker <= 20.10.9 is not adjusted to support the clone syscall of GNU libc introduced in version 2.34.
-
Please check that your Docker installation is working. If it is, you should be able to run a Hello World:
docker run hello-world
Hello from Docker!
This message shows that your installation appears to be working correctly.
...
Otherwise, please refer to the Docker documentation and the Docker installation steps.
-
If you still experience issues running CI Gate after following the steps above, feel free to contact [email protected].
Please include in the report as much information as possible to help to reproduce the problem, for example:
- The Docker engine and Server version:
docker info - The host fingerprint:
uname -a - The value of
docker inspect fluidattacks/forces:latest - The organization, group, and repository name you are executing the agent on.
- The Docker engine and Server version: