Functions
Last updated: Oct 27, 2026
The VS Code extension of Fluid Attacks has these functions:
- See vulnerable file and code line
- Request reattacks
- Go to Criteria (links to the database of Fluid Attacks about vulnerabilities)
- Go to vulnerability on the platform
- View vulnerability description
- Get step-by-step remediation guides with Custom Fix
- Get automatic fix suggestions with Autofix
- Get update options for vulnerable dependencies
- View SCA remediation options
- Apply SCA fixes automatically
To use these functions, click the Fluid Attacks extension in the activity bar of VS Code. You can also click the repository files with a red dot in the explorer of VS Code. This page tells you how to use these functions. Custom Fix and Autofix have their own pages with more details.
If you do not have the extension, install it.
See vulnerable file and code line
You can see the vulnerabilities that the Fluid Attacks platform reports directly in the IDE.
To start from the Fluid Attacks extension icon, follow these steps:
-
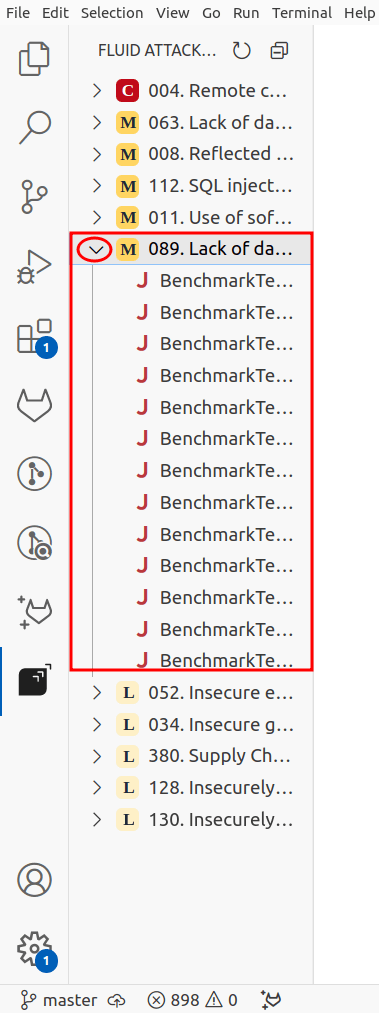
Click the Fluid Attacks icon in the activity bar of VS Code. The extension shows a list of the vulnerability types in your code.

The letters next to the names of the vulnerability types show their severity, as the CVSS calculates it.
-
Click the vulnerability type that you want to examine. The extension shows all the affected files.
-
Select a file. The line of code with the vulnerability has a red underline.

To start from the explorer of VS Code, follow these steps:
-
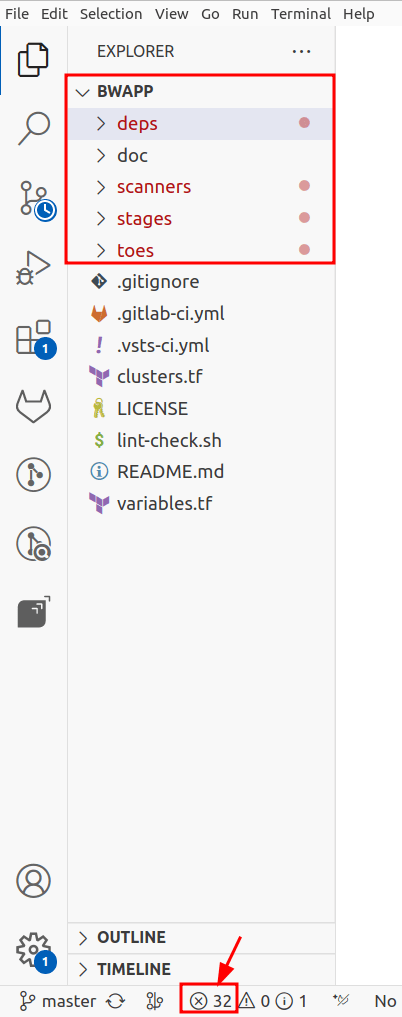
Open the project of the Git repository that Fluid Attacks tests. The files with vulnerabilities have red dots.
-
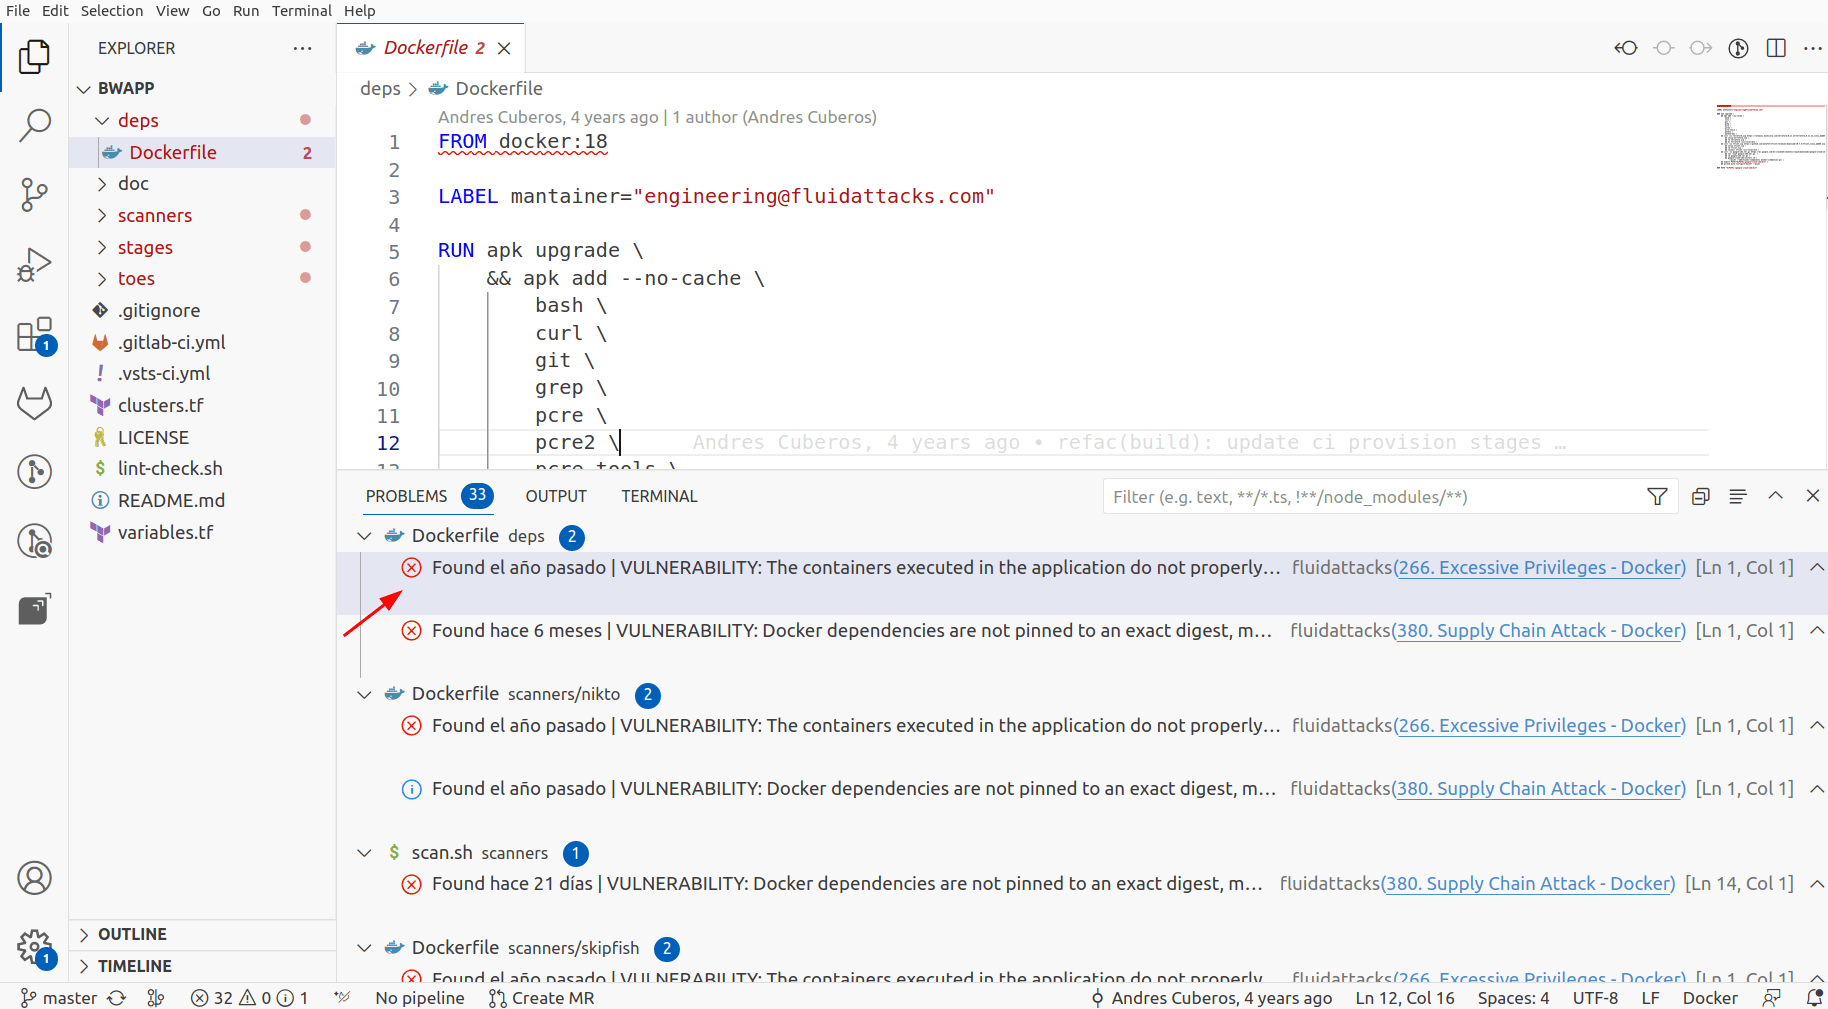
Click a file to open it. You can also click the X icon to open the panel with the problems of all the files.
If you use the panel, click an item to open the file and see the vulnerable line of code.
-
Find the vulnerable lines of code. They have a red underline.
Request reattacks
Reattacks are the retests where Fluid Attacks examines if your code fixes correct the vulnerabilities.
To request reattacks from the Fluid Attacks extension icon, follow these steps:
-
Click the Fluid Attacks extension in the activity bar of VS Code.
-
Click the name of the vulnerability type to expand it.
-
Click a vulnerability. Some icons appear.
-
Click the shield icon to request a reattack.

-
Write a description of the fix that you applied.
-
Press Enter. Wait for the notification that shows that you sent the request.
-
If you want, refresh the view. If the underline of the vulnerability changes from red to blue, the Fluid Attacks platform received your request.
To start from the explorer of VS Code, follow these steps:
-
Click the file to open it.
-
Right-click the underlined code.
-
Select the Request reattack option.

-
Write a description of the fix that you applied.
-
Press Enter. Wait for the notification that shows that you sent the request.
Make sure that you push your code to the tests/security/integration branch.
Go to Criteria and vulnerability on the platform
The VS Code extension of Fluid Attacks has external links to the Fluid Attacks database (DB). It also has links to the report of the vulnerability on the Fluid Attacks platform.
The primary subjects of the DB are the standards, requirements, and vulnerability types that set the results of security testing.
To open these external links from the Fluid Attacks extension icon, follow these steps:
- Click the extension in the activity bar of VS Code.
- Right-click the vulnerability type that you want to examine.
- Select Go to Criteria or Go to Finding.
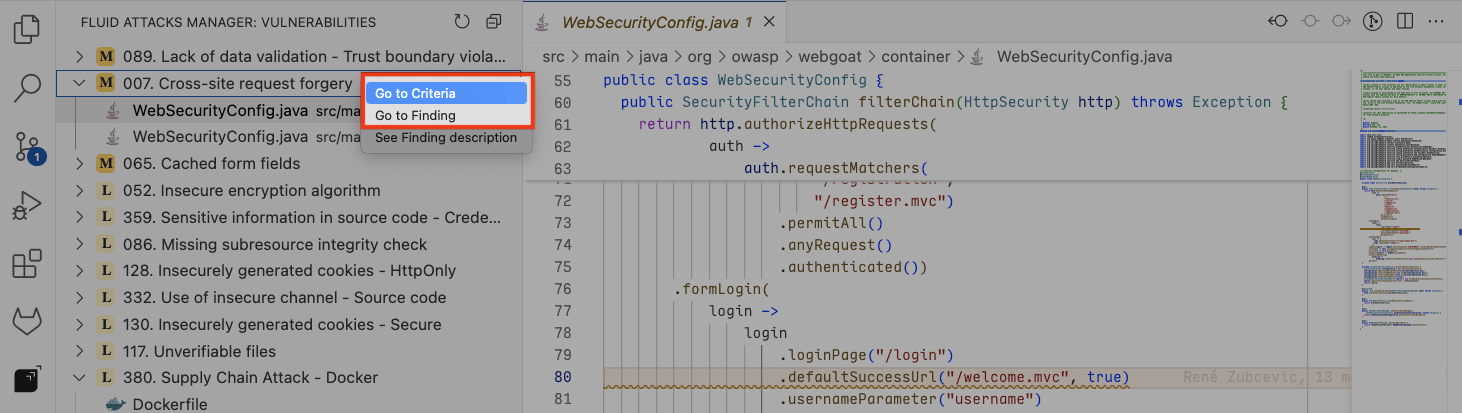
To open the link to the DB from the explorer of VS Code, follow these steps:
-
Click the file to open it.
-
Right-click the vulnerable line.
-
Select Go to criteria.

To open the link to the vulnerability on the Fluid Attacks platform from the explorer of VS Code, follow these steps:
-
Click the file to open it.
-
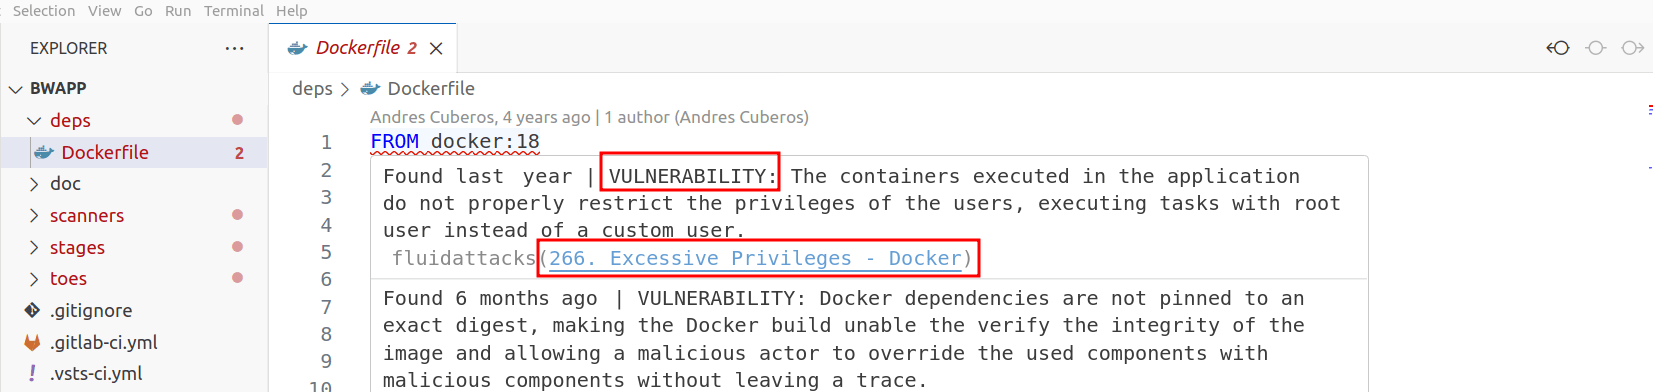
Hover over the vulnerable line. A pop-up window shows the definition and the external link.
-
Click the link to the vulnerability URL on the Fluid Attacks platform.
View vulnerability description
Fluid Attacks has full documentation about its classification of vulnerabilities.
To see the description of a vulnerability type (also known as a weakness) from the Fluid Attacks extension icon, follow these steps:
-
Click the Fluid Attacks extension in the activity bar of VS Code.
-
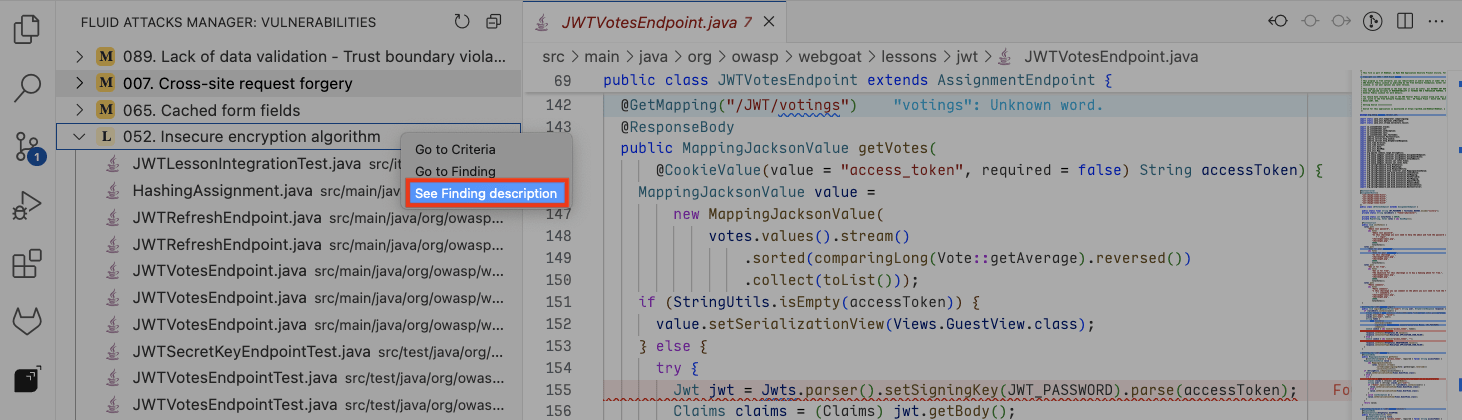
Right-click the vulnerability type that you want to examine.
-
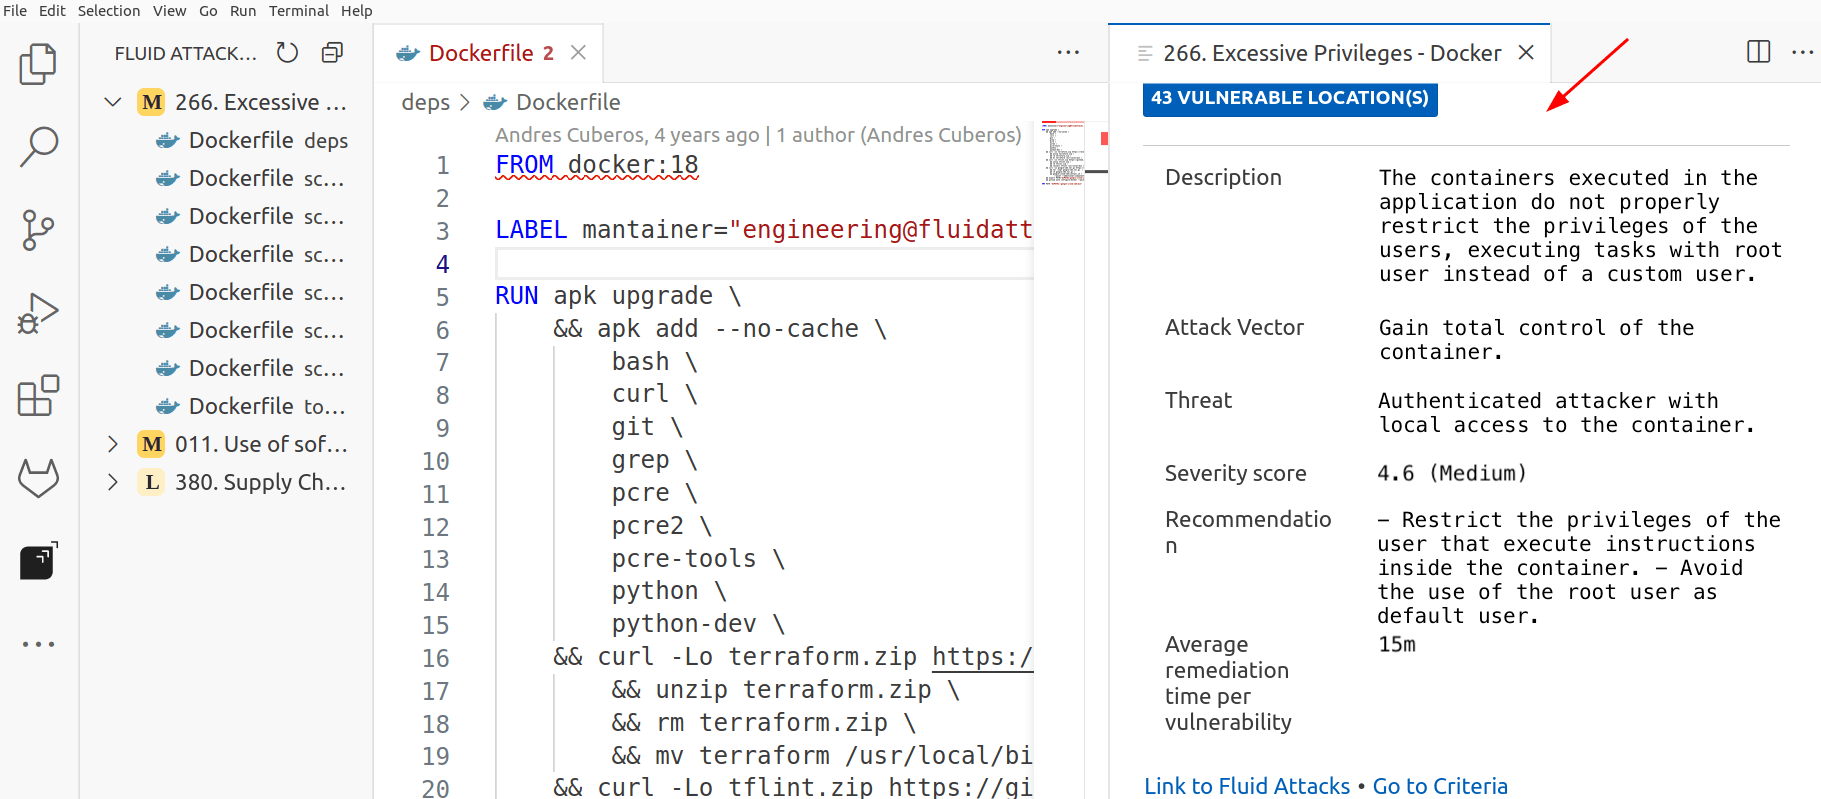
Select See Finding description. The editor view splits and shows the related documentation of Fluid Attacks in VS Code. This documentation includes the attack vector, threat, severity score, and average remediation time.
To see the vulnerability description from the explorer of VS Code, follow these steps:
-
Click the file to open it.
-
Right-click the vulnerable line.
-
Select See Finding description.

The editor shows the vulnerability description and other details on the right side.
Use AI-generated fix options
Always make sure that the remediation suggestions from AI are correct.
The VS Code extension of Fluid Attacks uses artificial intelligence to generate fix suggestions. You can use two functions:
- Custom Fix: Generates step-by-step guides about how to fix your code.
- Autofix: Generates a suggested pull request with the fixed code automatically. Be careful with this function, because its suggestions change your codebase.
See dependency update options
The VS Code extension can show update options for vulnerable dependencies that software composition analysis (SCA) detects. To see them, hover over the vulnerability and click the wrench icon. To learn what the update options mean, read Update dependencies.

SCA Remediation
This function applies to the dependency vulnerabilities that software composition analysis (SCA) detects.
For SCA vulnerabilities, the extension has an SCA Remediation panel that shows the available fix versions for the vulnerable dependency. To open it, follow these steps:
- Click the Fluid Attacks extension in the activity bar of VS Code.
- Expand the vulnerability type that you want to examine.
- Click a vulnerable file to select it.
- Click the Get Custom Fix icon. As an alternative, right-click the file. Then, select Get Custom Fix.
The SCA Remediation panel opens and shows this information:
- The currently installed version of the vulnerable dependency
- A maximum of three fix options.
Each option shows the target version,
the number of vulnerabilities that it resolves for each severity level
(Critical, High, Medium, Low),
and the estimated update impact:
- Safe Update: Updates to the nearest secure version, with a low risk of breaking changes
- Complete Fix: Updates to the latest secure version, which resolves all the known vulnerabilities in that dependency
- Minimum Fix: Applies the smallest version change that resolves the vulnerability
Apply SCA Fix
This function works with JavaScript and Python projects. It works with these package managers: npm, Yarn, Bun, pip, Poetry, Pipenv, and uv.
An SCA fix changes the dependency files in your repository. Examine the changes before you commit them.
The extension can apply the recommended dependency fix to your project files automatically. To apply it, follow these steps:
- Click the Fluid Attacks extension in the activity bar of VS Code.
- Expand the vulnerability type that you want to examine.
- Hover over an SCA vulnerability.
- Click the Apply SCA Fix icon.
As an alternative, follow these steps:
- Open the vulnerable dependency file in the editor.
- Put your cursor on the vulnerable line.
- Right-click the vulnerable line.
- Select Apply SCA Fix.
After you start the fix, the extension does these actions:
- Uploads the related dependency files and applies the fix with
git apply. - Updates the manifest files (for example,
package.jsonorrequirements.txt) with the new version. - Shows a warning if the automatic update of the lock files fails
(for example,
package-lock.json). The warning tells you to generate them again with your package manager (for example,npm install). - Shows a notification with the fix strategy, the target version, and a confidence level.
- Shows a Retry option if it cannot apply the fix.
Refresh button
To make sure that the extension shows your actions, for example, reattack requests and treatment assignments, click the refresh button.
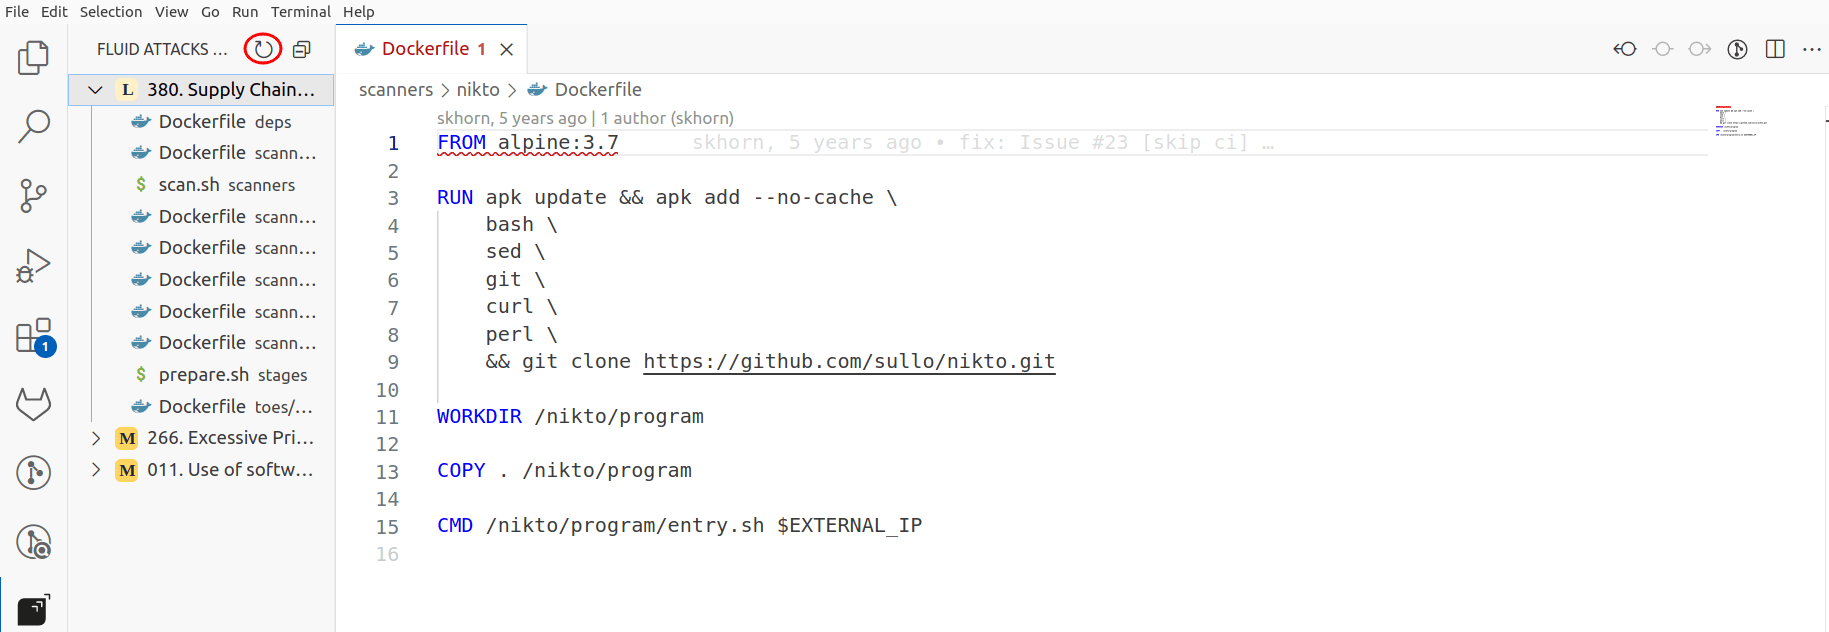
After the refresh, the vulnerability underlines show their status:
- Blue: Reattack requested or on hold
- Yellow: Accepted treatment applied ("Temporarily accepted" or "Indefinitely accepted")