Environments
Last updated: Jun 30, 2026
Fluid Attacks evaluates environments that you have appropriately matched with source code repositories. Environments are tested through the following techniques:
| Technique | Plan | Tested environment |
|---|---|---|
| Essential and Advanced | Pre-production | |
| Essential and Advanced | Pre-production | |
| Advanced | Pre-production and production | |
| Advanced | Pre-production and production |
Environments table
Role required: User, Vulnerability Manager or Group Manager
The table listing the environments under evaluation is found in your group's Scope section. Its columns show the following information:
- URL: The URL address of the environment
- Type:
Whether the resource is
- a mobile app,
- an AWS environment, or
- a microservice, API or web application.
- Status:
The inclusion or exclusion of the environment in the security testing scope;
its value can be one of the following:
- Included: The environment is included for security testing
- Excluded: The environment is excluded from security testing
- Open event: A situation prevents the inclusion of the environment for security testing (an icon is provided linking to the event report on the platform)
- Secrets: Indicates the number of secrets (credentials) that you or other members have registered to access the environment
- Connection type:
The custom connection through which Fluid Attacks must access
the environment;
its value can be one of the following:
- Connector: The environment is behind a private network; a Cloudflare tunnel is configured
- Egress: The environment is behind a private network; Fluid Attacks' egress IP addresses are whitelisted
- N/A: No custom connection
- Deployment Stage: Whether the environment is a production or pre-production environment
- Requires authentication: Whether or not Fluid Attacks needs credentials to access the environment
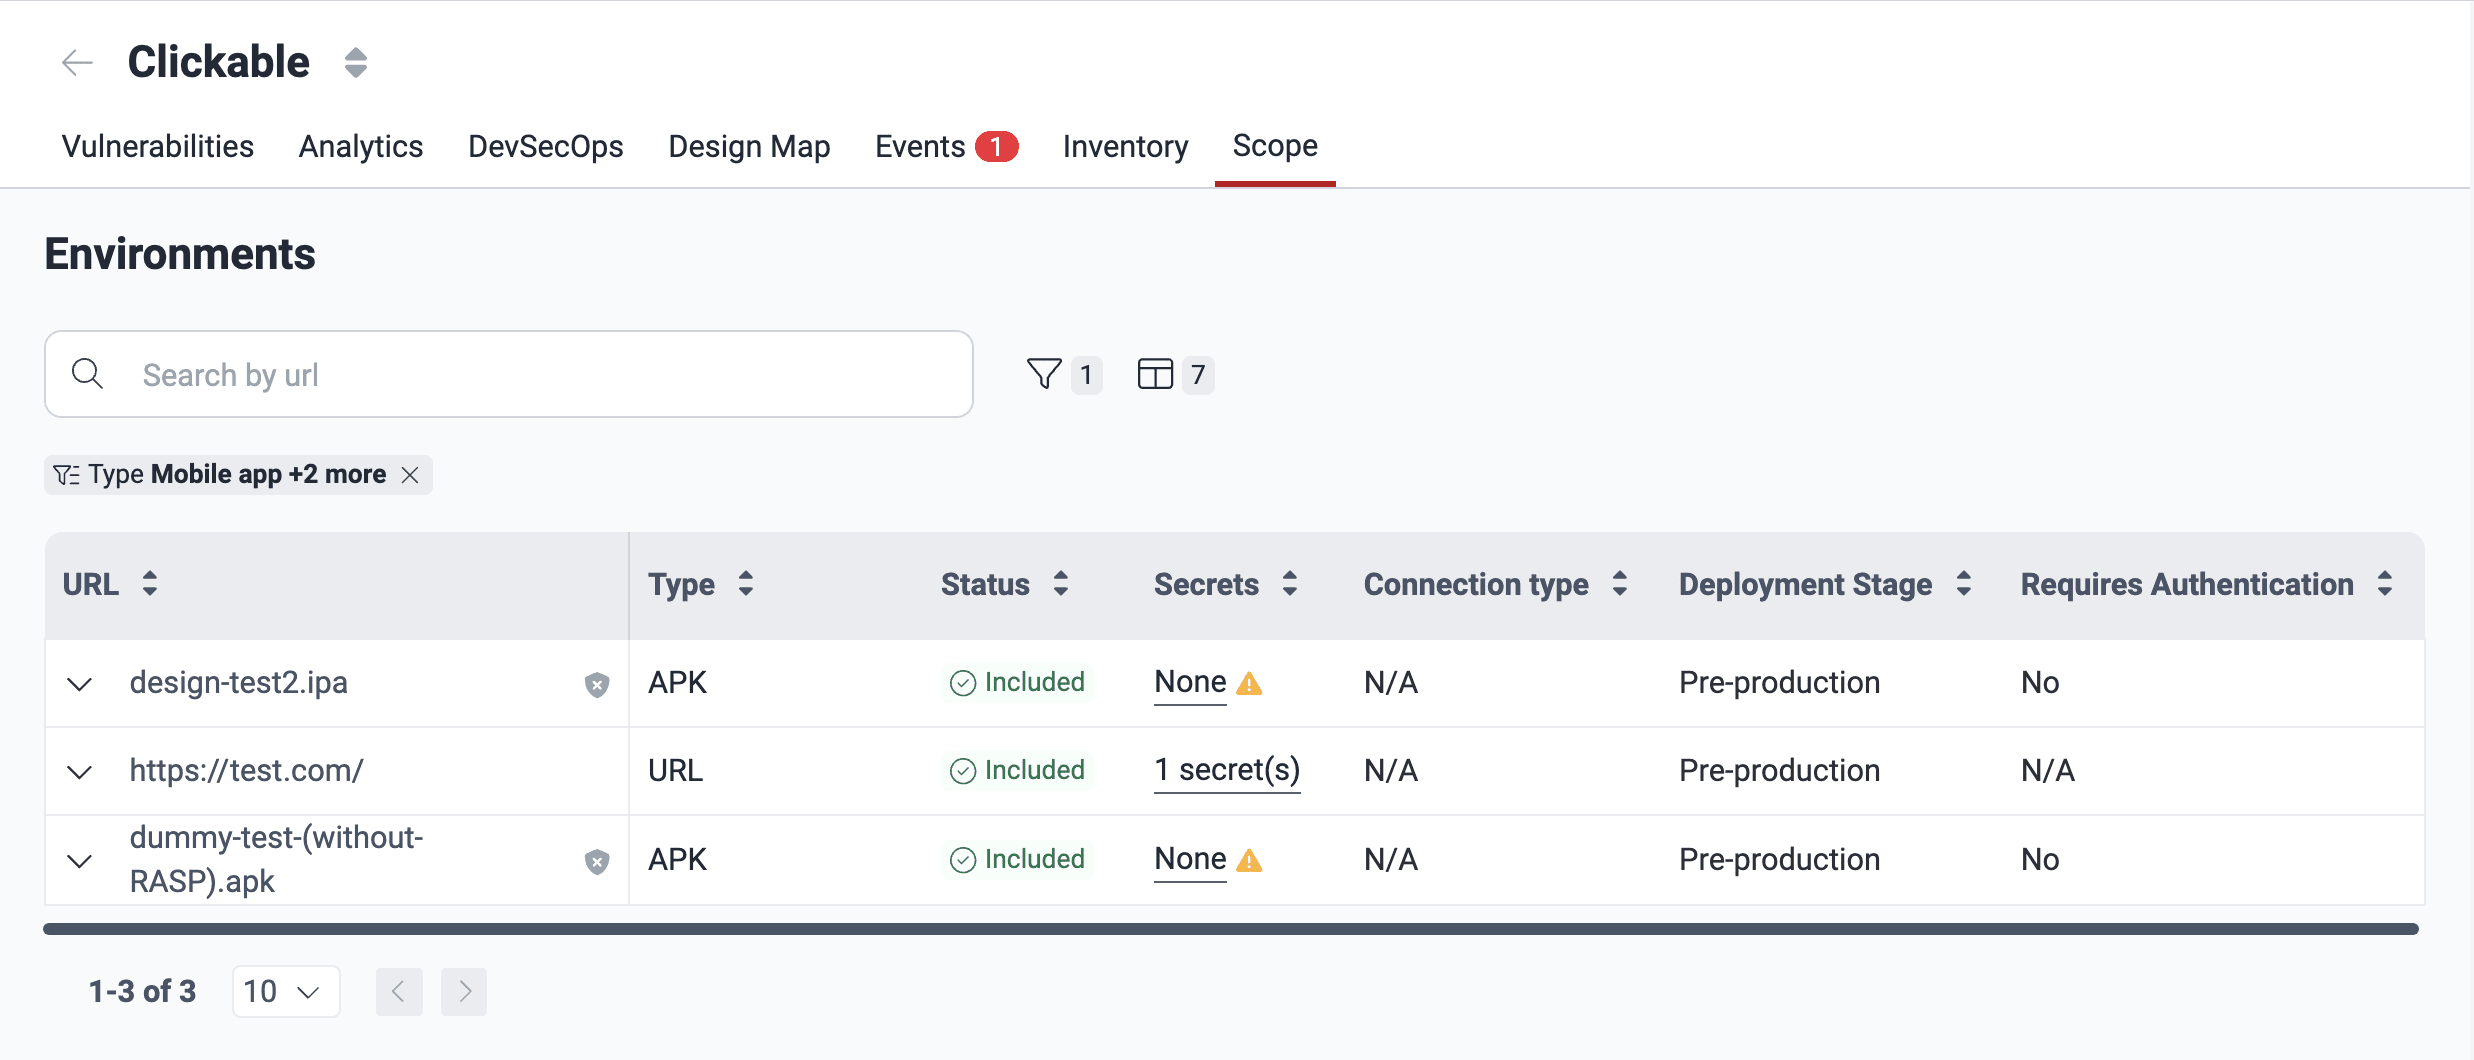
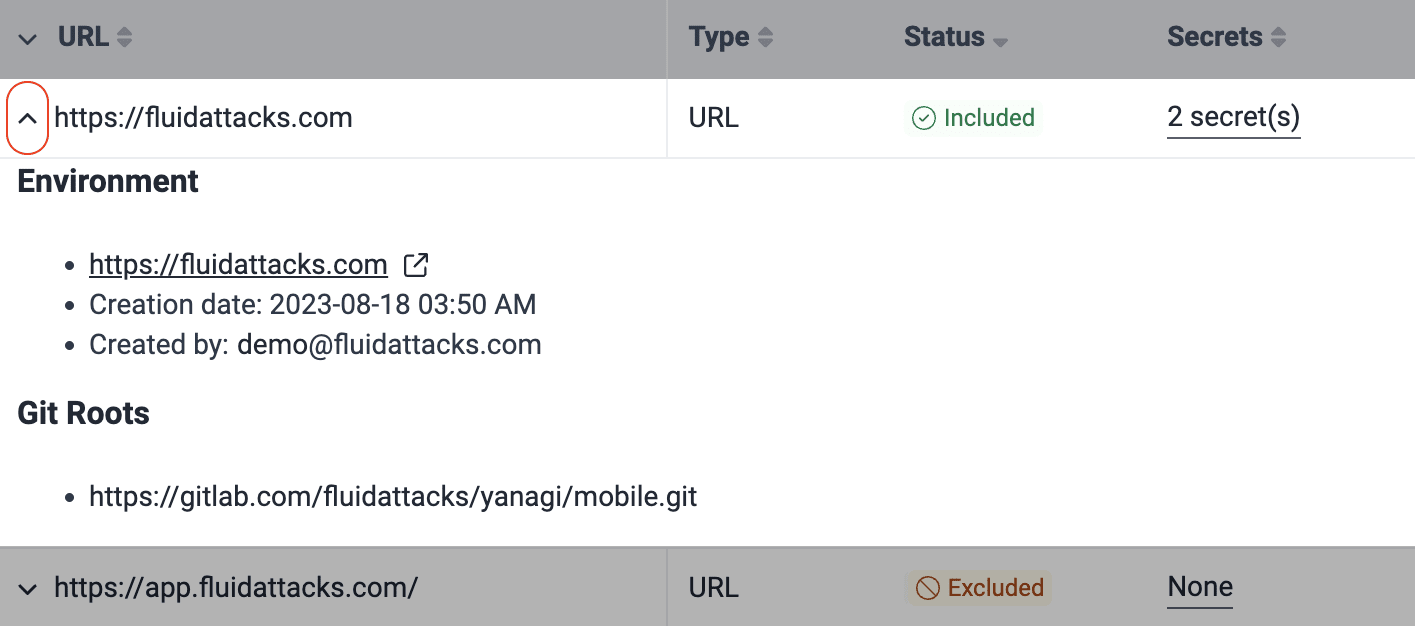
Clicking the downward-facing arrow reveals more information about the environment. Namely, the date it was added, the email address of the group member who added it, and the Git repo(s) to which it is associated.
Add environments
Role required: User, Vulnerability Manager or Group Manager
You can add two environments per Git repository to be tested, as long as one of the two corresponds to a production environment. Here is why adding the latter, with no additional cost, is recommended:
- It enables testing the production stage directly, in addition to the pre-production stage, resulting in a comprehensive view of risk exposure.
- In the absence of environment parity, testing the production environment means targeting the system's behavior that is not present in pre-production environments and is what attackers would likely interact with.
- Production environments are more stable and less prone to unexpected issues than pre-production ones, which facilitates continuous testing.
For more information, read the FAQ.
Environments you have marked as "production" (step 6 below) are not analyzed by the DAST scanner; they are exclusively analyzed by Fluid Attacks' security analysts in the Advanced plan.
A vulnerability found in your production environment is reported for production only when it does not also exist in the other non-production environment you have registered.
To add environments to the security testing scope, follow these steps:
-
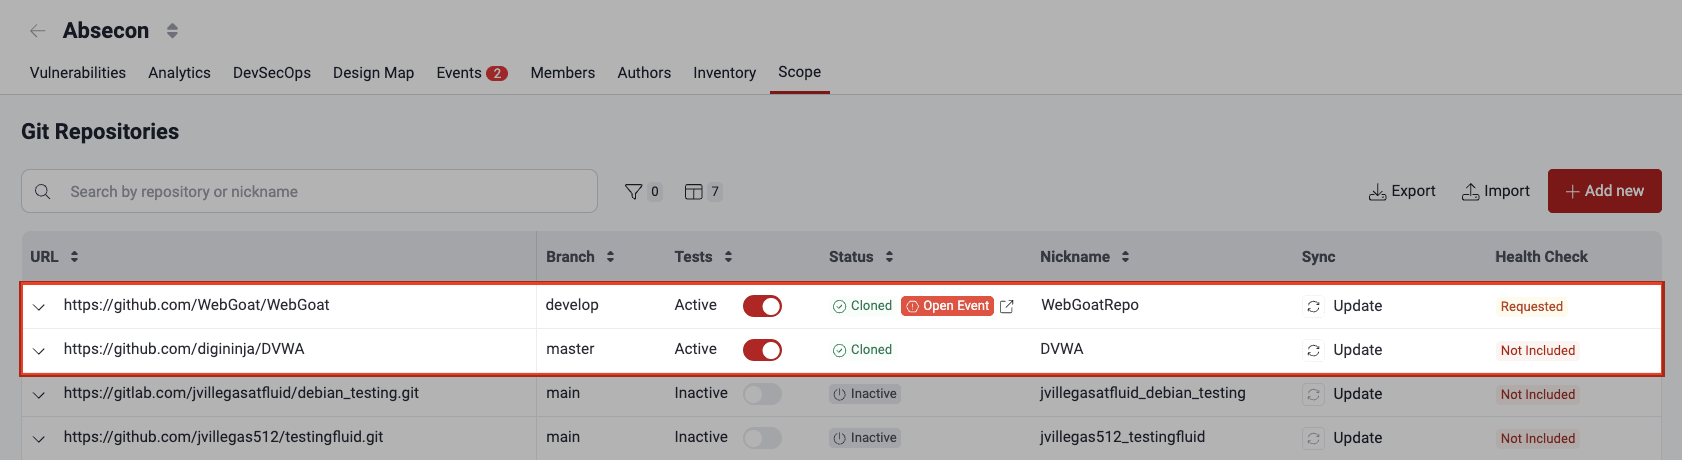
Access the group's Scope section and click the URL of the active Git repository whose environment you wish to add.
-
In the pop-up window, choose the Environments tab.
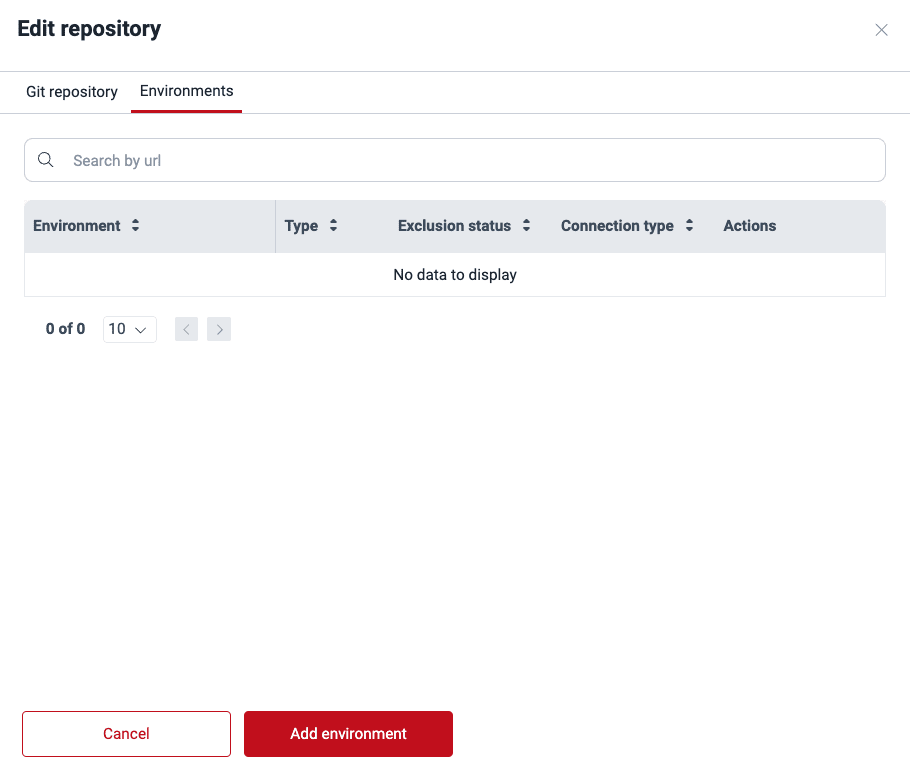
-
Click on Add environment.
-
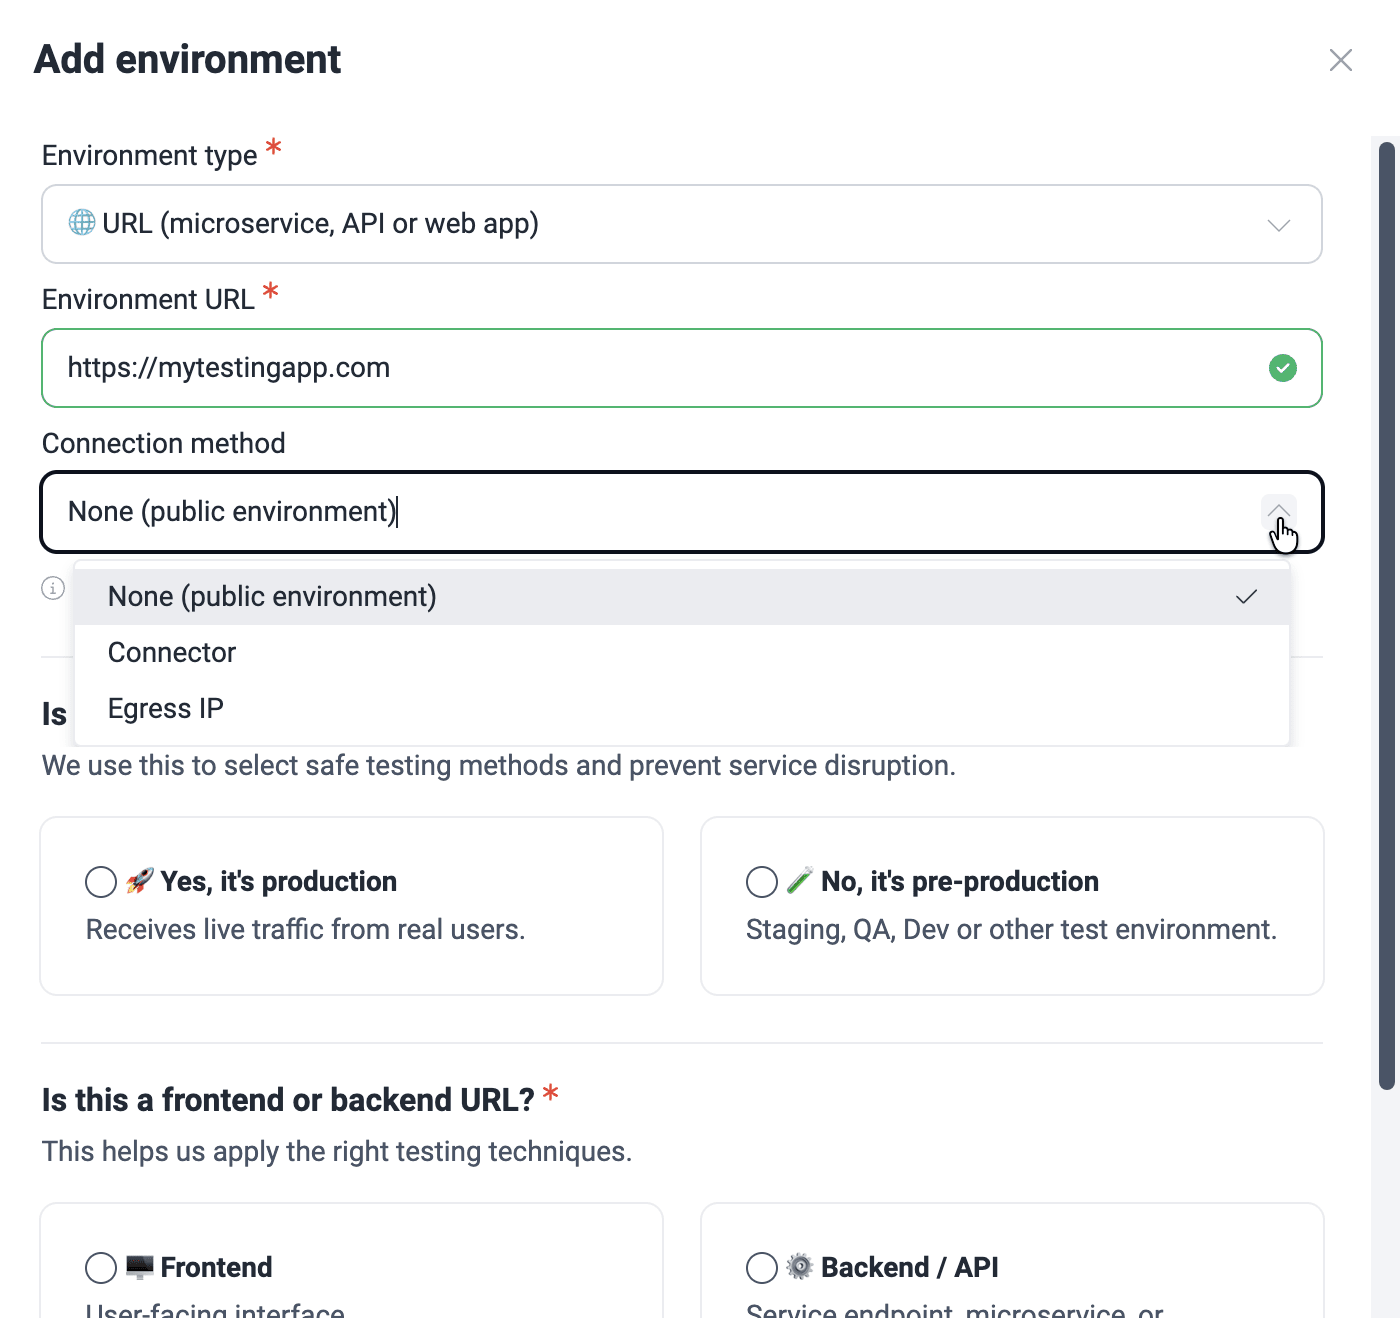
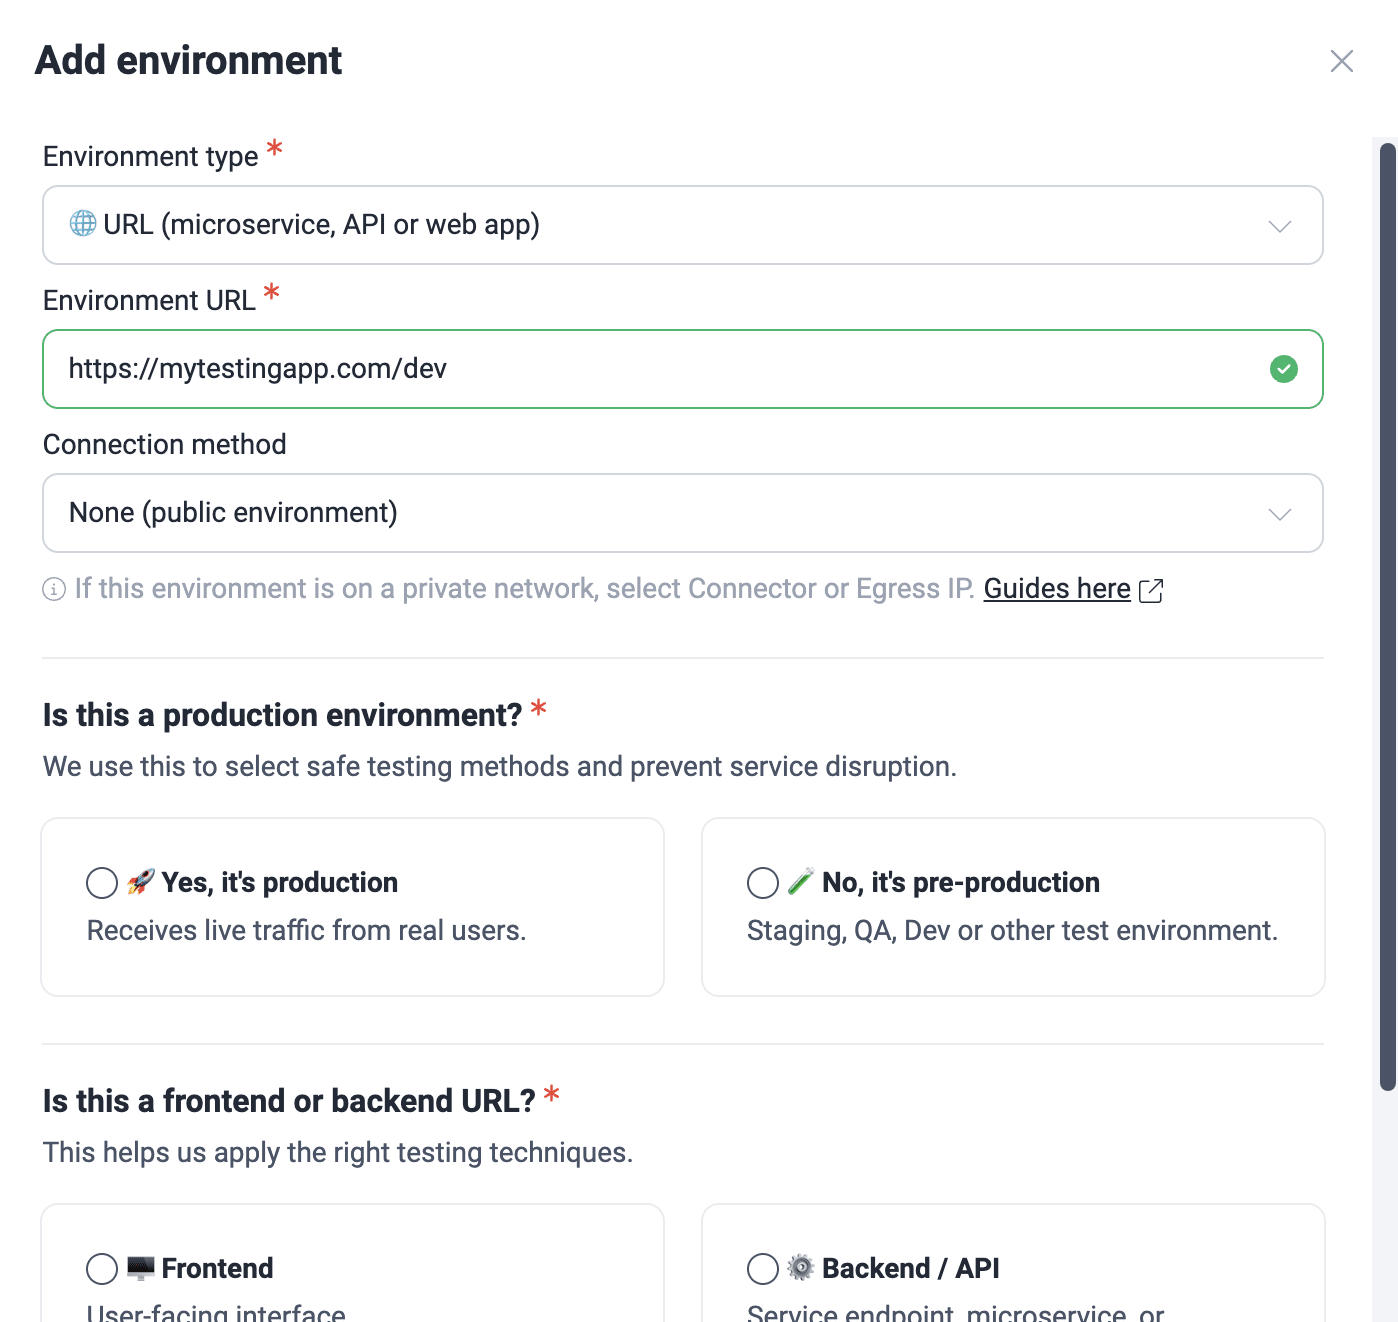
Select the environment type and provide the required information in each case.

Here is a short definition of each of the options:
- Cloud (CSPM): You are adding your AWS environment to be tested with cloud security posture management. This type requires you to follow this guide.
- Mobile app: The environment to test corresponds to a mobile application. This type requires you to choose the previously added mobile app file.
- URL (microservice, API or web app): The environment to test is at a URL where the application is deployed. This type requires you to provide the URL.
-
For URL environments, you are asked about the connection method. If access is behind a private network, check the condition accordingly. If it is not, choose the option 'None (public environment)'.
-
Connector: Cloudflare Tunnel is configured
Read the Connector connection configuration guide!
-
Egress: Specific IPs need to be whitelisted on your firewall
Learn about the Egress connection requirements!
-
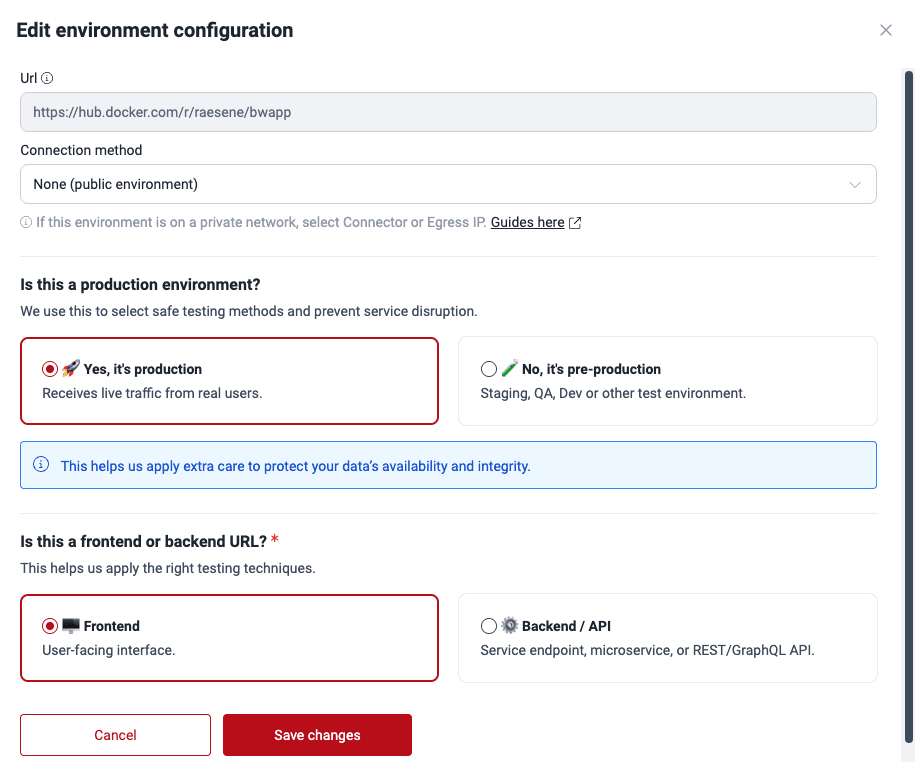
-
Specify whether or not the environment is a production environment.

-
Specify if it is a frontend or backend URL. Selecting the latter, you are asked whether it requires authentication.
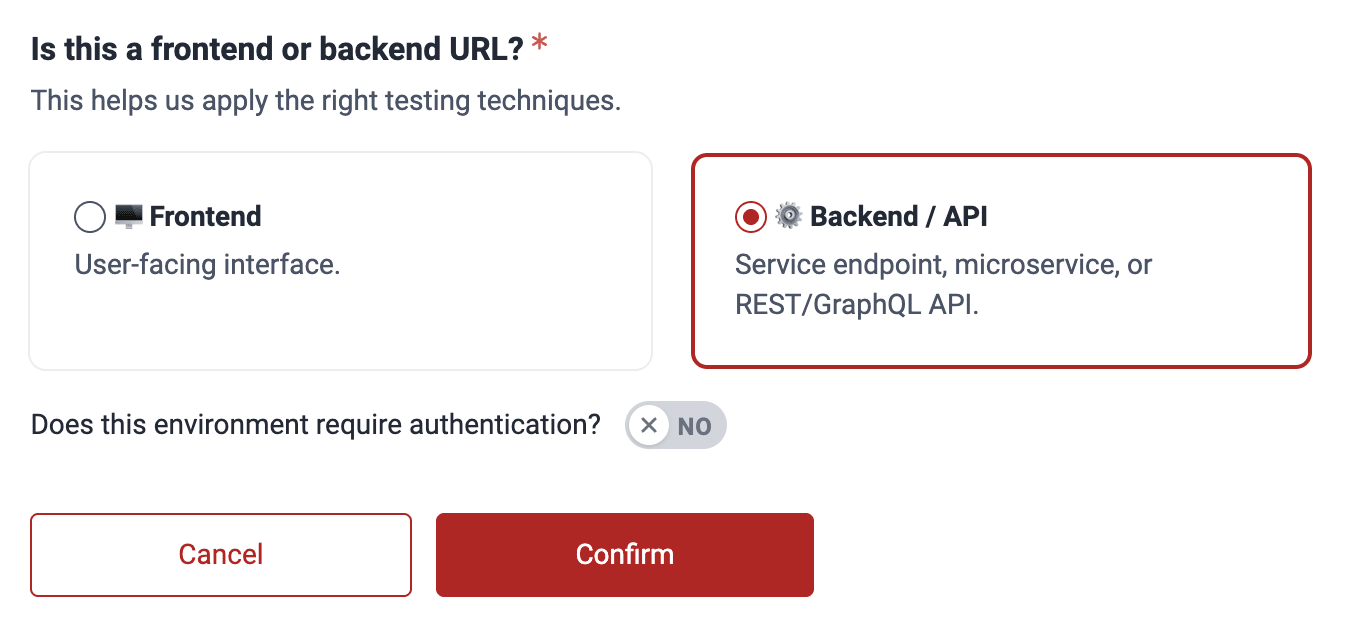 Example having chosen backend URL
 Warning if authentication is needed
 -
Click on Confirm to add the environment.
When checking an environment, an HTTP response code 200 usually means that the request was processed correctly. If this code is not received, there may be several reasons why the environment could have problems, which include
- authentication or authorization errors;
- data validation errors;
- connection or infrastructure problems;
- internal server errors.
A status code other than 200 can indicate something is wrong with the environment you are trying to add. In this case, check that you correctly followed the above configuration steps. After verifying this, you can add your environment disregarding the platform warning. Keep in mind that the DAST scanner cannot analyze your environment if it is unreachable.
Remember to provide the credentials to your pre-production and production environments.
Manage environment secrets
Role required: User, Vulnerability Manager or Group Manager
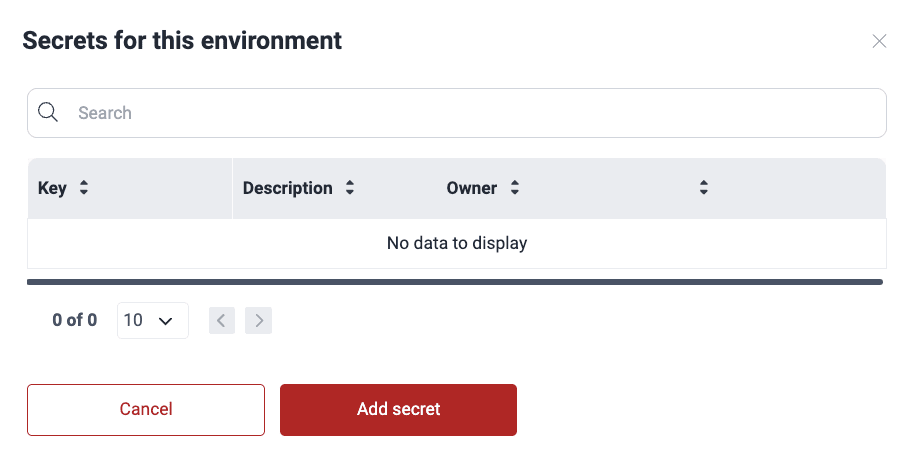
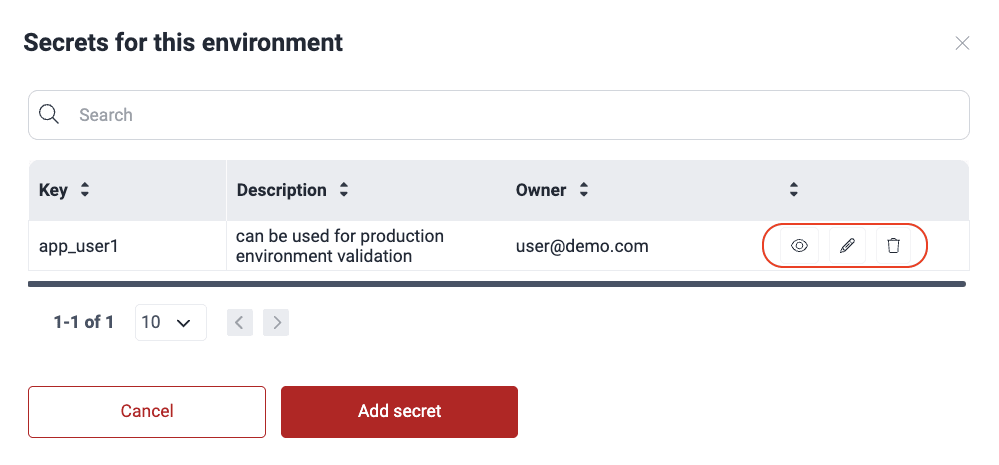
On the platform, you can securely manage secrets (credentials) that grant Fluid Attacks access to environments in order to test them. Follow these steps to add secrets:
-
Access the group's Scope section and click the environment's URL.
-
Click the Add secret button.
-
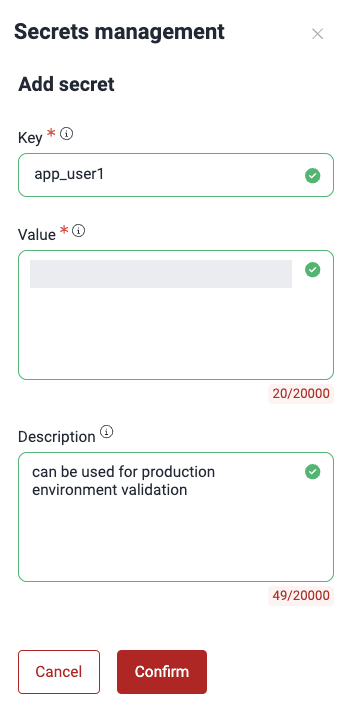
Add as Key the kind of secret it is (e.g., token) and as Value the actual secret. Optionally, provide a description that can help its use.
-
Click on Confirm.
The environment secret is added to the table and made available for Fluid Attacks to view. You can view, edit or remove only the secrets you added.
Edit environments
Role required: User, Vulnerability Manager or Group Manager
You may edit the information on connection type, whether the environment is a production environment, and whether it is a frontend or backend URL. These are the steps:
-
Access the group's Scope section and click the URL of the active Git repository whose environment you wish to edit.
-
Switch to the Environments tab.
-
From the Actions column, click on the edit icon.
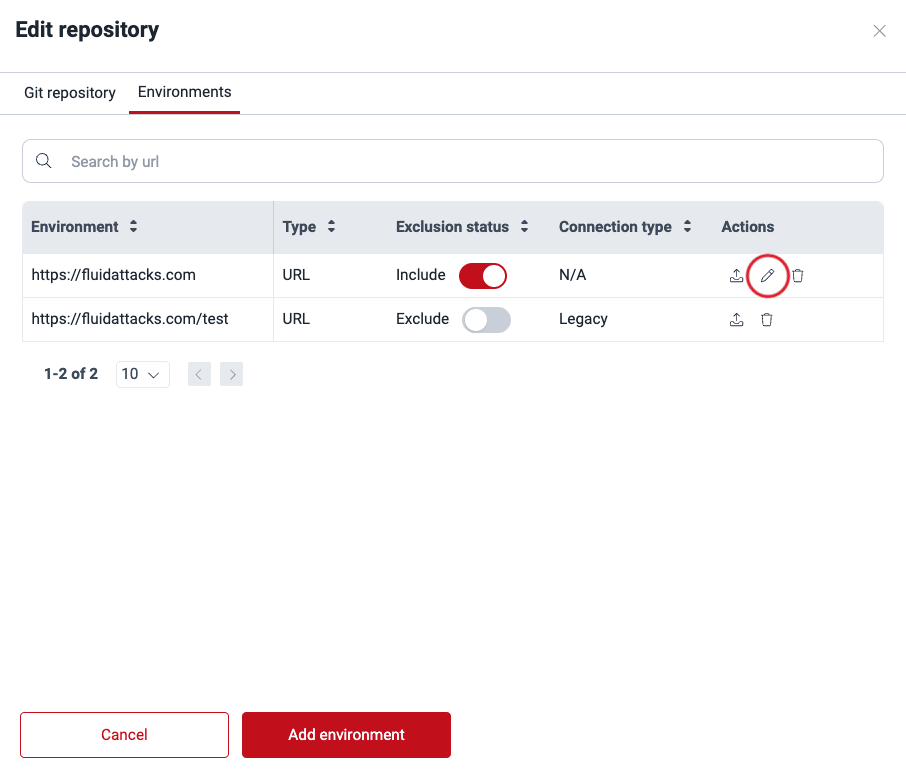
-
Make the desired changes and click on Confirm.
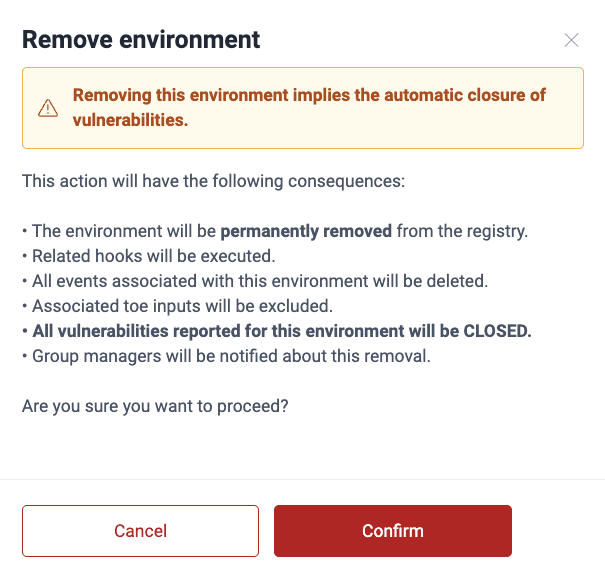
Remove environments
Role required: Group Manager
In order to remove an environment, follow these steps:
-
Click on the Git repository to which the environment is linked.
-
Switch to the Environments tab.
-
From the Actions column, click the trash can icon corresponding to the environment you wish to delete.
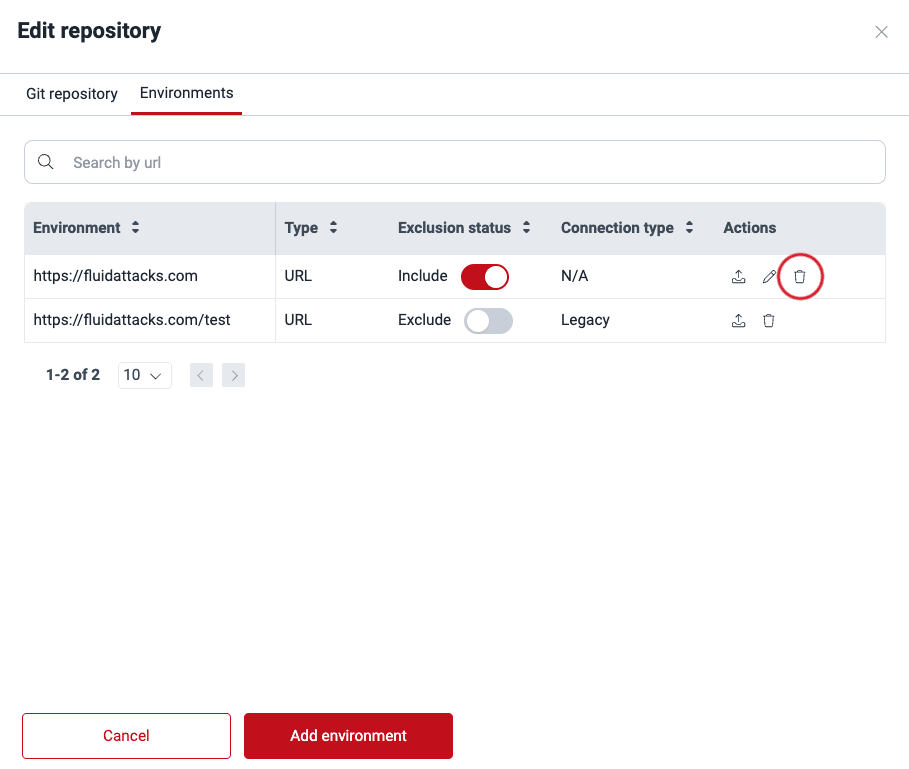
-
Confirm removal.
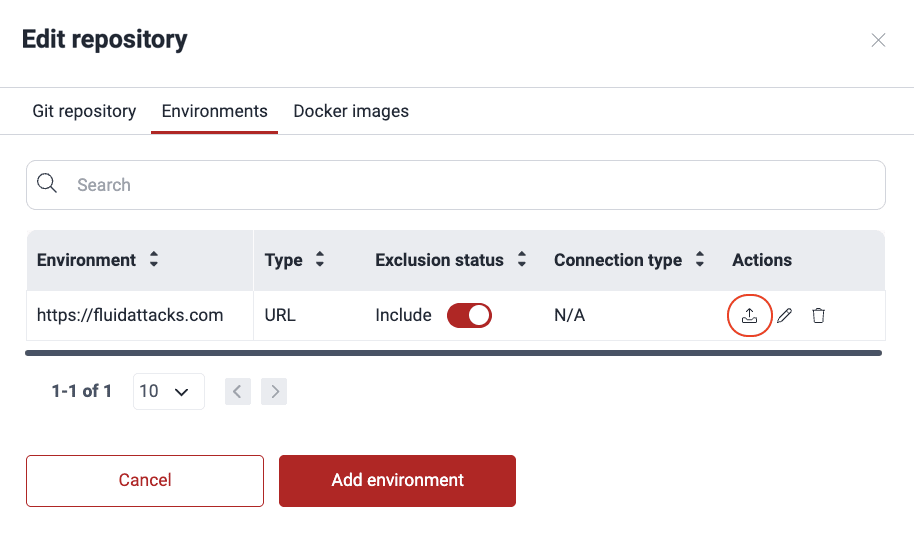
Move environments
Role required: Group Manager
You can move environments across Git repositories within the same group or in a different one. These are the steps:
-
Access the group's Scope section and click the URL of the active Git repository whose environment you wish to move.
-
Switch to the Environments tab.
-
From the Actions column, click on the move icon.
-
Select the target group.
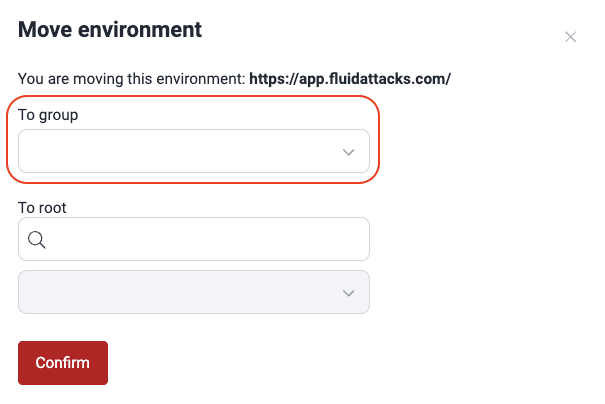
-
Type in the search box either part of the target repo's URL, branch or nickname, to activate the dropdown menu from which you can choose the repo.
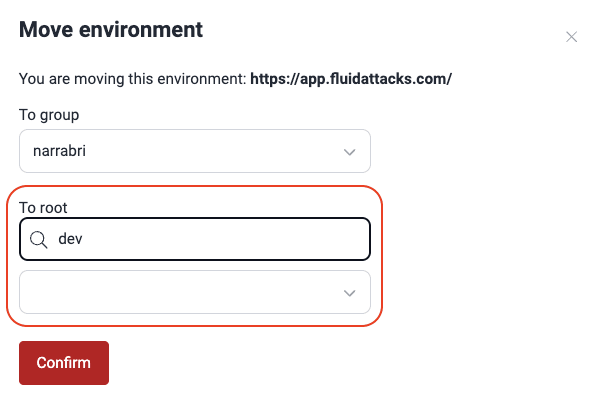
-
Click Confirm.
Exclude environments
Role required: Group Manager
(a) Excluding a subpath implies it is not considered in vulnerability
analysis.
(b) Excluding a main path automatically excludes all of its subpaths.
(c) You cannot activate a subpath if its main environment is
inactive.
If you want to exclude from security testing a subpath of a specific environment, follow the steps below:
-
Go to your group's Scope section.
-
Add the subpath you wish to exclude as you would add an environment to test. To learn how to do the latter, read the "Add environments" section.
-
Click Confirm.
-
In the table, locate the added subpath and switch the corresponding toggle in the Exclusion status column to off.
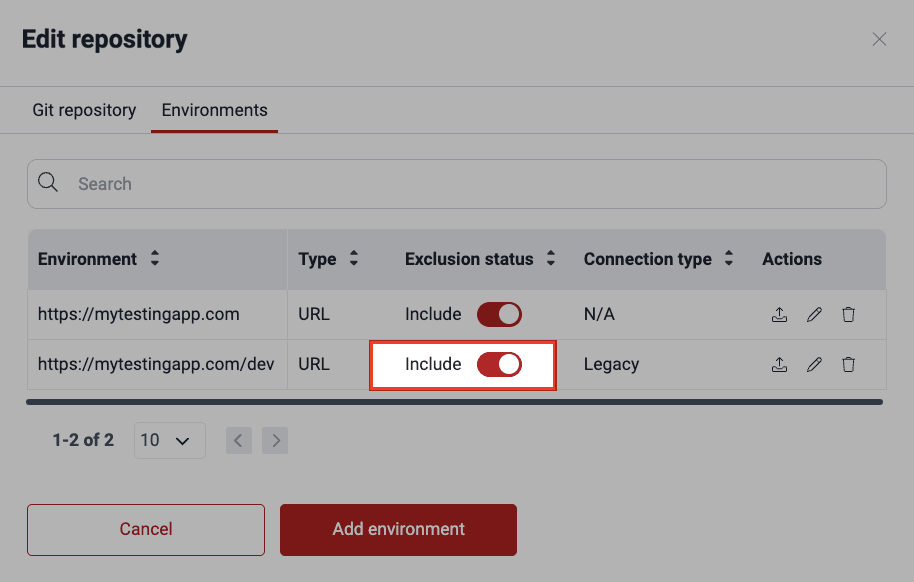
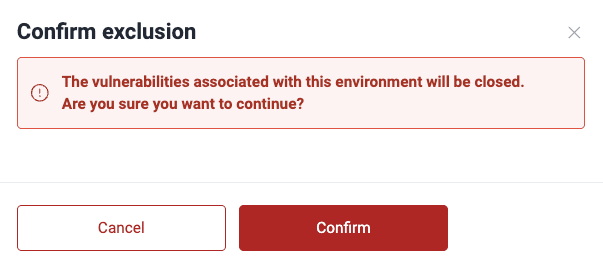
-
Click on Confirm to apply the exclusion.
Make sure the main path exists before excluding a specific path.
Manage mobile apps
Role required: User, Vulnerability Manager or Group Manager
Add mobile apps to test
To add mobile apps for testing (e.g., .aab, .ipa, .apk), you can refer to the mobile app distribution platform where it is located or upload the app file directly. Choosing the latter, you can either upload the file in the Add environment window or upload it in Files and then add an environment linking to that file.
Here are the steps to upload your mobile app, starting from the Add environment window:
-
Access the group's Scope section and click on the URL of the repository related to the mobile app. If you have not yet added the repository, do so by following the steps in "Add a new Git repository".
-
Switch to the Environments tab and click on Add environment.
-
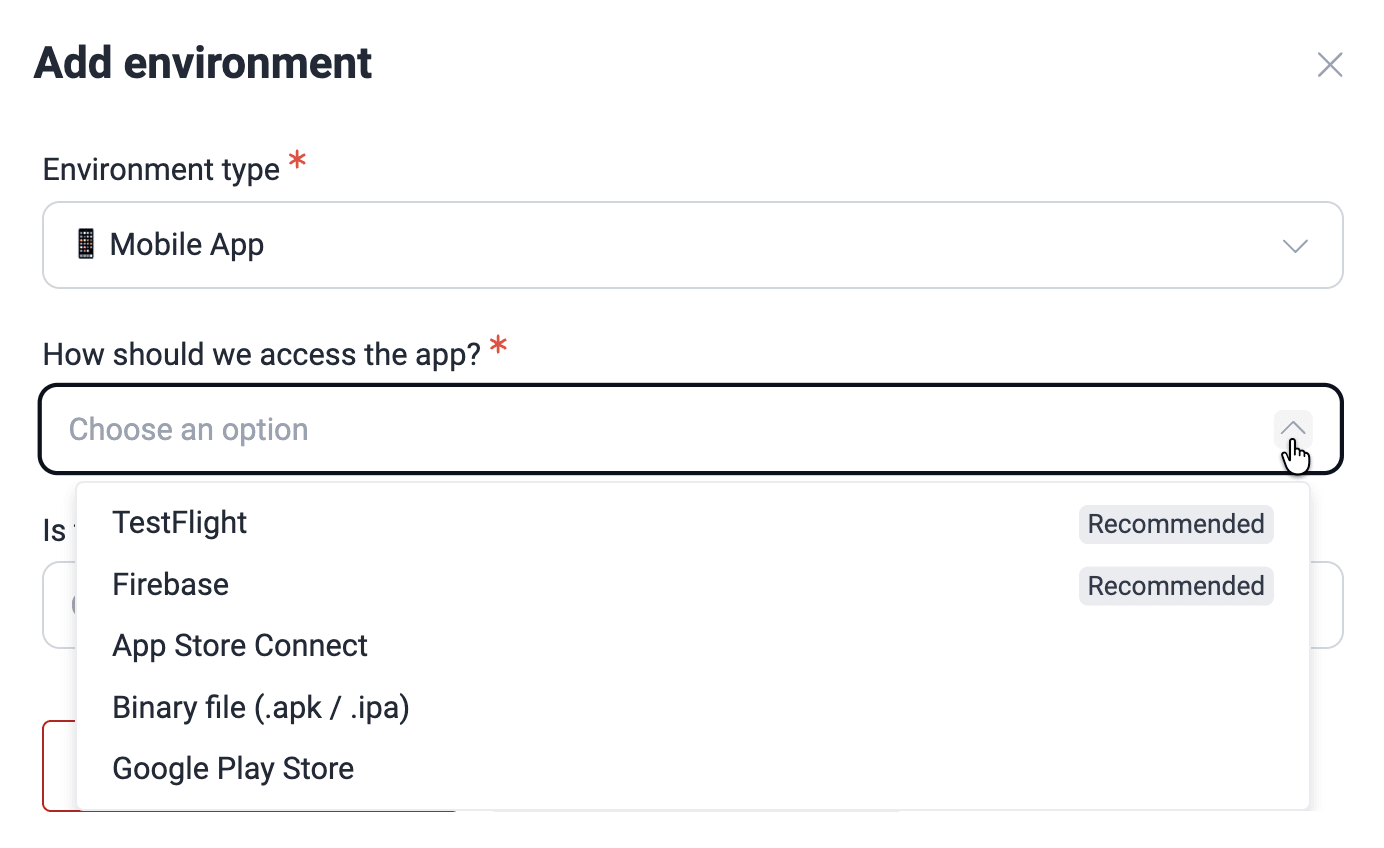
Choose "Mobile App" as the environment type.
-
Choose a mobile app distribution platform or indicate that you will upload the file directly. The supported platforms are TestFlight, Firebase, App Store Connect, and Google Play Store.
When choosing distribution platforms, you need to indicate your app's name. And if you choose Firebase, you are also asked to specify the OS for which the app is made (Android or iOS).
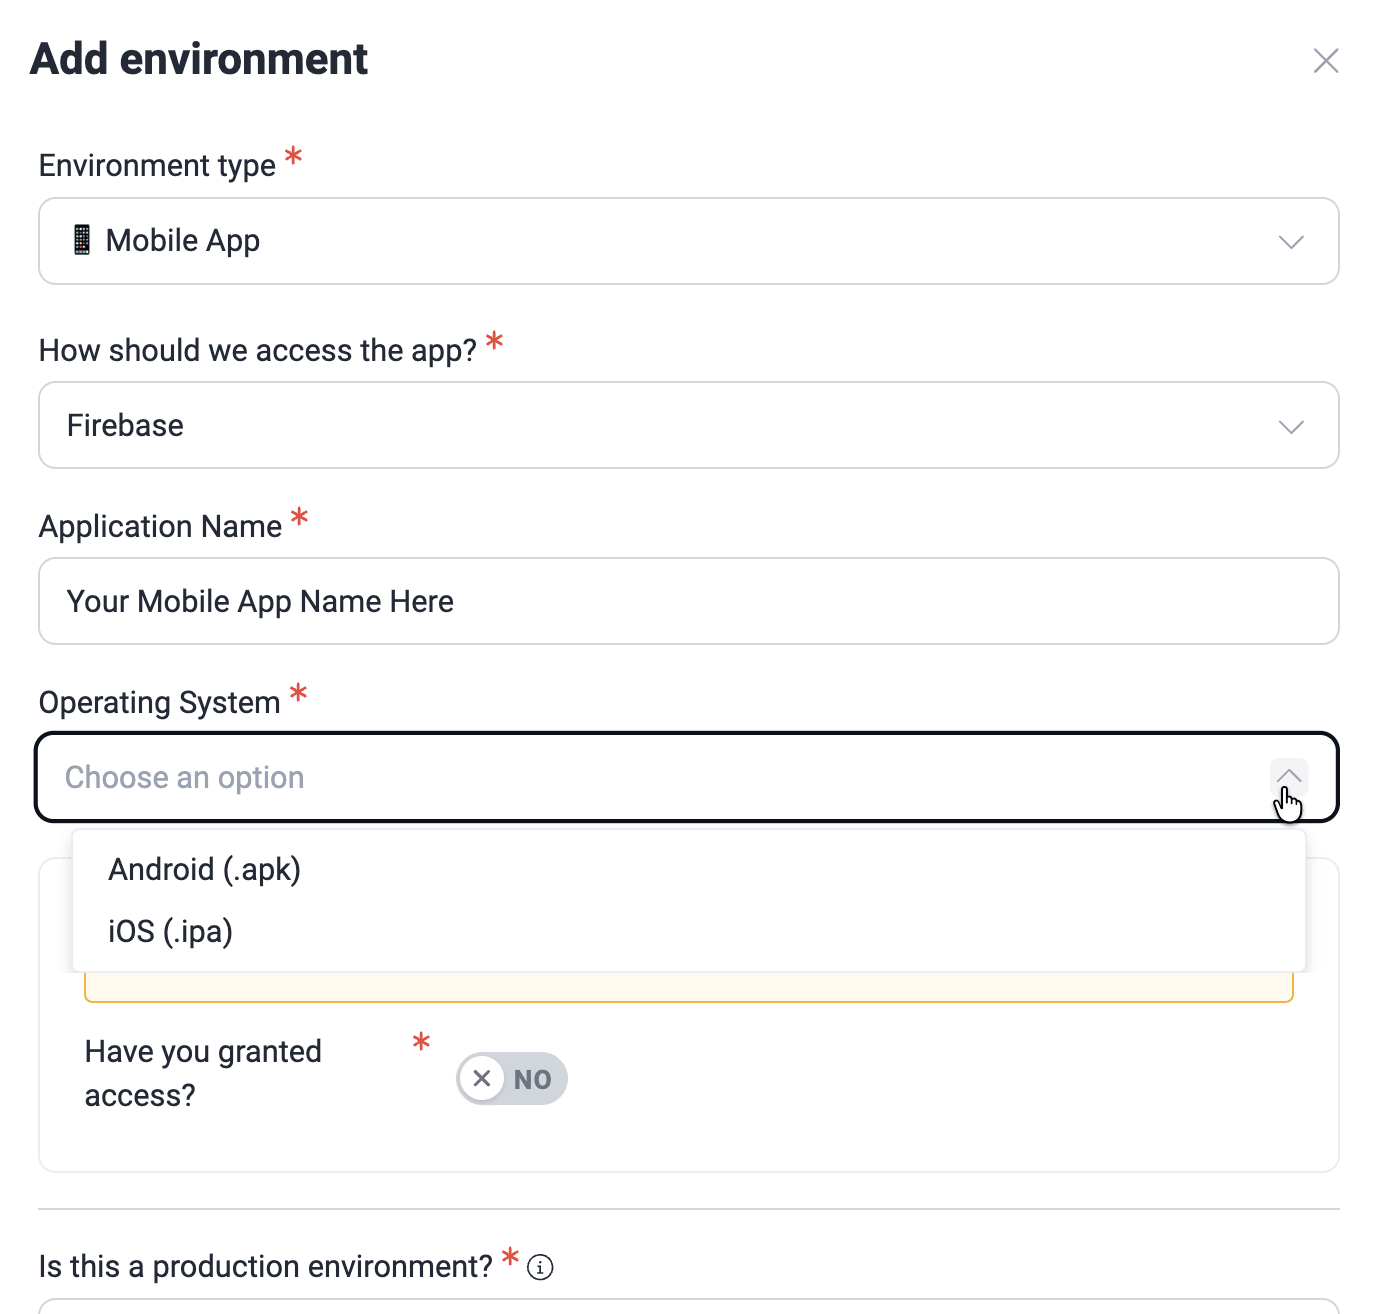
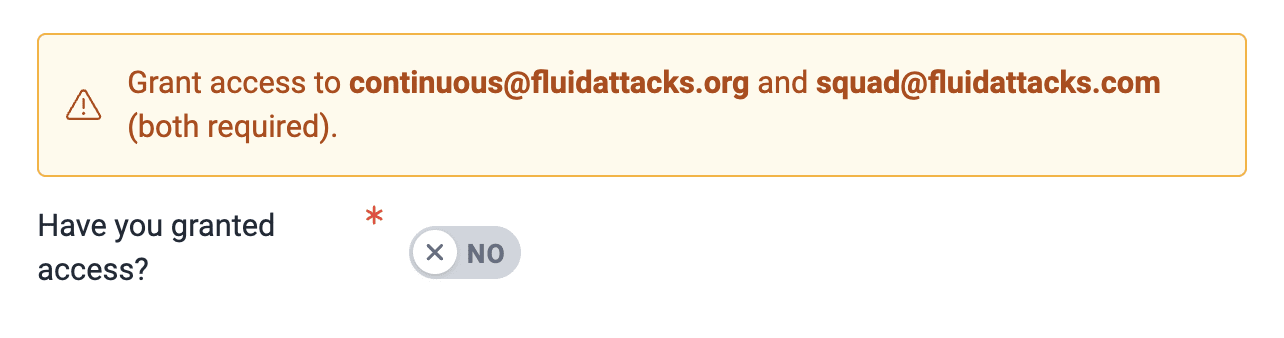
You are required to grant access to [email protected], [email protected], and [email protected], depending on the chosen distribution platform. Click on the toggle to confirm this step.
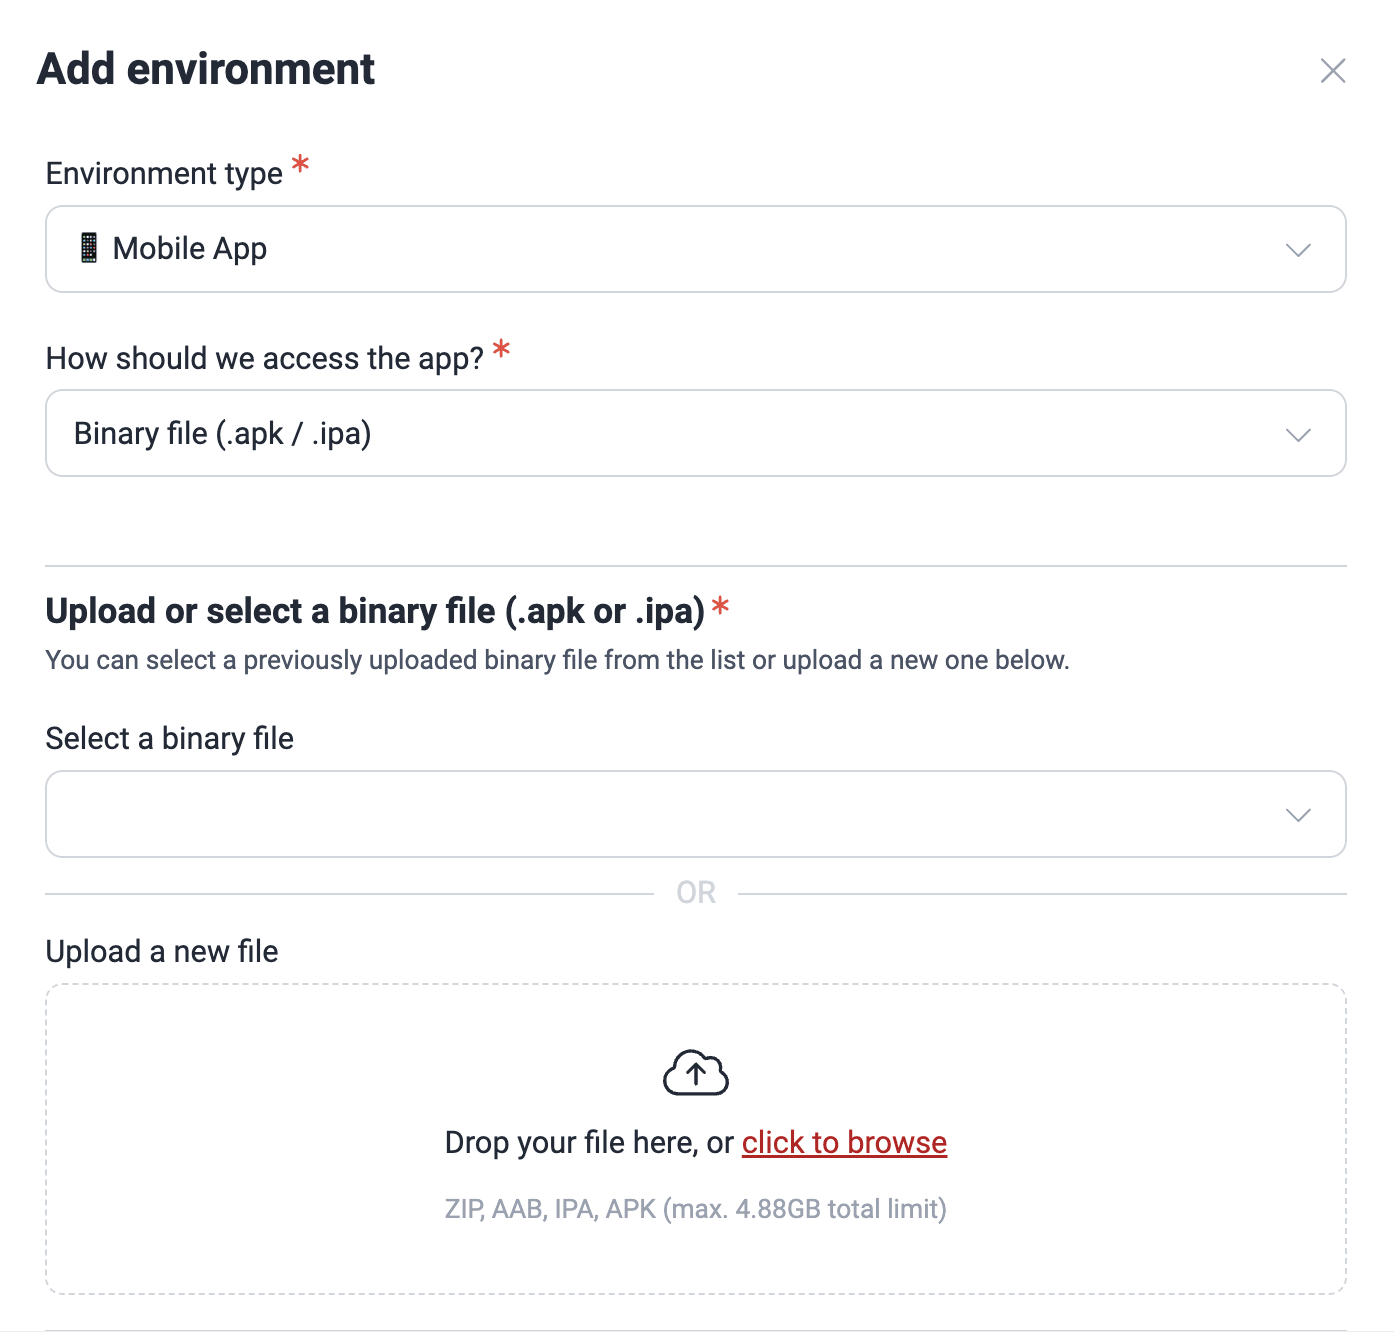
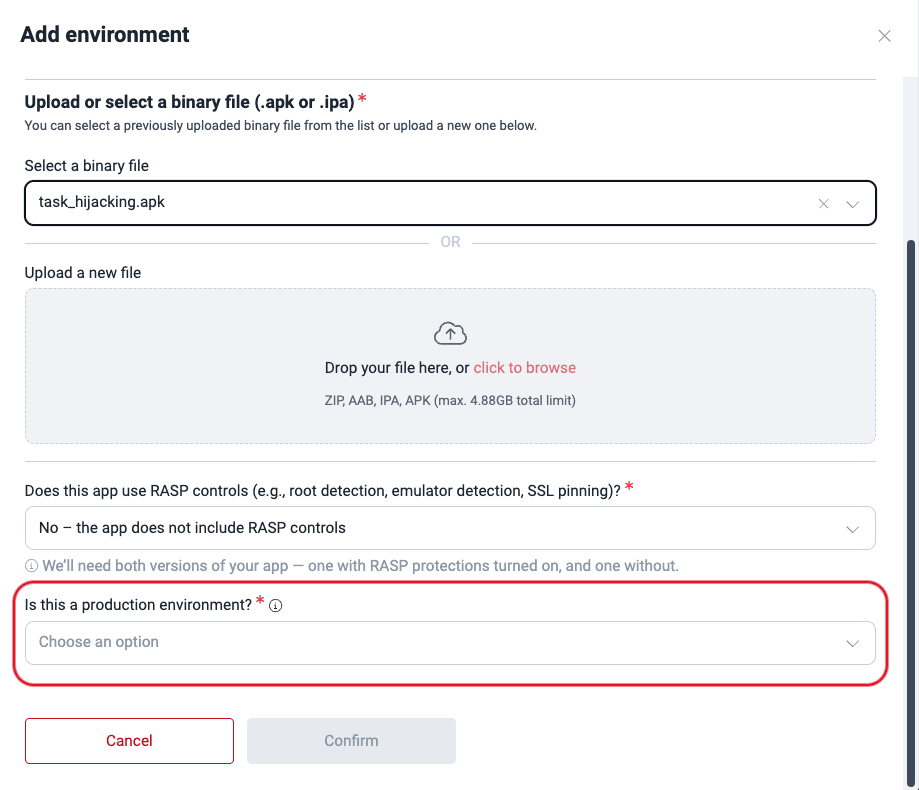
If you are uploading the mobile app file directly, you can select a preuploaded file (steps further below) or upload the file. Its size must not exceed 4.88 GB.
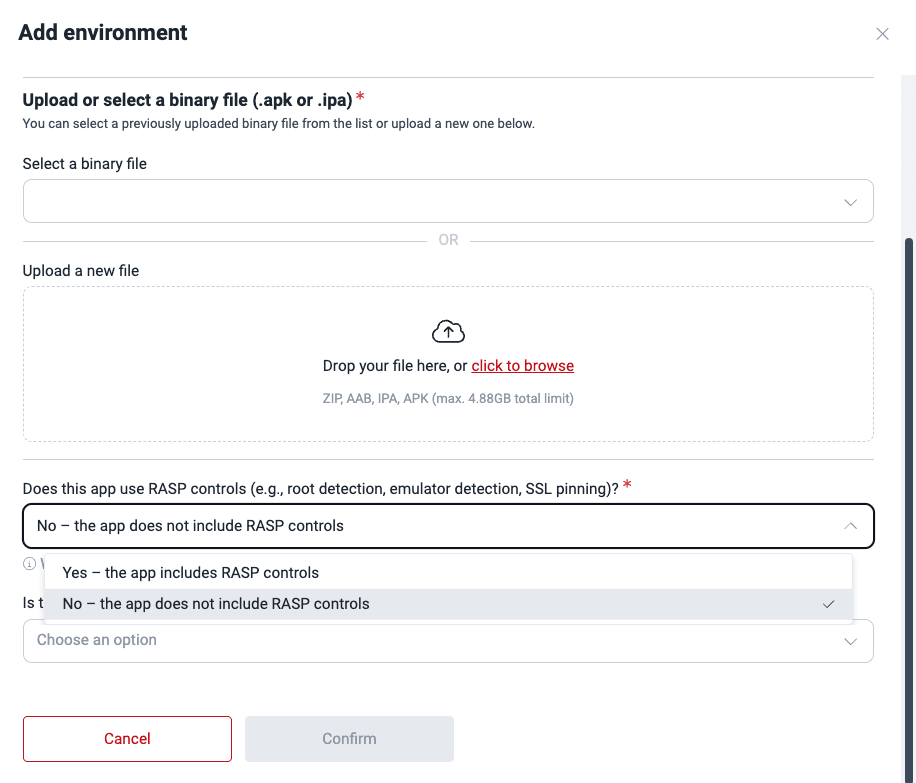
Additionally, for Fluid Attacks to perform security testing in your environment, you must upload two versions of the application at different times: one with and another without RASP controls (e.g., root detection, emulator detection, SSL pinning). Select the option that corresponds to the file in question.
-
Lastly, specify if it is a production environment.
-
Click on Confirm.
As an alternative, add the mobile app in Files and then link it to an environment:
-
Access the group's Scope section and scroll down to Files.
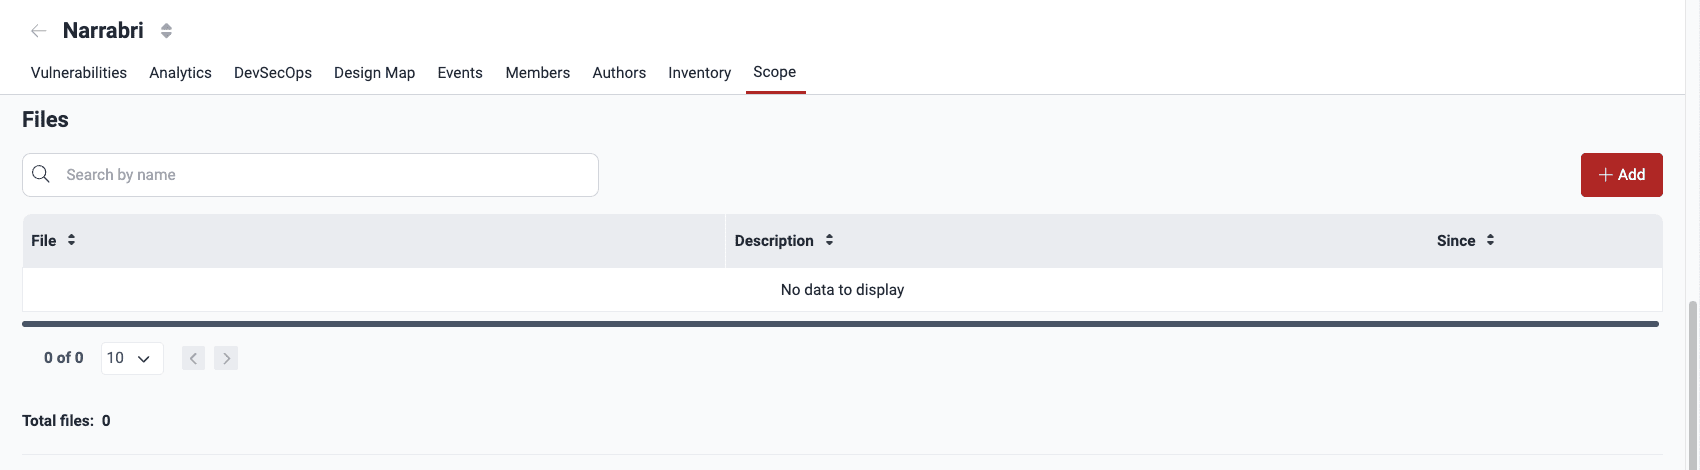
-
Click on Add.
-
Click on the Add file button and choose the mobile app file (size limit: 4.88 GB).

-
Click on Confirm. Your file should now be visible in the table.
-
Scroll up to Git Repositories. If you have not yet added the repository related to the mobile app in question, do so by following the steps in "Add a new Git repository".
-
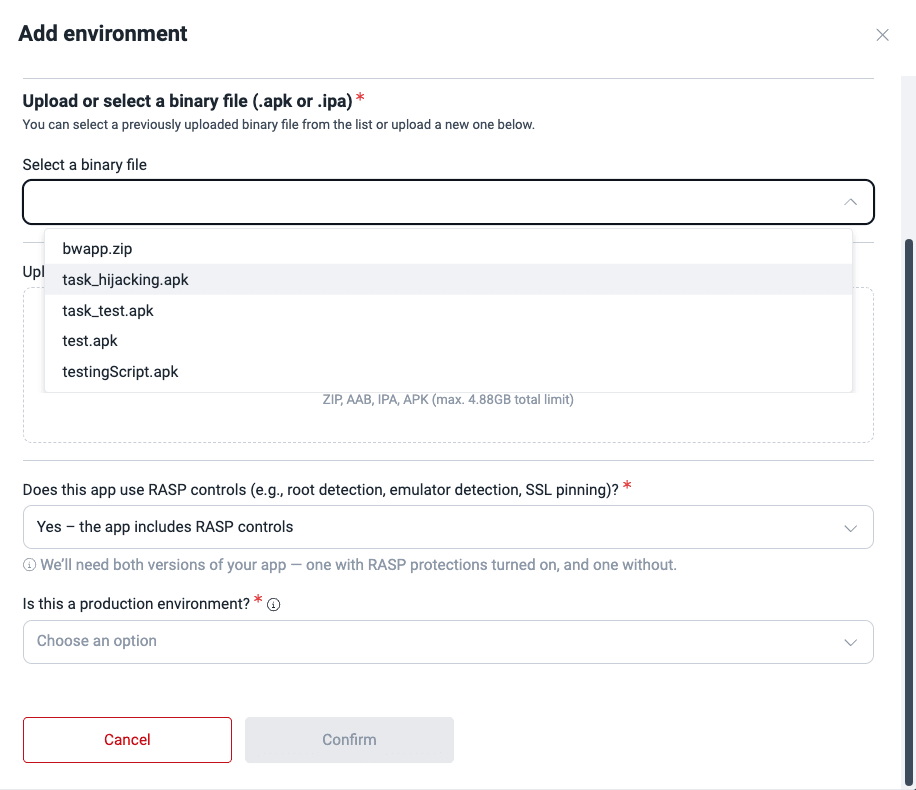
Click on the repository URL and choose Environments > Add environment.
-
Choose Mobile App as the environment type, then select the corresponding file from Select a binary file, and specify if it includes RASP controls and if it is a production environment.
-
Click on Confirm.
Update mobile app file
The platform does not allow replacing a file with one of a different extension.
If you have added your mobile app through TestFlight, Firebase, App Store Connect, or Google Play Store, Fluid Attacks can always get the latest version of your app on those platforms. Otherwise, follow these steps to add a newer version of your mobile app.
Do not delete the file, as this causes the platform to mark any "Open" vulnerabilities found in the app as "Closed" (this is undesirable, as you want us to continue testing the app).
-
Go to Scope > Files.
-
Click on the mobile app file.
-
Click on Add file and upload the newer app version.

-
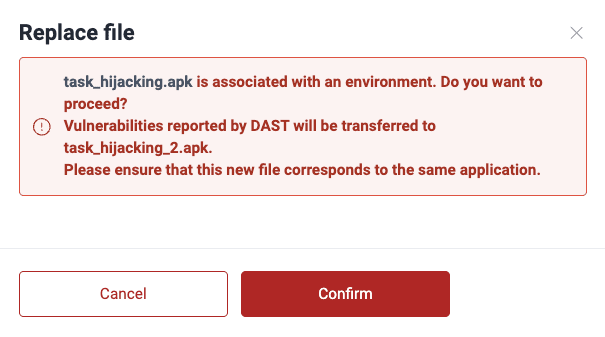
Click on Replace file.
-
Read the warning message. You acknowledge that the file is linked to an environment, vulnerabilities found in the older file can refer to the newer file, and the latter corresponds to the same mobile app. If you wish to proceed, click on Confirm.
Remove mobile app file
Removal causes "Open" vulnerabilities found in the file to be marked as "Closed." Please make sure you do not prefer to update the file.
If you are removing a file associated with an environment, you get the following message after step 3 below.

In this case, follow the steps described in "Remove environments" instead. This should be done by a Group Manager. As the message says, removing the environment also removes the mobile app file.
If the file is not associated with an environment, do the following:
-
Go to Scope > Files.
-
Click on the file to be removed.
-
Click on Remove.

-
Click on Confirm.

Search for vulnerabilities in your apps for free with Fluid Attacks' automated security testing! Start your 21-day free trial and discover the benefits of the Essential plan. If you prefer the Advanced plan, which includes the expertise of Fluid Attacks' pentesting team, fill out this contact form.
Manage your credentials
Manage organization credentials and OAuth connections that give Fluid Attacks access to repositories to start security testing.
Resolve events
The Events section in the Fluid Attacks platform keeps a record of solved and unsolved events within a group, which are situations impeding security testing.